How to Make a Quilted Tree Skirt (Featuring the Spiceberry Petite Plaid Quilt!)

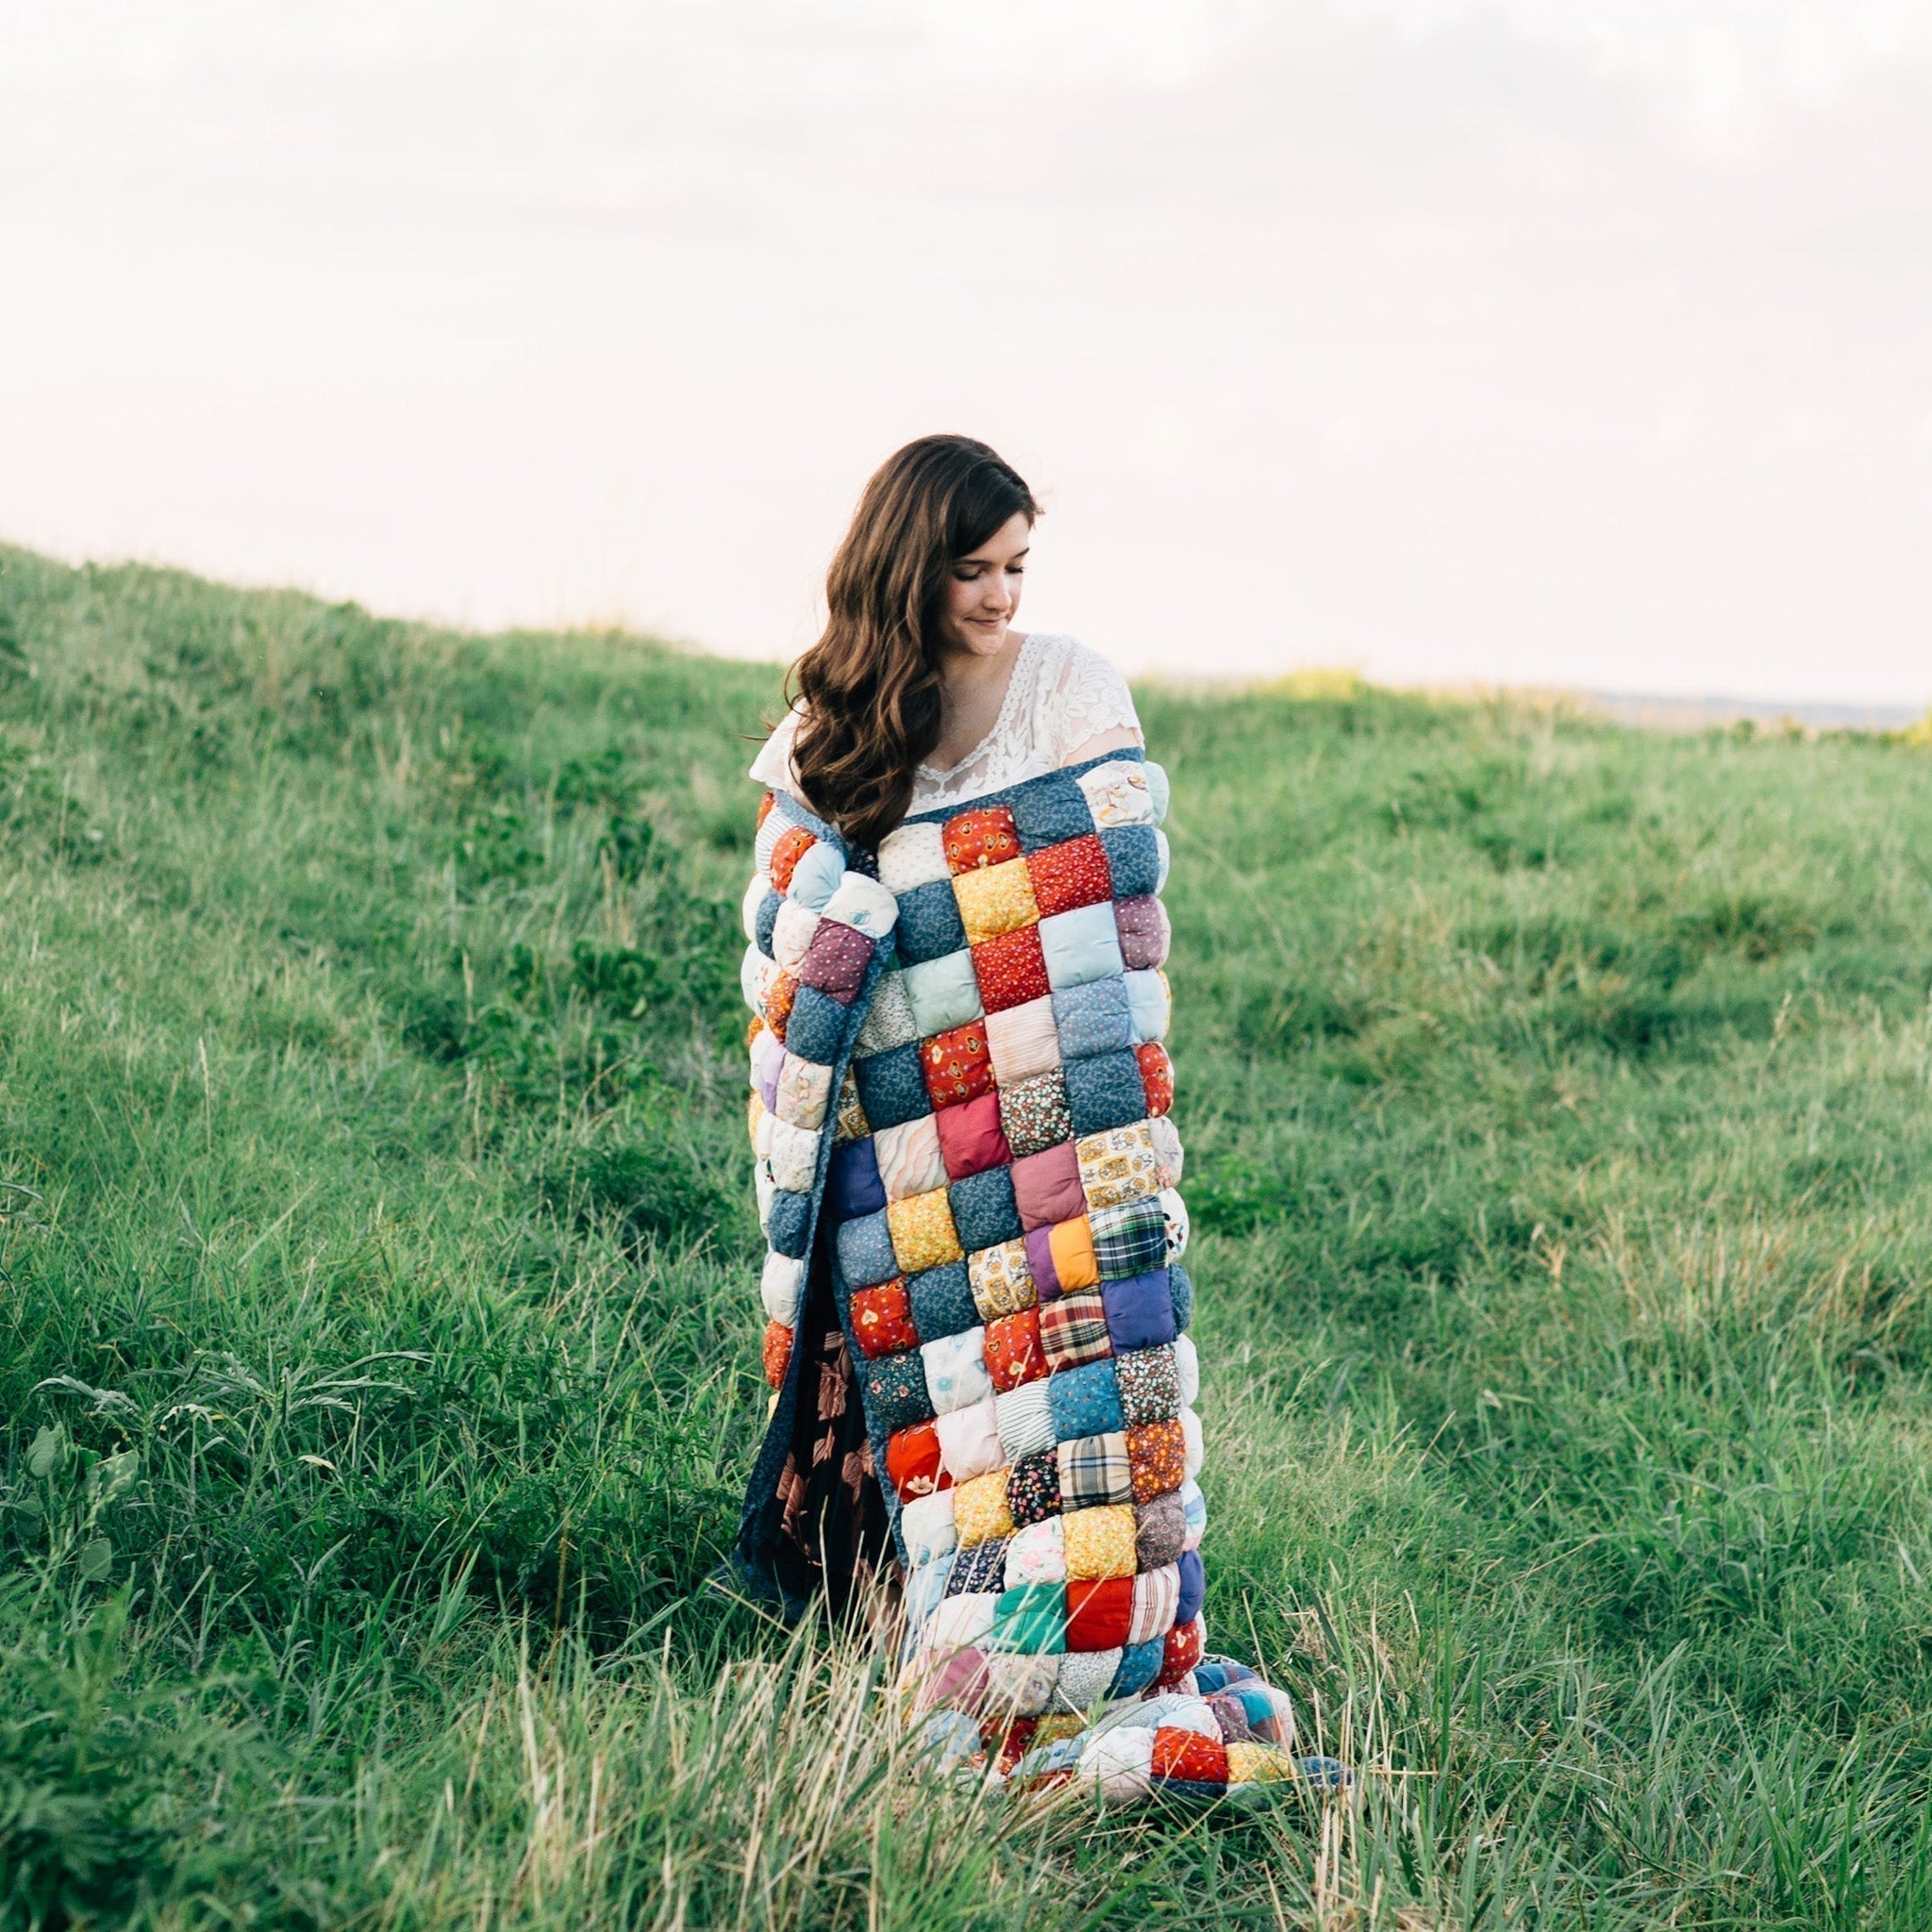
I love decorating our home for the seasons, and while I tend to lean more toward cozy winter decor than strictly Christmas, a quilted Christmas tree skirt has been on my quilting bucket list for years…until now!
My most recent pattern release, Petite Plaid, prompted me to finally sit down and make a quilted tree skirt a reality. But this free tutorial isn’t limited only to Petite Plaid! The instructions are written for any pattern you choose (and we compiled a full list of compatible Lo & Behold Stitchery quilt patterns at the end!) and allows you to make the tree skirt in whatever size works for your space…so it’s completely customizable for you!
First, I’ll tell you all about how I turned my own quilt into a Christmas tree skirt, and then I'll tell you how you can do it yourself. I’m so excited…so let’s go!
TABLE OF CONTENTS
- My Spiceberry Petite Plaid tree skirt
- Quilted Christmas tree skirt tutorial
- Make your own Petite Plaid quilt
- Tree skirt-compatible quilt patterns
-
Tree skirt FAQ
My Petite Plaid - Spiceberry Tree Skirt
As I designed the Petite Plaid quilt pattern, I knew I wanted (needed?) to make a Christmas-y version. Knowing that I also wanted to make a tree skirt at some point, I figured, why not combine the two? A few years ago, I actually entertained the idea of doing a tree skirt with Upscale Plaid…but now, I’m glad I waited for Petite Plaid. It makes SUCH a cute little accent, and the scale is just right!
I decided to make the lap quilt size, which measures 48” square, which seemed to be the perfect size for our tree.
FABRICS
I took color inspiration from the Upscale Plaid cover quilt. I made that quilt right around Christmas time, so I made it with some not-quite-traditional greens and pinks…and it’s always been one of my favorite holiday quilts!
For my Petite Plaid tree skirt, I wanted to do something similar….but of course I had to make some tweaks. I went with a slightly different green color, I added in some brighter pinks, and then I used a bright green/yellow for the accents. It’s like my Upscale Plaid palette, just kicked up a notch.

My final pull used these Art Galley Fabrics PURE Solids:
- Hunter Fields (Background)
- Rosemary (A1)
- Lemonade (A2)
- Sweet Fig (A3)
- Weathered Brick (B1)
- Festival Fuchsia (B2)
- Raspberry Rose (B3)
- Quartz Pink (C1)
- Spiceberry (C2)
- Crystal Pink (C3)

And I love how they came together!
Part of my thinking was that Petite Plaid uses (much!) smaller pieces than Upscale Plaid. Adding more vibrant accent colors helps the Petite Plaid quilt design feel a little more modern and distinguished…because otherwise, the colors can blend together a little too easily when you’re looking at them from far away.

Have I mentioned how Petite Plaid is strip-pieced and block-based with nesting seams?? Well, it is. 🥰 And it's SUCH a delight to create because of that!


That’s not a problem with this colorway. It looks great from across the room (and nestled under a tree).
If you haven’t already seen them, we carry Spiceberry quilt kits in the shop, so you can make your own!
BACKING AND QUILTING
I backed my quilt with Sugar Ornaments (from Art Gallery Fabrics’s Adventale collection). Since I knew I would be making my quilt into a tree skirt, I did realize that no one would ever see the backing after it was all finished…but I still wanted something seasonal and fun, like a little secret for just me! And Sugar Ornaments draws on all the pinks of the quilt top while still feeling super festive.

After basting my quilt sandwich, I took it to the machine and quilted my top go-to quilting design: straight-line quilting, using a 1” diagonal crosshatch grid. This kind of quilting looks great with pretty much any quilt pattern!


To spice things up a bit (no pun intended!), I used a pinkish-purple thread (Aurifil Wine) for the quilting (that I also used on the Retro Blossoms cover quilt). It was a fun way to play up the secondary colors of my quilt top!

Normally I’d put on my binding next. But not for this project!
THE TREE SKIRT TRANSFORMATION
Once I had my quilt all quilted, it was time to cut it into a tree skirt shape. I’ll be honest: this was totally nerve-wracking! I kept looking at my beautiful lap quilt and worrying I might ruin it. I was at least a little tempted to scrap the tree skirt project and keep it as a lap quilt.
Of course, I finally made that first cut…and as soon as I saw the circular shape, I felt so much better. I could tell it would turn out beautifully!
I bound my quilt with the same Rosemary color I used for my A1 fabric on the quilt top. I went for the fabric tie option (instead of the ribbon, more on that below). And I have to say…I’m completely in love with this tree skirt! It’s one of those projects I keep sneaking another peek at, because I’m just so delighted with how it turned out. It’s so me, and I can’t wait to use it as part of my holiday decor.

So I guess I learned a valuable lesson with this project: Don’t be afraid to turn a quilt into something else! It can be scary at first…but the payoff is worth it, as my new quilted tree skirt clearly proves. 🥰
Ready to try it for yourself?
Free tutorial: Turn a quilt into a Christmas tree skirt
The first two steps go hand-in-hand: determine the right size for your space and choose your quilt pattern.
To determine the right size Christmas tree skirt for your tree and/or space here are a few considerations:
- Consider your tree height: Using a larger tree skirt with a taller tree helps balance out the proportion visually.
- Decor style: If you typically place a large amount of presents under your tree, or you use a large tree stand, you may prefer to have a larger tree skirt to help hide the tree stand or as a base for your presents. Your tree skirt should sit comfortably around the stand, covering it but not bunching up.
- Check your space: Make sure the size of your tree skirt won’t crowd nearby furniture or block any walkways.
-
Consider tree circumference:
- Artificial tree: Measure the diameter of your Christmas tree across the widest part of the tree, usually the bottom row of branches. If you would like your tree skirt to extend beyond the bottom branches, consider adding 6-12” to this size to determine your desired tree skirt size.
- Real tree: Measure the space where your tree is usually placed, then determine your desired tree skirt size.
Note: For this tutorial, I made a 48” tree skirt for a 7.5” tall tree.
Once you have worked out the right size for your needs and space, it’s time to narrow down which quilt pattern you want to use and make that quilt top. A full list of compatible Lo & Behold Stitchery patterns are linked below. The tree skirt tutorial begins with a basted and quilted top, so when you have your quilt top ready, come back and I’ll show you how to transform your quilt into a Christmas tree skirt! Or, if you have a quilt you would like to repurpose, you can do that too!
Let’s get started!
SUPPLIES
- Quilted quilt top (does not need to be bound) or finished quilt greater than or equal to your desired size
- Binding*
- Rotary Cutter
- Large Fabric Scissors
- Quilting Ruler
- Self-Locking Tape Measure (or a flexible tape measure)
- Marking tool (tailor’s chalk or fabric-safe pen preferred)
- Tie Closure (choose one)
- Fabric (can match binding fabric or coordinate): ¼ yard or 7” x WOF if using scrap fabric
- ⅜” or ½” Grosgrain Ribbon: 120” or 3-½ yards
*Depending on how you prefer to cut your bias binding, the circumference of your tree skirt and the circumference of the inner circle, you will need ½-¾ yard of binding fabric. If you choose to use straight grain binding instead of bias binding, the fabric requirement in your chosen pattern should work to bind your tree skirt.
I chose to use bias binding for my tree skirt and cut from yardage instead of a square.
HOW TO MAKE A QUILTED CHRISTMAS TREE SKIRT
If you are turning a finished quilt into a Christmas tree skirt, begin by removing the binding. You can save this to re-use on your tree skirt, however I recommend measuring to make sure you have enough. Using straight grain binding to bind a circular tree skirt may be a little more challenging than using bias binding, but it will work.
If you are creating your Christmas tree skirt from a quilt top, baste and quilt as desired.
🧺 |
Extra resource: Straight-line quilting
|
.
Using your rotary cutter and a long quilting ruler, carefully trim the batting and backing layers so they are even with the quilt top.

Once your quilt top is quilted, find the exact center of your quilt. To do this, fold your quilt sandwich in half widthwise with the backing fabric together. Then fold your quilt in half again, this time lengthwise. Mark the center point. Because we are going to cut this portion of the quilt out, I recommend using a marker to mark the exact center of your quilt.


Carefully unfold your quilt. Extend your self-locking tape measure to half of your Christmas tree skirt’s diameter and lock into place. For example, if you are making a 48” Tree Skirt, extend your ruler to 24”. Place the tape measure on the marked center of your quilt with the tape measure extending out toward the edges of your quilt. Using your marking tool, make a mark directly on your quilt at the end of the tape measure. Carefully rotate the tape measure approximately 1-2” and make another mark. Moving in a circular motion, continue marking the outer circle of your Christmas tree skirt around the quilt.


Once you have added dashed marks to create the full outer circle of your tree skirt, carefully draw a line to join the dashed marks to create a solid line.

Repeat these steps to create the center circle that will wrap around your Christmas tree’s trunk/base. Extend your self-locking tape measure to 2.5”. Mark around the tape measure to create a 5” circle to wrap around the trunk/base of your Christmas tree. You can also use a bowl or plate as a template to trace this circle! If this is your first time sewing with bias edges or curves, you may consider making this inner circle a little larger than 5”; 6-8” would also work and will make binding this section of the tree skirt easier to handle.
Note: If you have a real Christmas tree, you may need to adjust the diameter of the inner circle to accommodate your base and watering system.


The next step can be done one of two ways. You can sew a line of stay stitches BEFORE you cut, or you can cut first, then sew a line of stay stitches. The "stay stitches" are a straight stitch seam that help keep your quilting lines/pieced fabrics from unraveling. It doesn't really matter which order you do it in. I recently made a scalloped-edge quilt (found here) and for that quilt, I cut my scallops first, then stay-stitched. So for this tree skirt, I wanted to experiment and do it in the reverse order to see what I preferred. Spoiler: I don't really have a preference!
Using a walking foot, stitch 1/8" inside of the marked line, all the way around the tree skirt. Repeat for the inner circle.


Using a sharp pair of fabric scissors, carefully cut directly on your drawn outer line.

Then you have your curved outer edge! Now we need to mark and cut one more line, which will connect to the inner circle. Looking at your quilt, visualize which part of the quilt you would like facing out into your room as the front of your Christmas tree skirt. Then determine the location of the “back” or “opening” of your tree skirt. Using a long quilting ruler, draw a line connecting the outer curve to the inner circle


Stitch a 1/8" stay stitch on the left and right side of that line and also around the inner circle. Remember that your stay stitches are going to eventually be hidden by your binding.


Finally, cut along your drawn lines and you have officially created the unfinished shape of your tree skirt! I started to become SO excited after this step!


Finishing your quilted tree skirt
From your Fabric Ties fabric, cut (3) 2” x WOF strips, then sub-cut into a total of (6) 2” x 20” strips. Note: Feel free to create ties that are wider or skinnier.

On one short end of the strip, fold one edge in approximately 1/2”. Then, press the strip in half lengthwise with wrong sides together to create a center crease.


Open the strip and fold the bottom edge in toward the center crease so the raw edge meets the center crease. Press in place. Repeat with the top edge.


Fold the strip in half lengthwise again and press. Your tie should now be 1/2” wide and have one finished end and one raw end.

Topstitch the folded edge of the strip, leaving one raw edge open (which will be sewn into the binding). You might choose to sew a seam along both edges of your tie to make it symmetrical. Repeat to create (6) total ties. Set the fabric ties aside.


If you choose to use ribbon ties instead of fabric, cut your ribbon into (6) 20” strips. Then you might want to finish one edge of the ribbon by either sewing one edge or you can cut one edge in a “V” shape to minimize fraying, leaving one ribbon end raw. Set the six ribbon ties aside.
Measure and mark the placement of your ties evenly on the cut straight edge of your tree skirt. Your first tie should be approximately 1” from the inner circle opening. Place your second tie halfway down the opening and your third tie approximately 1” from the bottom edge of your Christmas Tree Skirt. Make sure your ties line up with each other evenly across the cut opening so they will tie the skirt together neatly when it is finished.
Pin or clip each tie in place, aligning the raw edge of the tie with the raw edge of your skirt. Set aside.

At this point, you can either go ahead and secure your ties to the tree skirt or you can wait and do that during the binding step. I wanted to go ahead and stitch them in place so that I didn't have to worry about my clips moving around. Stitch 1/4" back and forth a few times to secure the ties in place. Remember you don't want to use a seam allowance larger than what you plan to use for the binding step.


Creating your bias binding
A quick note on bias binding: If you haven’t created bias binding in the past, don’t be intimidated! It is easier than you think. There are several different methods for creating bias binding; I’ll review two options below. For my tree skirt, I went with Method 2, cutting bias strips from yardage as I’ve found that to be the best use of fabric. If you prefer a more consistent length to your binding strips, you may like the Method 1 better, as this will yield more uniform strip lengths, but also uses more fabric.
Bias Binding Method 1:
- Start with a square of fabric. Place your fabric on your cutting mat. Use a large ruler to square up the edge of the fabric as needed. Cut the square in half on the diagonal to yield two triangles.
- Place your triangles right side up on your cutting mat. The first triangle should be oriented with the 90° angle in the top right corner with the second triangle oriented with the 90° angle in the lower left corner.
- Carefully place the triangles with right sides together, aligning the top edges. The points of the triangle will be staggered so there is a 1/4" overhang on each side (forming dog ears).
- Sew along the top edge with a 1/4" seam allowance. Press seam open.
- Place your fabric on your cutting mat. Starting on the left side (right side if you are left-handed), find the 45° line on your ruler. Line up the 45° with the top or bottom edge of the fabric.
- Cut strips parallel to the edge (the bias) at your desired binding width.
Bias Binding Method 2:
- Start with your unfolded yardage. Place your fabric on your cutting mat. Use a large ruler to square up the edge of the fabric as needed.
- Starting at the bottom left corner (bottom right corner if you are left-handed), find the 45° line on your ruler. Line up the 45° with the selvedge edge of the fabric.
- Using your rotary cutter, cut off the bottom left side (right side if you are left-handed) triangle.
- Turn your ruler so it is parallel with the new bias edge. Cut strips parallel to the folded edge (the bias) at your desired binding width.
- If your fabric gets too long to cut diagonally with your ruler, fold your remaining fabric wrong sides together, matching up the bias edge. Lay your ruler on top and continue cutting your strips.


To join your binding strips, follow the steps below:
- Place strips right sides together so they are perpendicular to each other.
- Sew from one corner to the other, as seen below.
- Chain piece all seams.
- Trim excess binding fabric to create a 1/4" seam.
- Press the seam open. Repeat this process for all of the binding strips to create one continuous strip.
- Once your strips are joined, press the entire length in half lengthwise, wrong sides together. Your binding is now ready to sew onto your tree skirt!


Align the raw edge of your bias binding with the raw edge of your Christmas tree skirt. I recommend sewing your binding to the front of your tree skirt first, and beginning the binding on the outer circle on the back portion of your tree skirt. If you need a refresher on machine binding your quilt, you can review my machine binding tutorial here.
Attach your binding to your Christmas tree skirt in the same manner as if you were attaching binding to a quilt. Gently form the binding to the curves.

When you reach the corners of the inner circle and outer circle, you can either miter the corners like you would on a square or rectangular quilt, or gently stretch the binding around the corners and continue sewing. I experimented with both for the inner circle so that you can see what each looks like.
Here's what it would look like to miter the corner. Remember it's exactly the same as an actual quilt, but the angle is slightly different from a perfect 90° corner.


And here's what it looks like to round the corner instead. If you were going to go this route, it might be helpful to use a pair of scissors to slightly round out the corners of your quilt before adding binding. Trimming off a 1-2" rounded corner would help this process, but this can still give you and idea of what it would look like: no folds, all curves:


When you reach your ties, make sure the ties are positioned so that they are laying across the tree skirt and you are sewing only over the raw end of each tie. Sew carefully to attach the ties to your tree skirt while you are attaching your binding. You may choose to backstitch over each tie to make sure they are securely attached.


Once you reach the beginning of your binding, join the binding ends using your favorite method. After your binding is secured to the first side of your tree skirt, machine or hand stitch your binding to the opposite side. If you are machine stitching, pay extra close attention to your ties on the other side. You could choose to stitch through them again, or you might want to fold them around like what I did here:


Here's another look at the mitered corner vs. rounded corner. Which do you prefer?


The autumn leaves were beautiful as I was working on this project. Here's a peek at my view during the process...


If you have a real Christmas tree, I recommend applying a protective spray to your finished tree skirt to protect against water spills or sap.


Congratulations! You have finished your Christmas tree skirt!
Project ideas for trimmed quilt remnants
Don’t let the quilted trimmings go to waste! Here are a few project ideas to use up those scraps.
- Quilted Ornament
- Coaster/Mug Rug
- Throw Pillow
- Potholders/Oven Mitts
- Stockings
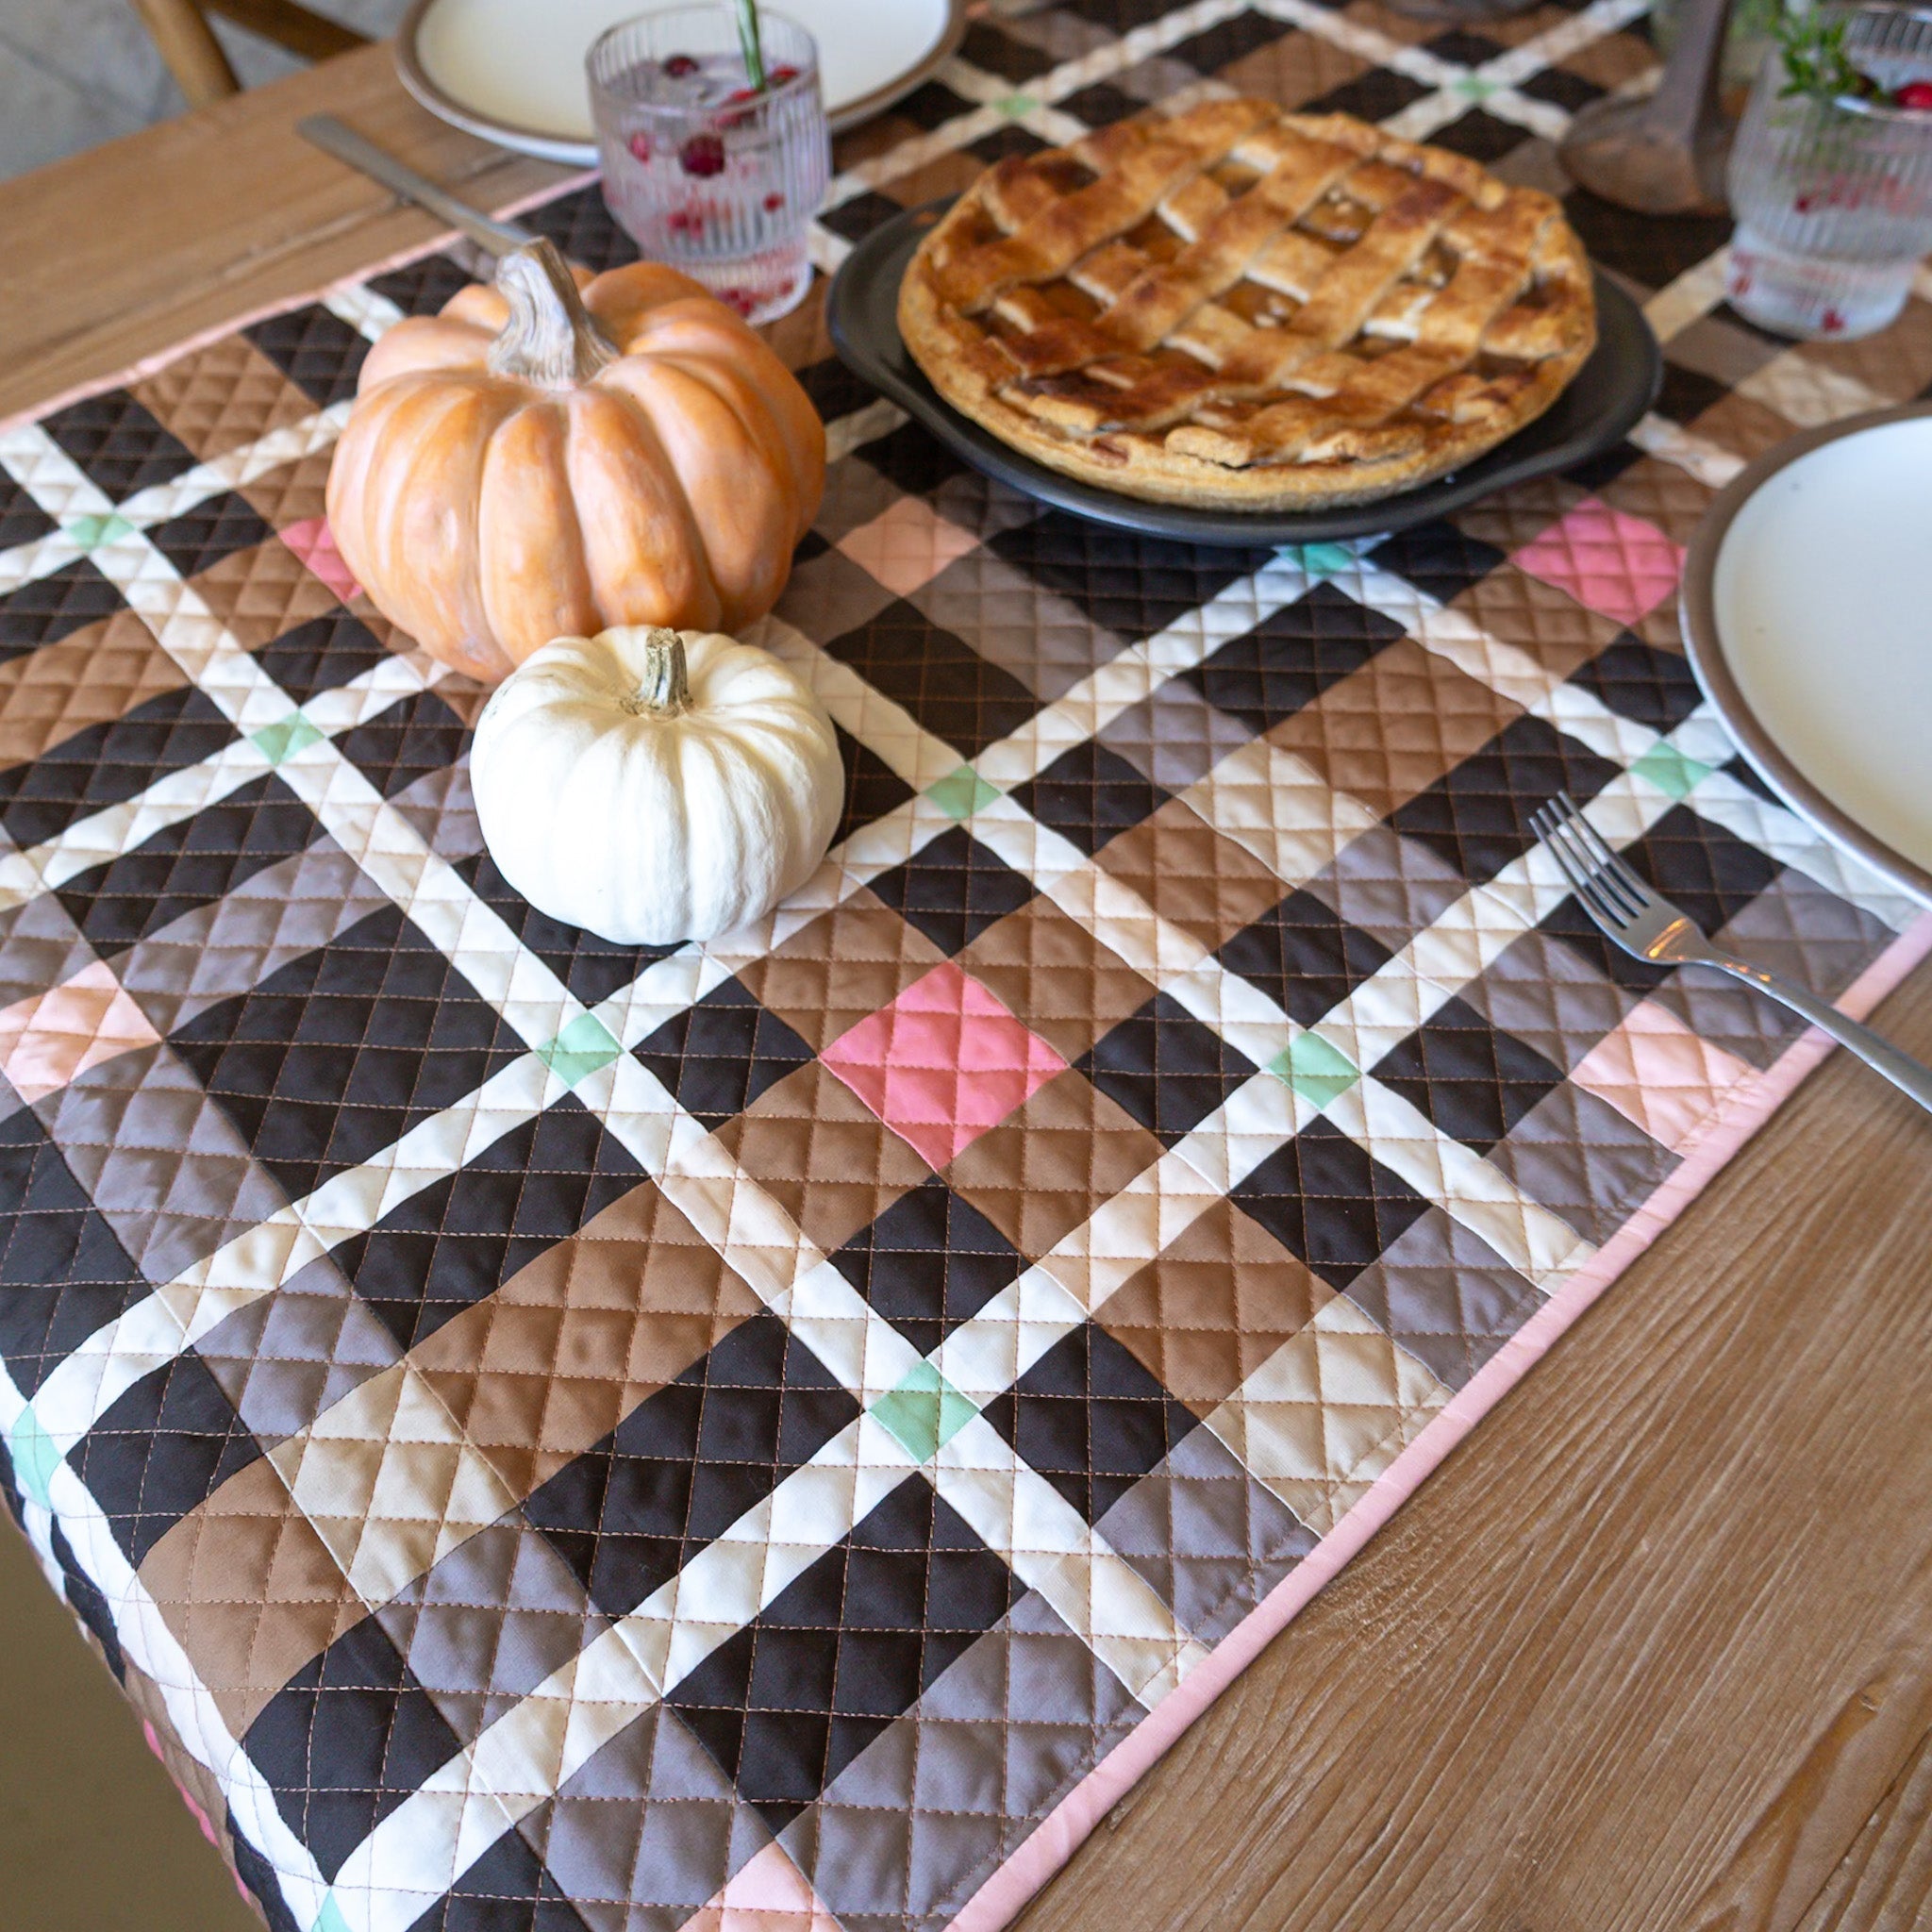
- Placemats
Make your own Petite Plaid Quilt
This project made me want to keep sewing and playing with the Petite Plaid quilt pattern, and I hope it gives you some ideas too! We have some great resources for your Petite Plaid project…
QUILT KITS
First up, we have plenty of Petite Plaid quilt kits in the Lo & Behold Stitchery shop!
If you want to recreate my quilt (as either a tree skirt, a lap quilt or a table runner), we have the Petite Plaid Spiceberry quilt kit!
We also have four other Petite Plaid quilt kits in fun, very different colorways:
DESIGN YOUR OWN
Or you can make your own Petite Plaid colorway (perhaps to match your holiday decor?). You can test out your fabrics with the Petite Plaid coloring page on PreQuilt or our free printable quilt coloring pages.
I do recommend taking a look at our guide to choosing colors for Petite Plaid. It will help you figure out the right colors to make the plaid effect pop!
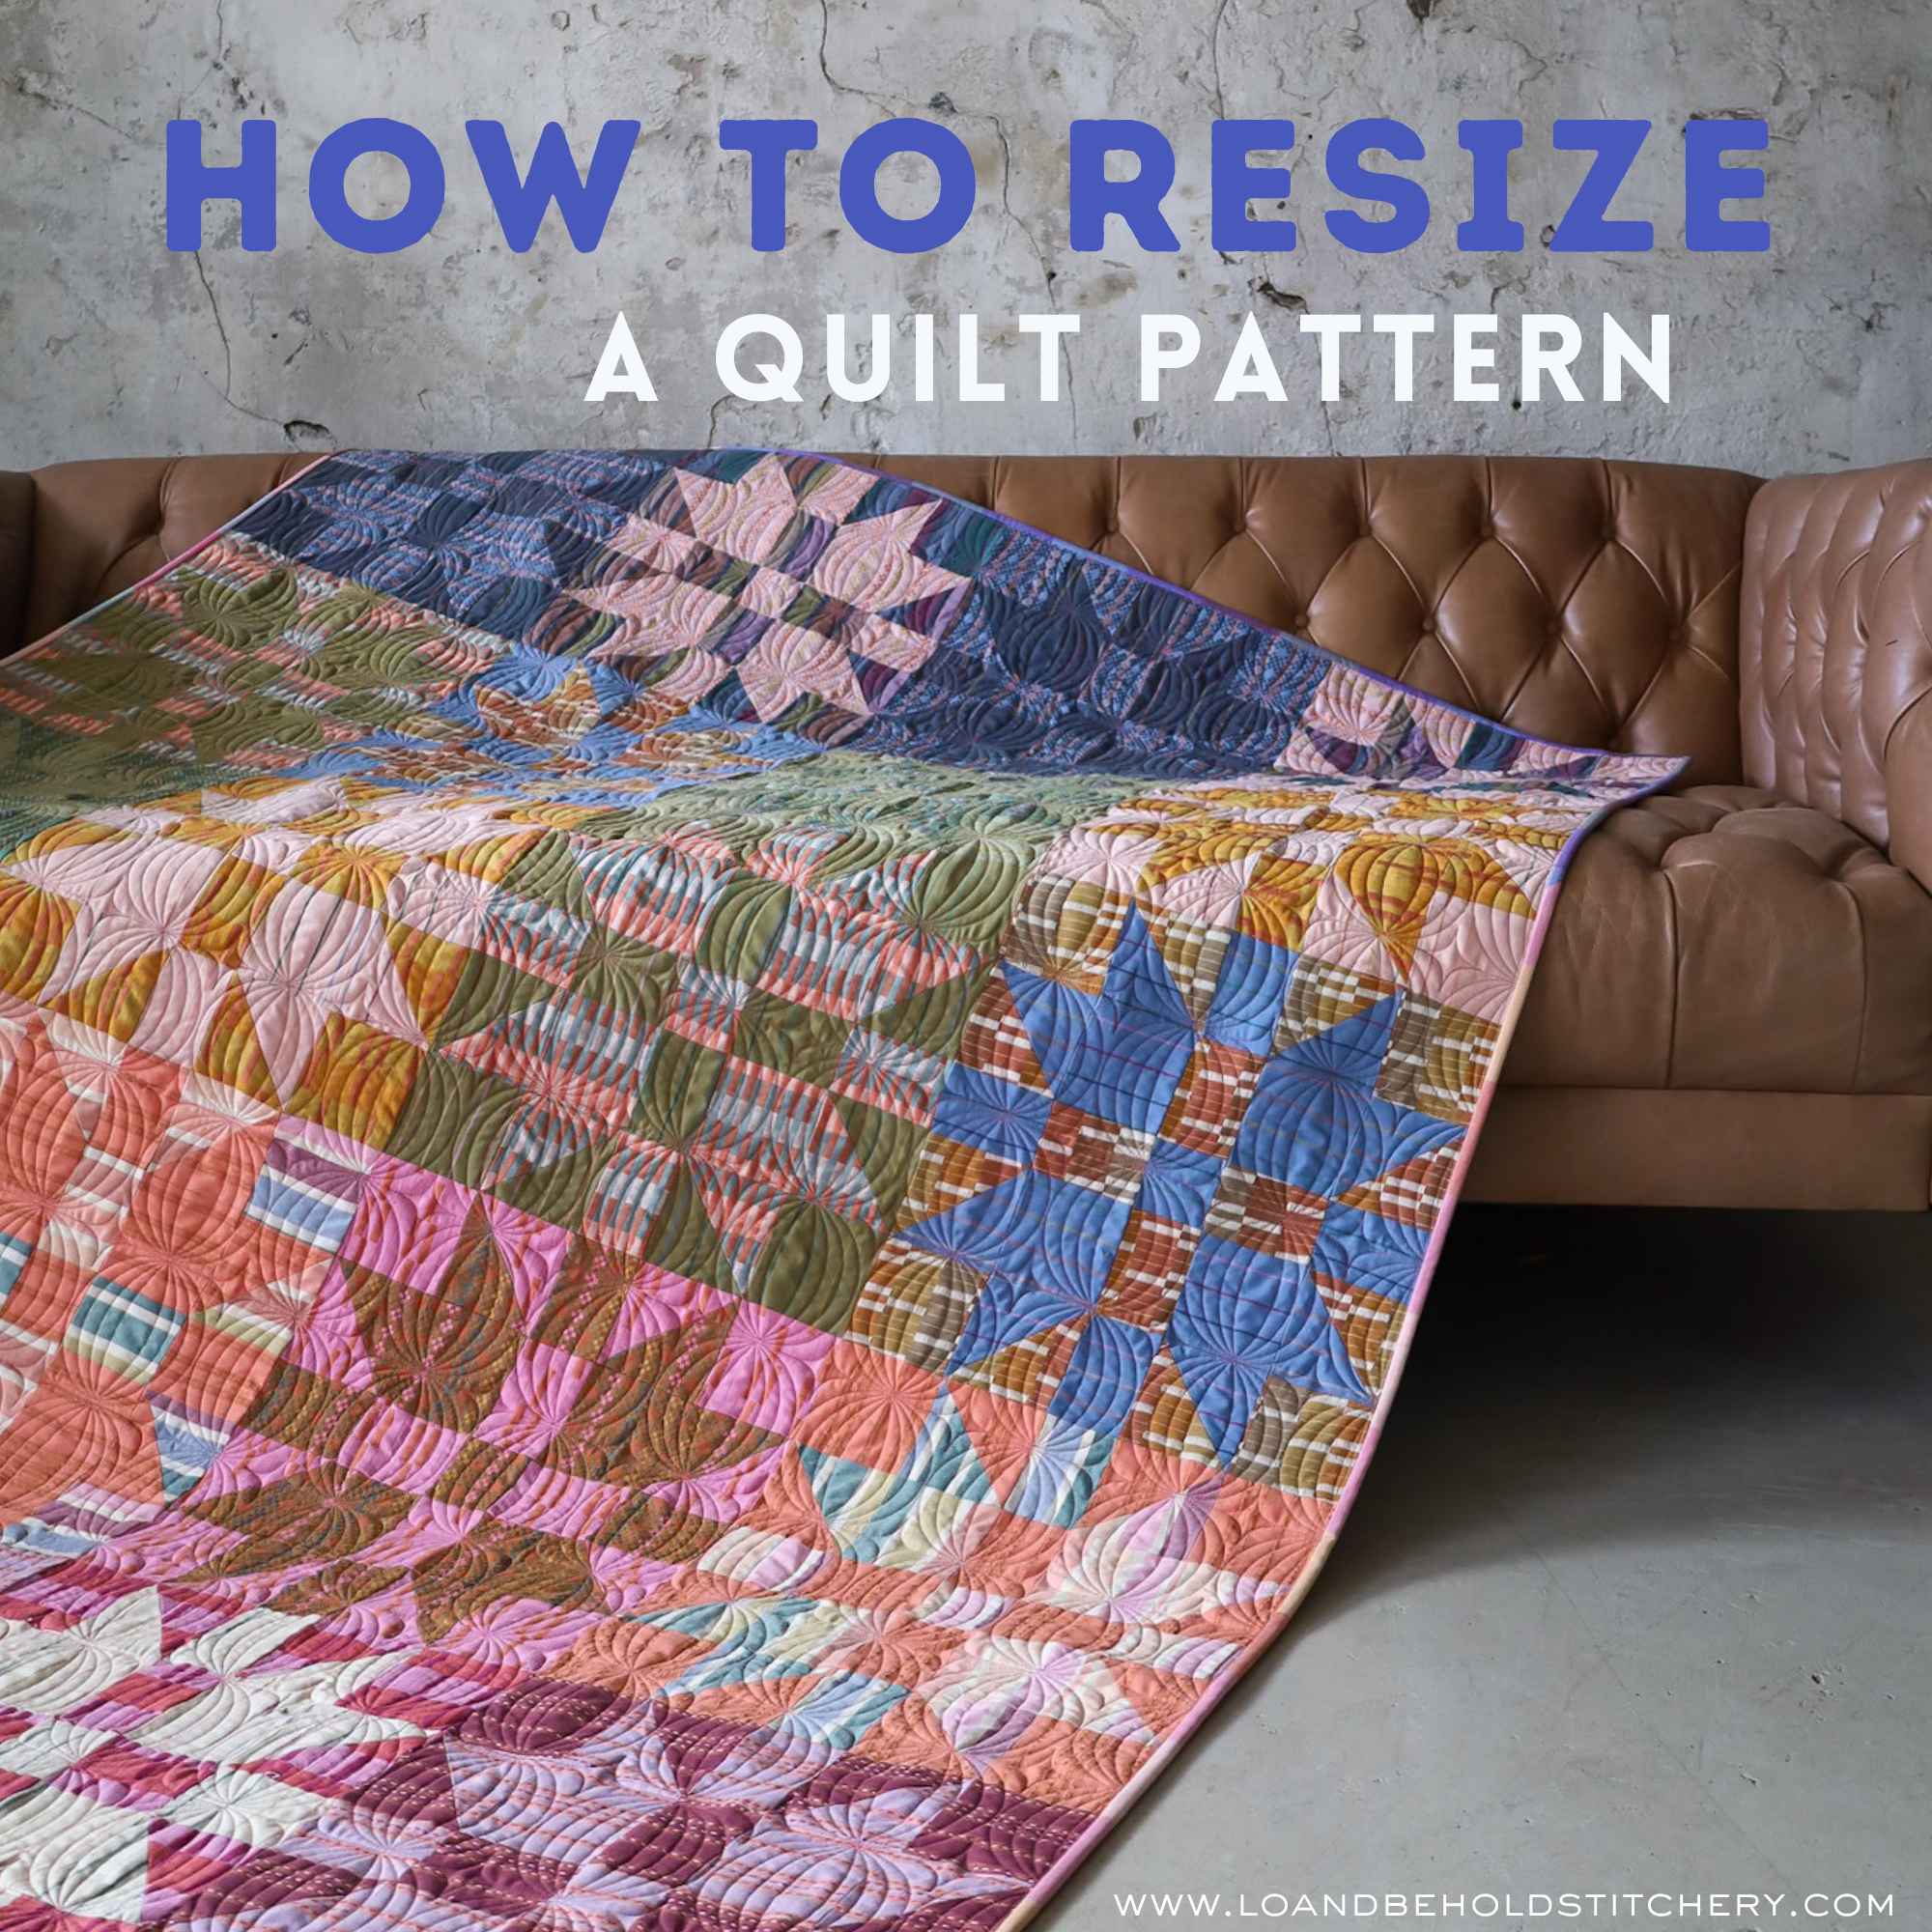
Good quilt patterns for a Christmas tree skirt
Of course, you don’t have to use the Petite Plaid quilt pattern to make your quilted tree skirt. You can use any quilt pattern (though we recommend quilt sizes between 45-60" or so). In fact, here are some other Lo & Behold Stitchery patterns that would make beautiful Christmas tree skirts, along with the recommended size:
- Upscale Plaid (lap)
- Celtic Crossing 2.0 (square throw)
- Granny Patch (small throw)
- Knitted Star (throw)
- Knitted Blooms (small throw)
- Mosaic Star (crib)
- Nightingale (square throw)
- Retro Blossoms (square throw)
- Shades of Citrus 2.0 (square throw)
Happy quilting!

In case you missed it…
- Petite Plaid PDF pattern
- Petite Plaid paper pattern
- Petite Plaid Spiceberry quilt kit
- Straight-line quilting tutorial
Quilted Christmas tree skirt FAQ
How many yards of fabric do I need for a tree skirt?
How many yards of fabric you need for a tree skirt depends on the quilt pattern you start with. To make a Petite Plaid tree skirt, you’ll need about 5 yards of fabric (split among your different colors) for the quilt top, plus another 3.5 yards for the skirt backing.
Alternatively, you can opt to create a tree skirt without any piecing using a solid piece of fabric on the front and back. You may still need to piece two halves of the skirt shape together to get your desired size. Plan on at least 1.5 yards of fabric for the top and another 1.5 yards for the bottom.
How big should a tree skirt be for a 7-foot tree?
For a 7-foot tree, a tree skirt between 48 and 60 inches usually looks best.
How do I make a quilted tree skirt?
To make a quilted tree skirt, start by making a quilt, and then cut into tree skirt shape. Bind it and add ties for closures. For more detailed instructions, use our quilted tree skirt tutorial!
What is a free tree skirt pattern?
The Lo & Behold Stitchery Christmas tree skirt tutorial is a free pattern for turning any quilt into a Christmas tree skirt.