Nightingale Quilt Pattern - The Zen Garden Version
I hadn’t planned to finish and show off this quilt just yet…but I got so excited about how it was turning out that I couldn’t wait, and it jumped the queue.
This is such a special project that I have a lot to share about it…including what inspired it and how you can make your own scalloped quilt!
The Nightingale quilt pattern so far
The Nightingale quilt pattern is almost five years old now, and it has definitely become one of the most iconic Lo & Behold Stitchery patterns…which makes me so happy! I designed this pattern when I left my nursing career to run Lo & Behold full time, and Nightingale is very much a tribute to the healthcare field and my time in it.
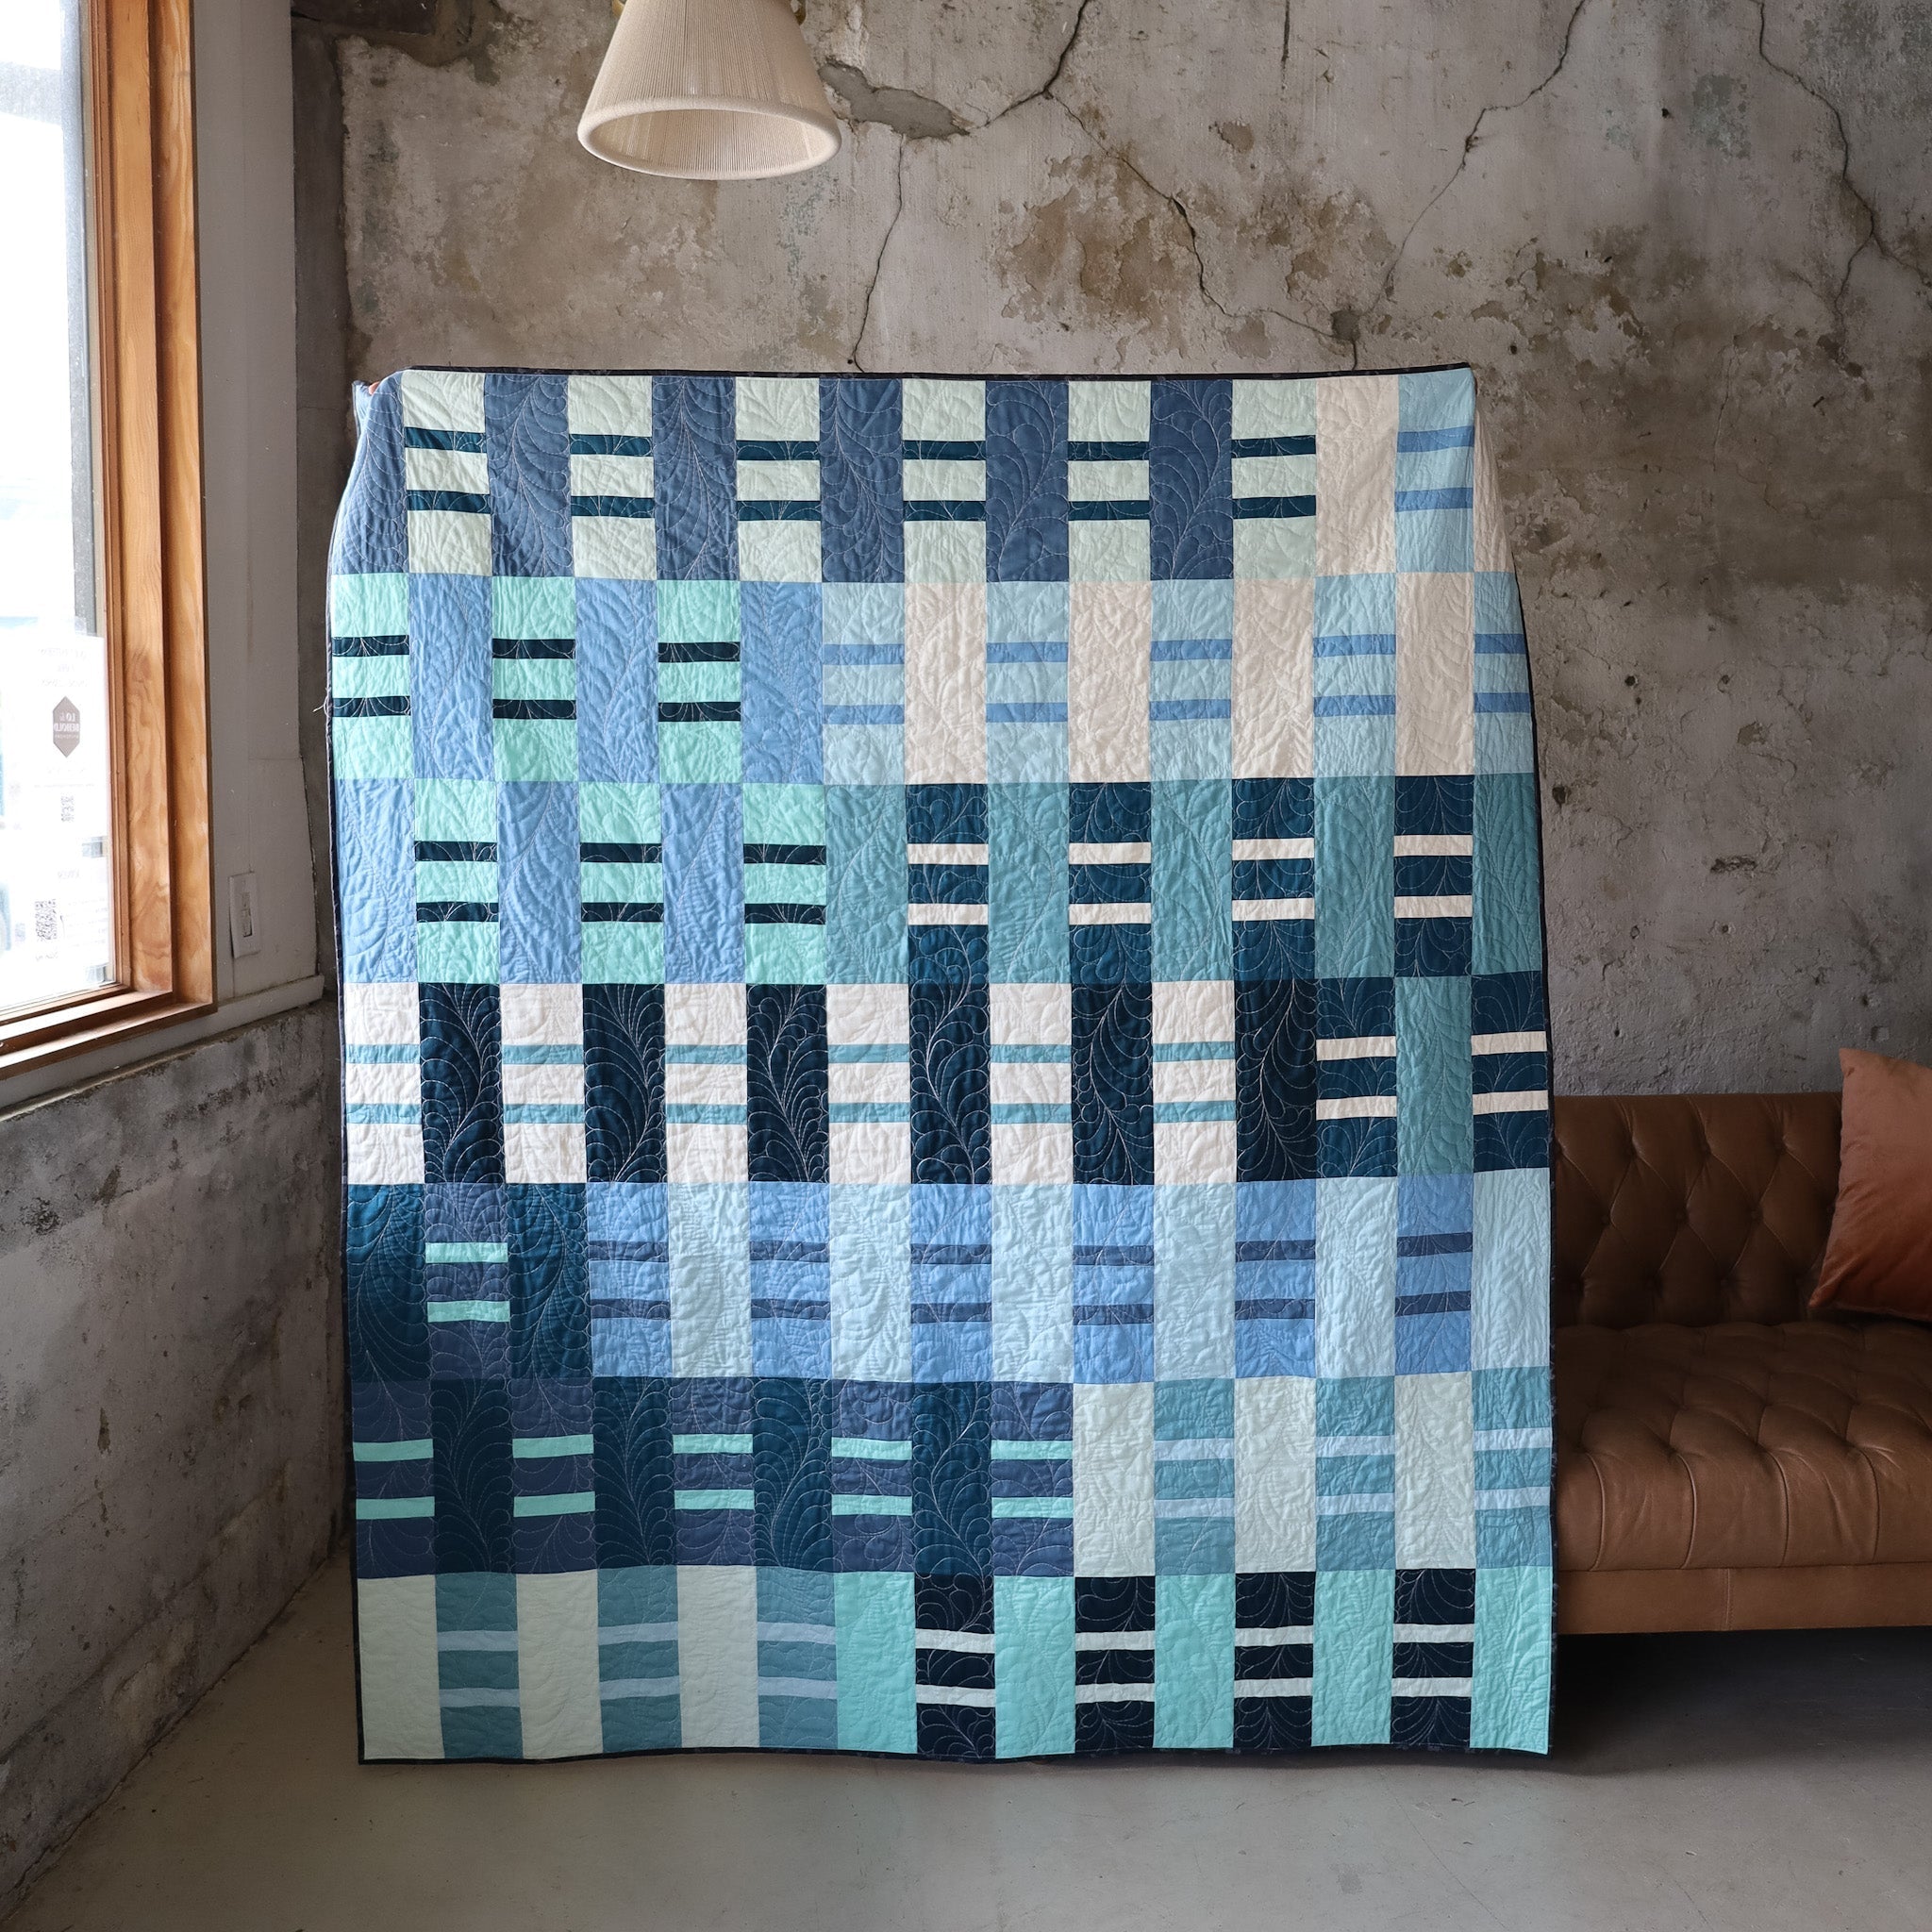
It’s also a beginner friendly pattern that looks great in all kinds of fabrics, as you can see from the different samples I’ve sewn up over the years! I kept the Nightingale Cover quilt simple with solids…but I’ve also played with prints in the Kismet version, the Botanist version, and my Scrappy version.
I even used Nightingale to show off my Robert Kaufman fat quarters bundles. In fact, I made two with my Palette Picks bundle and one with my Heirloom bundle. Nightingale looks good in everything!

So it was a natural fit for my newest quilt experiment…
My Zen Garden Nightingale quilt
Meet the Zen Garden version! Looking back, I’m not sure if I came up with the idea for the colors or the scallops first. Maybe I decided on both at the same time? All I know is the pattern, colors, and scallops are a match made in quilt heaven. 🙌
FABRICS
This version was inspired by Art Gallery Fabrics’s Botanica collection…specifically the Botanical Breeze print (which I ended up using as the backing for this quilt). I just loved the colors immediately, especially the dark forest green, so I built my color palette off the backing print.
I started by picking Forest Night (an AGF PURE Solid) as the background. I’ve used this one before (on my Botanist Nightingale), and I love it as a darker fabric with just a little hint of green!
For the foreground colors, I used a mix of half yards and fat quarters, which meant I included 13 fabrics total (all PURE solids):
- Asparagus
- Blossomed (half yard)
- Blushing (half yard)
- Cinnamon
- Ever So Pink
- Fresh Aloe
- Fresh Sage
- Icy Mint
- Pacific
- Parrot
- Rosemary
- Sprout
- Sweet Macadamia (half yard)


The colors all came together to give this quilt top such a calm yet lush feel, like strolling through a botanical garden in the evening…I can almost smell the blooms, feel the dewy air, and hear the birds calling. So naturally we had to call it the Zen Garden version. 🪷 (And yes, we have quilts kits for this…two actually! More on that below.)


Now, if I was making an ordinary Nightingale quilt, the quilt top would have been all done at this point. But I wanted to try something extra special for this one, so I added a border in the same Forest Night fabric as the background. That took this quilt top from the usual square throw size of 60” square to about 70” square, giving me room to play.
But first, I had to get it quilted!


QUILTING AND BACKING
We sent the finished quilt top over to Blue Ridge Quilt Co. for quilting. Megan always does a great job, and this was no exception! I asked her to use the Best Fronds panto, which is a favorite that I’ve used previously on my Heirloom Nightingale and Getaway cover version. It’s a fun, leafy panto, so it was perfect for this garden quilt!
I already mentioned that AGF’s Botanical Breeze inspired my color palette, so naturally I HAD to use it for my quilt backing. It goes perfectly with the quilt top, of course, and I like how it adds a lighter contrast to the darker background of the top.


Usually when I get my quilts back from the longarmer, it’s time to bind. But not this time!
SCALLOPING
A few months ago, I shared my Scrappy Log Cabin quilt. Like I said in the blog post about that one, I tried to add scalloped edges to that quilt, but I wasn’t happy with how they looked. I ended up cutting off the scallops (and losing a lot of the quilt in the process!) and binding it normally.
I learned a lot from that experience, and I’ve been itching to give scallops another try since then. I even taught a module in Quilt Finishing Fellowship all about scallops just a little before I started planning the Zen Garden quilt, and that inspired me to use scallops again!
My original plan was to add borders to make the quilt finish at 70” square, which would let me use 11” scallops that are 2” high…but even with my borders, the quilt somehow accidentally finished at 68” square! Did you know that dense quilting can actually make your quilt smaller? Lesson learned!
I wanted the scallops to fit this quilt perfectly, so I went back to the drawing board. I ended up trimming 2” from the quilt on all four sides, and that let me pivot and use a 10” scallop that would work much better.
Because I’d already added the border, I wasn’t cutting away any of the piecing. And since the border is the same color as the background, it doesn’t scream “BORDER!” Instead, it’s more subtle and lets the focus stay on the scallops and the blocks.

I’m happy to say that the scallops turned out perfectly! It took lots of trial and error to get there (I’m still sad when I think about cutting into that scrappy log cabin quilt), but it’s exciting to have this finishing technique in my toolbox now…and to share all about it in Quilt Finishing Fellowship! I definitely see more scalloped quilts in my future.


BINDING
With the scallops cut, all I had left was binding! I used Brick Road Blush (also from the Botanica collection), and I cut it into bias binding to accommodate the curves of the scallops.

Normally I use a 2.25” binding strip, but as you can tell, nothing about this quilt was normal! I used 2.5” strips instead, since this was a deeper 2” scallop, and that gave me enough fabric for the “valley” of my scallops.
I thought this extra special quilt deserved some special binding, so I used chunky stitch hand binding.


I’m so in love with this quilt! From the colors to the scallops to the binding, it all came together just like I imagined, and I’m so, so happy with the result.


Make your own Nightingale quilt
I’m just head over heels for my newest Nightingale, and I’d love to see your own interpretations!
If you want to add scallops like I did…join me in Quilt Finishing Fellowship! I teach scallops in a lot of depth in there, including how to:
- Calculate scallop size
- Create your own scallop template (no fancy rulers required)
- Trace and cut your scallops
- Create bias binding
- Sew the binding to one side and machine or hand finish to the other side
Plus, Quilt Finishing Fellowship includes a few scallop templates designed for the whole lcoth quilt project…but you can absolutely use them on other projects too!
Join the Quilt Finishing Fellowship waitlist now, and I'll let you know when enrollment reopens!
Whether or not you add scallops, it may help to review how to trim flying geese and how to trim HSTs before sewing up your Nightingale.


INSPIRATION
If you've been around for a while, you might have seen my grandmother's double wedding ring quilt that she made for my dad. It's a queen-sized, hand-cut, hand-pieced and hand-quilted STUNNING blue and white quilt that is probably one of my favorite quilts that she created. One day, I'm going to design my own version of a double wedding ring pattern, but apart from that, I have always day-dreamed about recreating a quilt with scalloped edges, just like this one. I was so smitten and excited that that has finally happened and I couldn't resist photographing them together. 🥹


This is my FAVORITE part about quilting. Honoring the past and carrying on the legacy of quilting in new a modern way. It sparks a feeling of remembrance and makes me feel all the more closer to those who have gone before me in the world of quilting...especially my sweet Granny. ❤️
QUILT KITS
We are offering TWO types of Zen Garden Nightingale quilt kits:
- Fabric for a traditional Nightingale with straight sides in a standard square throw size, found here.
- Fabric for a SCALLOPED Nightingale, including border fabric, found here.
We also still have kits for the Cover Quilt in stock, along with the Botanist quilt kit for you print lovers.
DESIGN YOUR OWN
You can find the Nightingale pattern on PreQuilt to audition your own colors and fabrics.
If you plan on using prints, I have a guide on how to use directional fabrics in Nightingale that might be helpful.
Happy quilting!