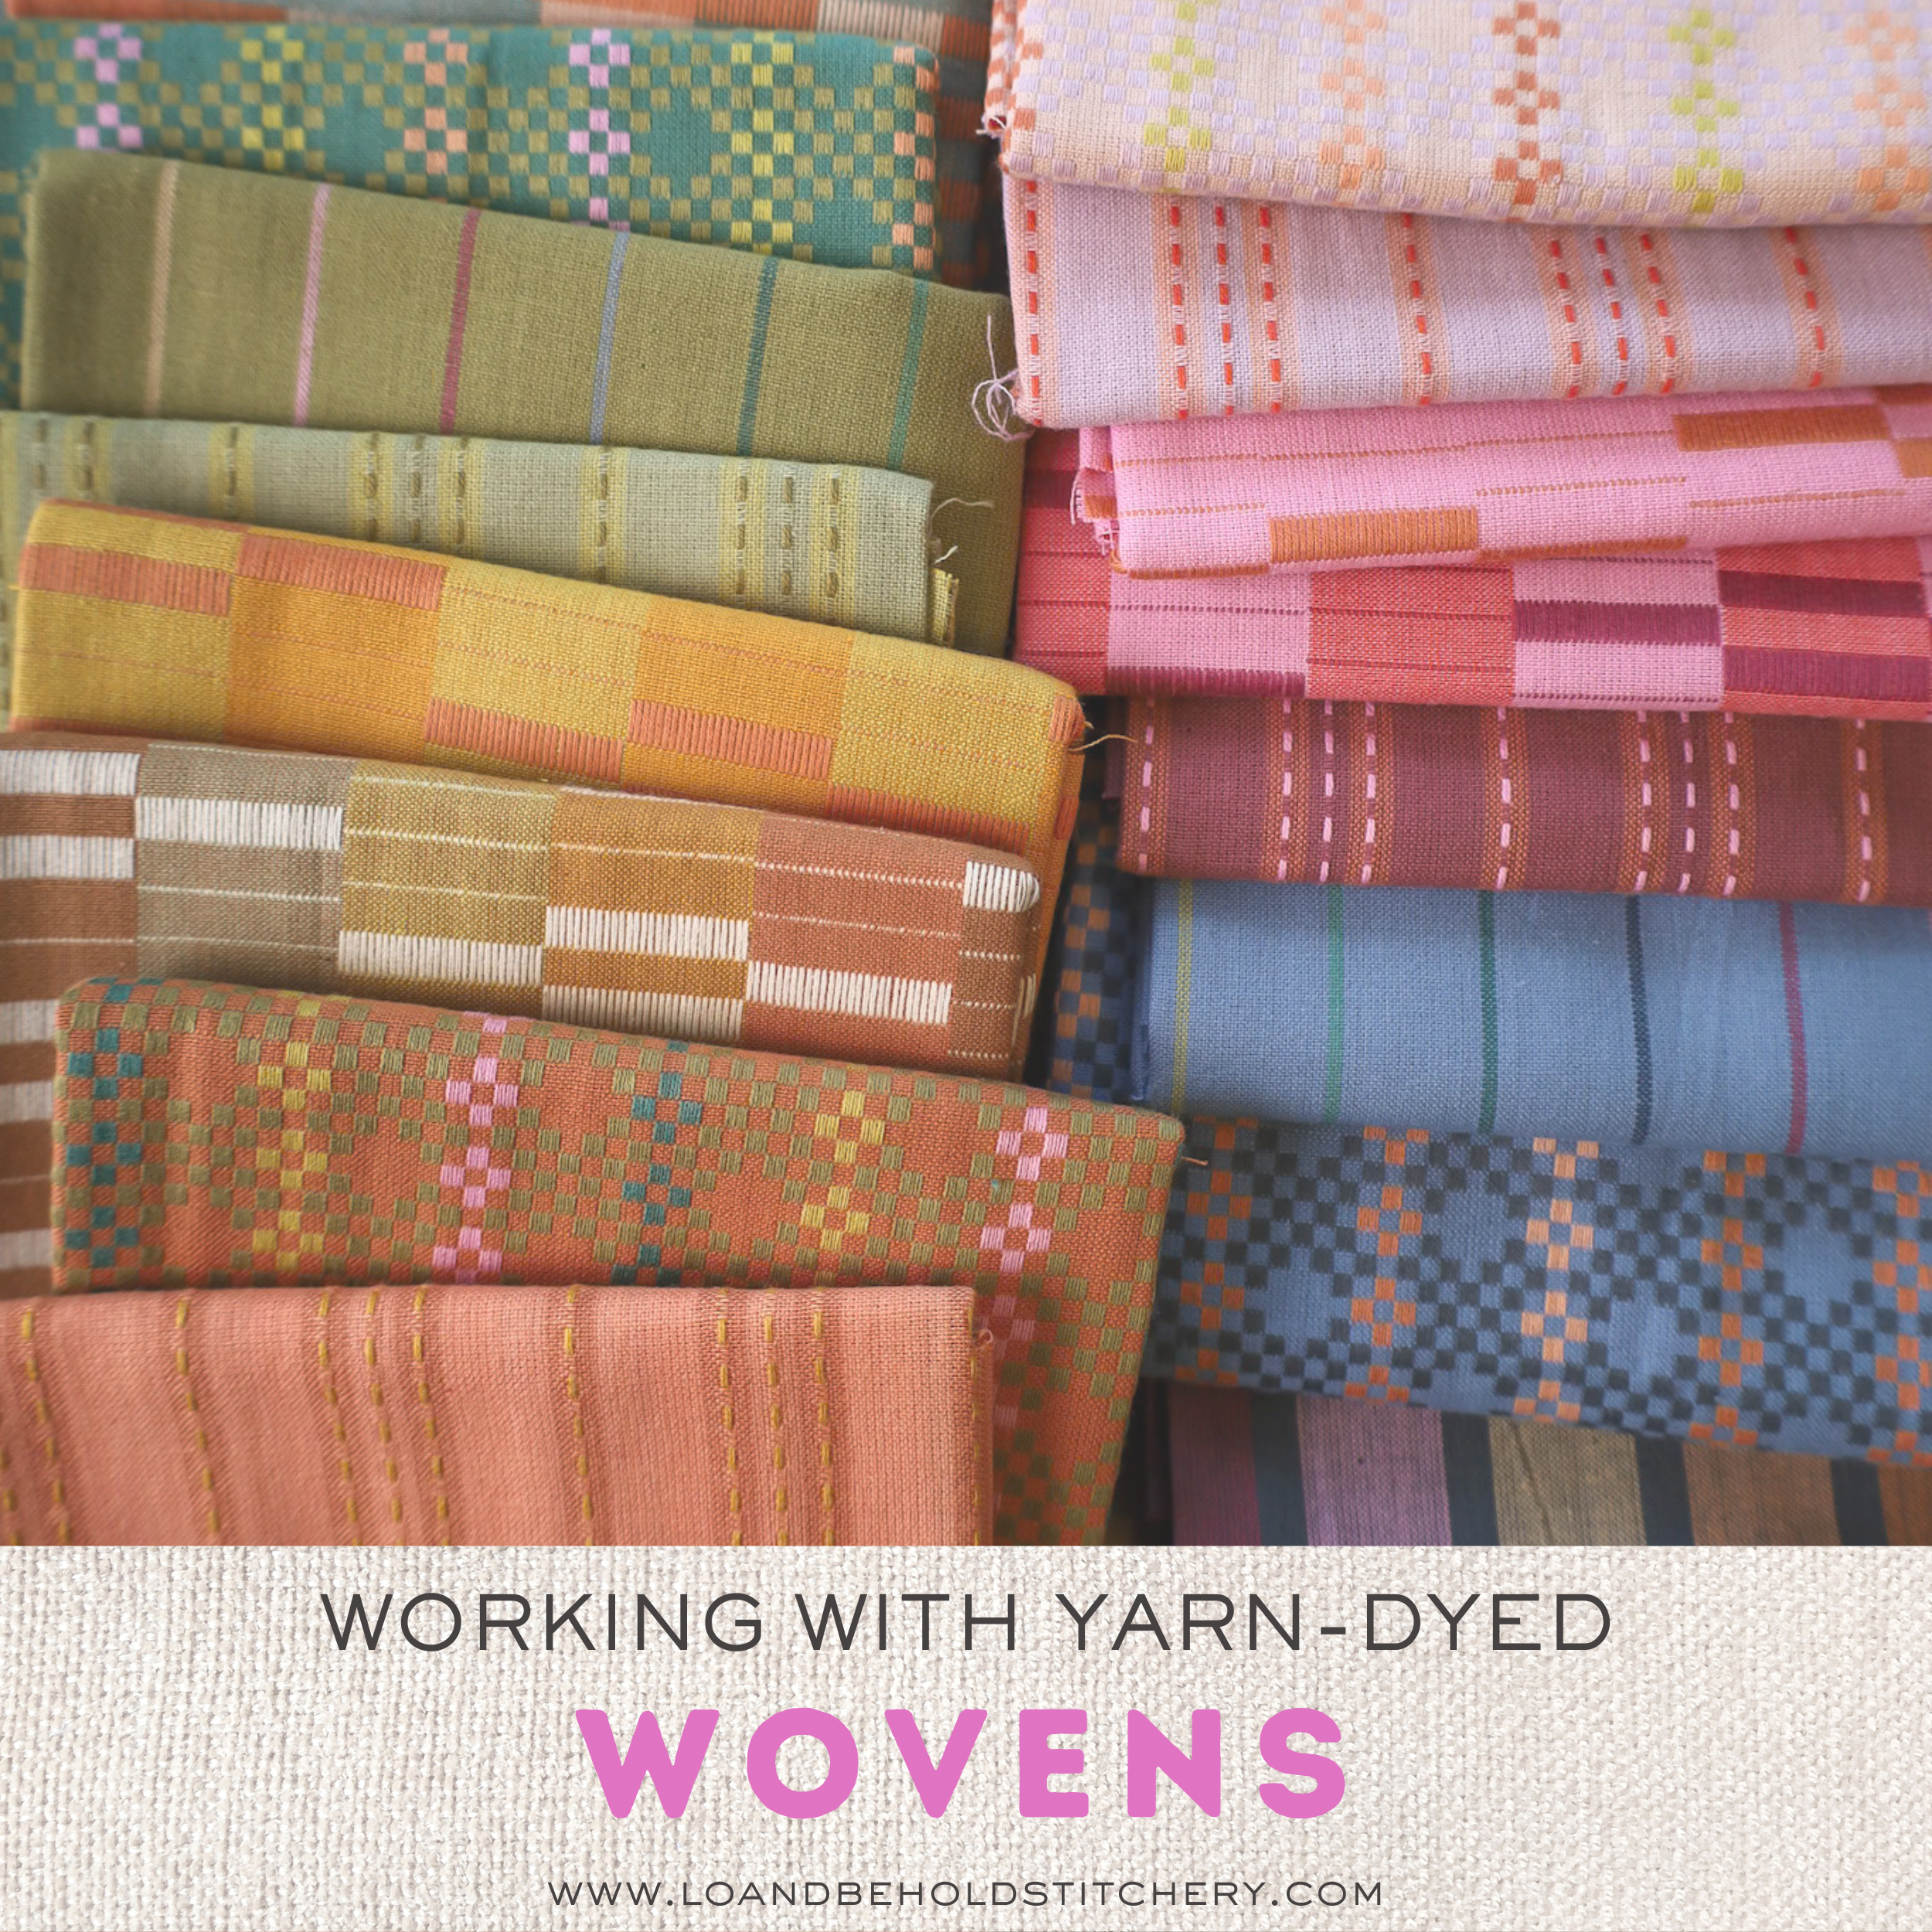
Working With Yarn-Dyed Wovens
It seems like yarn-dyed wovens are becoming more and more popular with quilters…and for good reasons! These heirloom quality fabrics bring extra texture and depth to quilts, adding to that cozy feel we all love. But since wovens behave differently than quilting cotton (hello fraying and stretching) these gorgeous fabrics can feel intimidating to work with.
I love using yarn-dyed wovens in my quilts, so I’m here to help you learn to love them too! I’ll let you know what’s special (and difficult) about yarn-dyed wovens…and give you all my best tips on how to set yourself up for success with them!
YARN-DYED WOVENS 101
Simply put, "yarn-dyed wovens" are a cotton woven fabric, similar to all quilting cottons (though they can also include blends like cotton/linen). So what sets them apart from other quilting fabrics types?
You probably already realized it has something to do with the dye and weave…specifically, yarn-dyed wovens are fabrics in which the threads (aka the yarns) are dyed before they’re woven together to make the fabric. The threads are often woven into designs like stripes, checkers, or plaids. That makes them different from quilting cottons, which are plain-weave fabrics with printed (not woven) designs.

You can use yarn-dyed wovens for garments and other sewing, but they have become especially popular with quilters.
WHAT WE LOVE ABOUT WOVENS
So why do quilters like me love yarn-dyed wovens so much?
Yarn-dyed wovens introduce a beautiful texture into your quilt. Even a very plain woven will look more textured than ordinary quilting cotton, but you don’t have to settle for plain! Yarn-dyed wovens come in all kinds of weaves, each with their own texture, which means you can add another dimension to your quilt.
It’s not just texture, though…we love the colors too! With regular quilting cotton, any design is printed onto the fabric, which you can tell by looking at the wrong side. But with yarn-dyed wovens, the color is actually woven into the fabric, which gives the fabric beautifully rich colors.

Plus, because of the weaving process, yarn-dyed wovens tend to have really classic designs…think plaids, stripes, checks, and that sort of thing. These timeless patterns have a classic look that make them perfect for heirloom quilts.
You can make your quilt entirely from wovens for maximum effect, or you can mix wovens with quilting cottons to add some extra interest. Either way, you’ll end up with some beautiful texture and color!


CHALLENGES TO KEEP IN MIND
Yarn-dyed wovens behave a little differently than traditional quilting cottons, so it helps to know what you’re getting into.
For instance, yarn-dyed wovens have a looser weave than quilting cotton. That gives you a beautiful drape-y texture…and it makes your fabric more likely to fray at the edges. The looser weave also means that yarn-dyed wovens stretch and distort more easily than tightly woven quilting cottons. This is especially noticeable when you’re working with bias cuts!

And while I haven’t had any issues so far, I know some people report woven quilts are less durable and more snag-prone than ones made of quilting cotton, again because of that looser weave. Especially if you have a furry friend that can’t resist digging its claws in, yarn-dyed wovens may not be the fabric for you.
Yarn-dyed wovens also have different thicknesses depending on the weave, which can take some getting used to as you piece and quilt.
It’s also important to note that, yarn-dyed wovens tend to shrink more than traditional quilting cottons. If you pre-wash your fabrics, you could end up short on fabric if you’re not prepared for that extra shrinkage. And if you don’t pre-wash, your finished quilt might shrink differently (and probably more) than you’re used to.
I have good news, though: with a little extra care and preparation, you’ll be ready for the unique challenges of yarn-dyed wovens!
How to use yarn-dyed wovens in your quilts:
After years of working with wovens, I’ve figured out a few things that make a big difference. Here are my top tips for using yarn-dyed wovens in your next project:
1. Choose the right design.
While you can use yarn-dyed wovens in just about any quilt pattern, I think it’s best to choose a pattern that makes the most of your special fabric!
Y’all know I love tiny piecing, but when I’m working with wovens, I like to choose a quilt pattern that highlights the plaids, stripes, and textures of the fabric. So instead of picking a pattern with lots of small pieces, I like to use something with larger cuts. My Warp & Weft Summer Pop, for example, really lets the Warp & Weft wovens shine! The Metamorphosis quilt pattern would be another great choice, thanks to the large pieces that make the most of your fabric.

Once you’ve got a pattern in mind, think about your fabrics. Are you going to use all yarn-dyed wovens, or will you mix them in with quilting cottons? I find mixing yarn-dyed fabrics with solids and small-scale prints can bring balance to a quilt. That Warp & Weft Summer Pop quilt uses a Moda solid for the background, for example.
You’ll also want to decide how to handle fabric alignment in your quilt. You can try to pattern match your wovens…or you can decide to embrace the organic wonkiness! There’s no wrong answer. In my Canyon Springs Church Window quilt, I cut my window pieces side-by-side to keep things aligned. But in my Dusty Merlot Nightingale quilt, I just accepted that the textures and patterns wouldn’t match up perfectly, and I still love how it turned out!
2. Prepare your yarn-dyed wovens before cutting.
Before you head to the cutting table, you might want to do some extra prep with your fabric.
First, you’ll have to decide if you want to pre-wash or not. Like I mentioned earlier, yarn-dyed wovens usually shrink more than quilting cotton does. So if you do plan to pre-wash, you might want to buy a little more fabric than what the pattern calls for. That way, you’ll be fine even if your fabric shrinks more than you’re used to.
Yarn-dyed wovens will fray (a LOT) if you just throw them into the washing machine. You can gently handwash, or you can try to stop the fraying by finishing the edges. A simple zig zag stitch along the cut edges should minimize fraying (or use a serger if you own one!). If your machine only has a straight stitch, then clip off the corners of your fabric to create a bias edge. It won’t stop fraying, but it can help.
You don’t have to pre-wash, though…and I usually don’t. I just know that my finished quilt will shrink when I wash it. If your project really needs to finish at a specific size, though, you should probably pre-wash.
Next up: starch! I’m a sometimes-starcher, but when it comes to wovens, I starch every time. This will help stabilize the fabric before you cut (though sometimes, depending on the weave, starch may not make a big difference).
Once you’re ready to press your fabrics, make sure to be very gentle to avoid stretching. For best results, don’t move the iron around on your fabric…pick it up first, and then press another section. I know that’s easier said than done, especially when you’re working with yardage. So just try to iron with the grain of the fabric to minimize stretching and warping.
I haven’t tried this personally, but I know some people add a very lightweight iron-on interfacing at this point. It should help with problems like fraying, stretching, and durability…but it’s an extra step, and it may change the drape of your fabrics. (If you do this, let me know how it works for you!)
3. Cut your yarn-dyed wovens carefully.
Finally, you can get to cutting! Make sure to put a fresh blade in your rotary cutter. Not only will it make cutting easier, but a fresh blade will help avoid stretching your fabrics as you cut.
I also recommend cutting wovens one layer at a time. With quilting cottons, you can pretty easily stack your fabrics to speed things up…but given that wovens are thicker and more prone to stretching, you’ll get more accurate cuts (and hopefully less fraying) by sticking to one piece of fabric at a time.
When you cut wovens, you should also try to keep your fabric squared up, especially if you have a plaid or stripe. This can be hard if you have a fat quarter and need to get a certain amount of cuts from it…you may not have enough room to square up and waste fabric. So measure before you cut, and do your best. (That’s all we can do, right??)

After your yarn-dyed wovens are cut, handle those pieces carefully! Try to handle the edges as little as possible (to prevent fraying).
4. Adjust your piecing and pressing as needed.
Once you’re at the sewing machine, adjust your stitch length. I like to use a slightly smaller stitch length to prevent my seams from unraveling.
Some people also like to use a larger seam allowance with yarn-dyed wovens (along with flannels and linens), since they shrink more than traditional quilting cotton. That’s easy to do with something like Patchwork Squares, but don’t try it with a quilt pattern that relies on a ¼” seam. (And for the record, I’ve been fine using a standard ¼” seam with my yarn-dyed wovens.)

I also recommend lots of pins with yarn-dyed wovens. Even if you don’t normally pin much, use them here! Pinning will help control stretching and shifting as you sew.
After you’ve sewn a seam, you’ll have to decide how to press it. Some quilters like to press wovens open to decrease bulk, especially since yarn-dyed wovens are usually thicker than quilting cottons…but other quilters like to press to one side to protect their stitches and stabilize the seam more. Again, there’s no right answer here…just do what feels right to you.
5. Embrace texture with your finishing.
Once you’ve got a finished quilt top, the hard part is over! But I still think yarn-dyed wovens need some extra consideration for finishing.
Since yarn-dyed wovens bring so much texture already, I love using a quilting design that enhances that texture…think simple straight lines, hand quilting, and even big-stitch quilting.
I also recommend quilting a little more densely than you might normally. The added quilting can help make your quilt more durable.

And speaking of durability, I usually pick a quilting cotton for my binding. Binding with a looser weave fabric makes me a bit nervous, since binding takes more stress than any other part of the quilt. That being said, you certainly can use yarn-dyed wovens for your binding…as long as you know the risks!
Plan your yarn-dyed woven quilt:
It might seem like yarn-dyed wovens are a lot of extra effort, but the richness and character they bring make them worth some extra care. If you’re anything like me, once you start quilting with them, you won’t want to stop!
And now that you know all about how to sew with yarn-dyed wovens, you’re ready to plan your next project…and I have some ideas to help!
Yarn-dyed woven inspiration
I’ve used yarn-dyed wovens in a few different quilts over the years:
- Warp & Weft Vintage Lace, Warp & Weft Summer Pop, and Canyon Springs Church Window quilt use mostly wovens for lots of texture and color
- Woven Mosaic Star uses just wovens in a simple two-color palette for a more subtle look
- Dusty Merlot Nightingale, Candlelight Retro Ornaments, and Scrappy Nightingale use mostly quilting cottons with some wovens thrown in for interest
I hope these inspire you…and help you imagine how you can use yarn-dyed wovens in your own projects!

Recommended quilt patterns for yarn-dyed wovens:
I said earlier that I love using wovens in quilt patterns that let your fabrics shine. These are some of my favorite patterns for showcasing special fabrics (like yarn-dyed wovens):
If it’s your first time with yarn-dyed wovens, you might want to start with small projects first, like a pillow, wall hanging, or baby quilt. You’ll have the chance to get familiar with yarn-dyed wovens without feeling overwhelmed…and then you’ll be ready to move on to bigger projects!

YARN-DYED WOVEN FABRICS
We carry some yarn-dyed woven fabrics in the Lo & Behold Stitchery shop.
Right now you can order the Lucky Loom fat quarter bundle, a gorgeous collection of Fableism wovens. This bundle includes a beautiful variety of colors and weaves…and I can’t wait to sew with it myself!
We also carry several woven three-yard cuts, which are perfect for mixing with quilting cottons.
(By the way, if you’ve never sewn with yarn-dyed wovens before, I think you’ll be excited to see that they’re even prettier in person!)
I can’t wait to see your unique woven creation. Happy quilting!
In case you missed it…
Yarn-dyed wovens FAQ
Can you quilt with yarn-dyed woven fabric?
Yes, you can quilt with yarn-dyed woven fabric! You may want to make some adjustments when quilting with yarn-dyed wovens, like starching your fabric and decreasing your stitch length.
Is yarn-dyed fabric more expensive?
Yes, yarn-dyed woven fabric is usually a little more expensive than typical quilting cottons. Yarn-dyed wovens have a more complicated manufacturing process process, which means a slightly higher price tag. But since yarn-woven fabrics have unparalleled color and texture, I think you’ll find they’re worth it!
How do you cut yarn-dyed woven fabric without it unraveling?
The best way to keep your yarn-dyed wovens from unraveling when you cut is to use a fresh, sharp rotary cutter blade. Starching before you cut can also help keep your fabric from fraying.