Ombre Puff Quilt Tutorial - with VIDEO!
 When I first published this pattern and tutorial in 2020, I had no idea how popular it would be! Five years later, and this Ombre Puff quilt pattern continues to be one of our most popular patterns, and I’ve seen so many incredible versions on social media and in your emails. I never imagined this pattern would bring so much joy to so many people…but I’m so honored that it has! 🥰
In this blog post, you’ll find everything you need to know about sewing your own ombre puff quilt. There’s a lot of information, so you can use the jump links below to navigate to what you need. Happy quilting!
Ombre Puff Quilt tutorial - table of contents
- What is a puff quilt?
- My puff quilt inspiration
- The LBS Ombre Puff quilt pattern
- How to make a puff quilt (full tutorial)
-
Alternative puff quilt techniques
What is a puff quilt?
A puff quilt is a specific variation of quilt, and it’s sometimes called a biscuit quilt.
With a traditional quilt, you sandwich a layer of batting between your quilt top and your backing fabric. But with a puff quilt, you stuff individual squares of your quilt top to create little “puffs.” You still sandwich the quilt top with batting and backing, but the stuffing gives puff quilts a very fun three-dimensional look and feel!
Puff quilts trend on social media every couple years…probably because they look so fun and comfy! But puff quilts have actually been around for much, much longer than the internet. Quilters were making puff quilts back in the 1800s!
In fact, the puff quilt that inspired me was sewn up almost 30 years ago, in the 1990s…
My puff quilt inspiration

If you've been around for any amount of time, you might've seen my Puff Quilt that my grandmother made for me. I love this thing SO much. She used various scrap fabrics and clothing to create this very dense, yet very snuggly quilt..
💬 |
My Ombre Puff Quilt interview
|
.

Granny's gift
When I look at this quilt, I see something new each time. Recycled tablecloths from the 80s, pieces of my grandfather's button-down shirts, leftover fabrics from previous quilt projects…the list goes on. Some fabrics are used multiple times within the quilt, while other fabrics are only represented once. I love looking over all of the puffs and finding all of the similarities and differences between the squares.
.
.

.
My Granny made this for me when I was 7 years old. I absolutely LOVE that she created a tag for this quilt. I also love that she referred to the quilt as a "Puff Puff" quilt. I cherish knowing the details about this quilt, but also seeing her sweet handwriting is so special.
.

It blows my mind that it took her seven months to create this quilt. Yet, at the same time, it makes sense. She tediously hand-stitched every part of this. She was a patient, persistent woman. She selflessly loved her family so much that it overflowed into her craft. I am SO thankful that I have these heirlooms to remember her by. To now possess something that she labored over for so long...is really, really special.
Updating the classic puff quilt
This is what inspired me to make my very own puff quilt, but with a modern spin. Of course, that was easier said than done.
When I was thinking about how I wanted to make this quilt more "modern", I was kind of at a loss! These puff quilts were extremely popular several decades ago but I hadn’t really seen one that felt "modernized.” I quickly decided that modernizing the colors was the way to go!
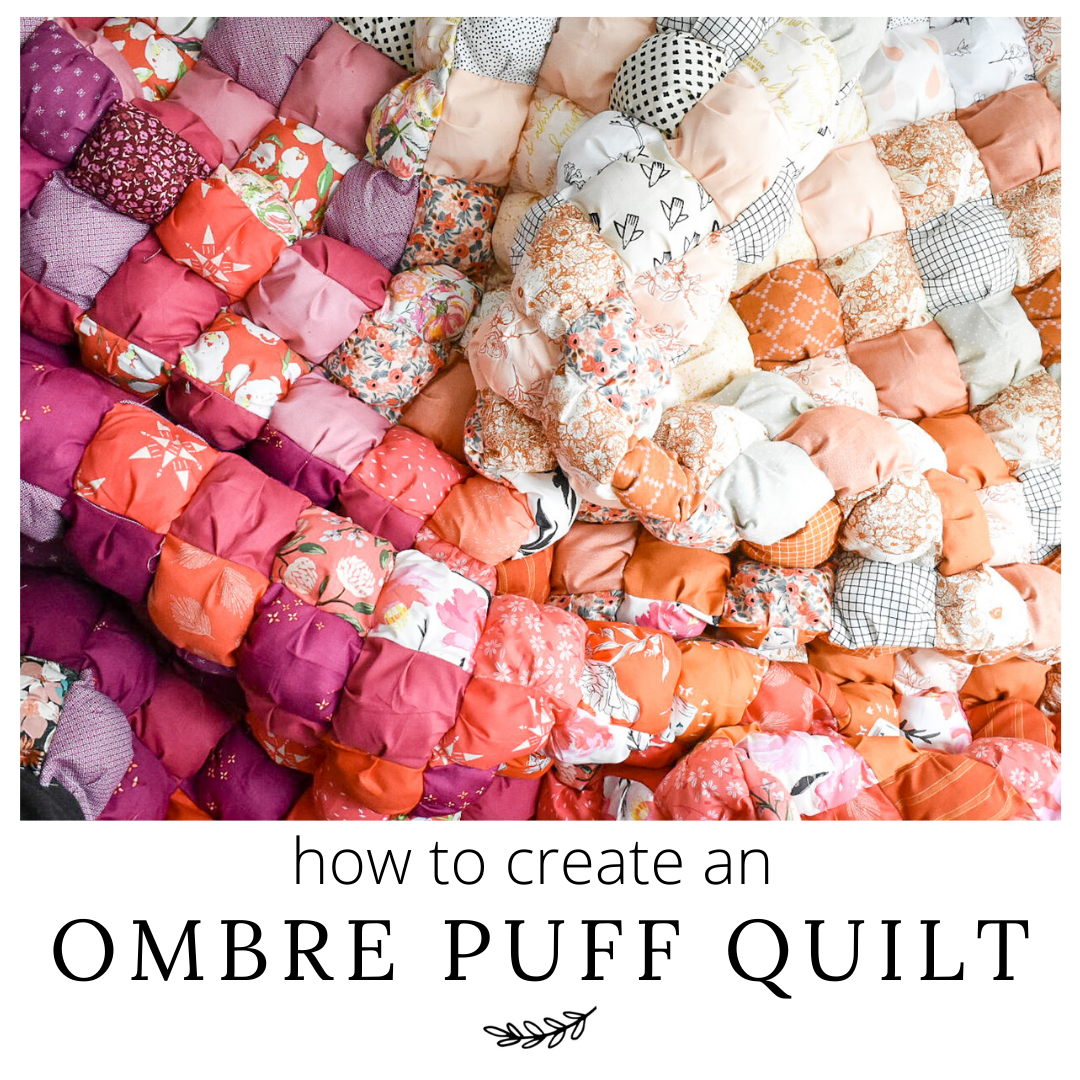
I chose to create a rich gradient of color throughout my quilt, using some of my favorite scrap modern fabrics...and boom. My Ombre Puff Quilt was born, and I wrote the Ombre Puff quilt pattern soon after.
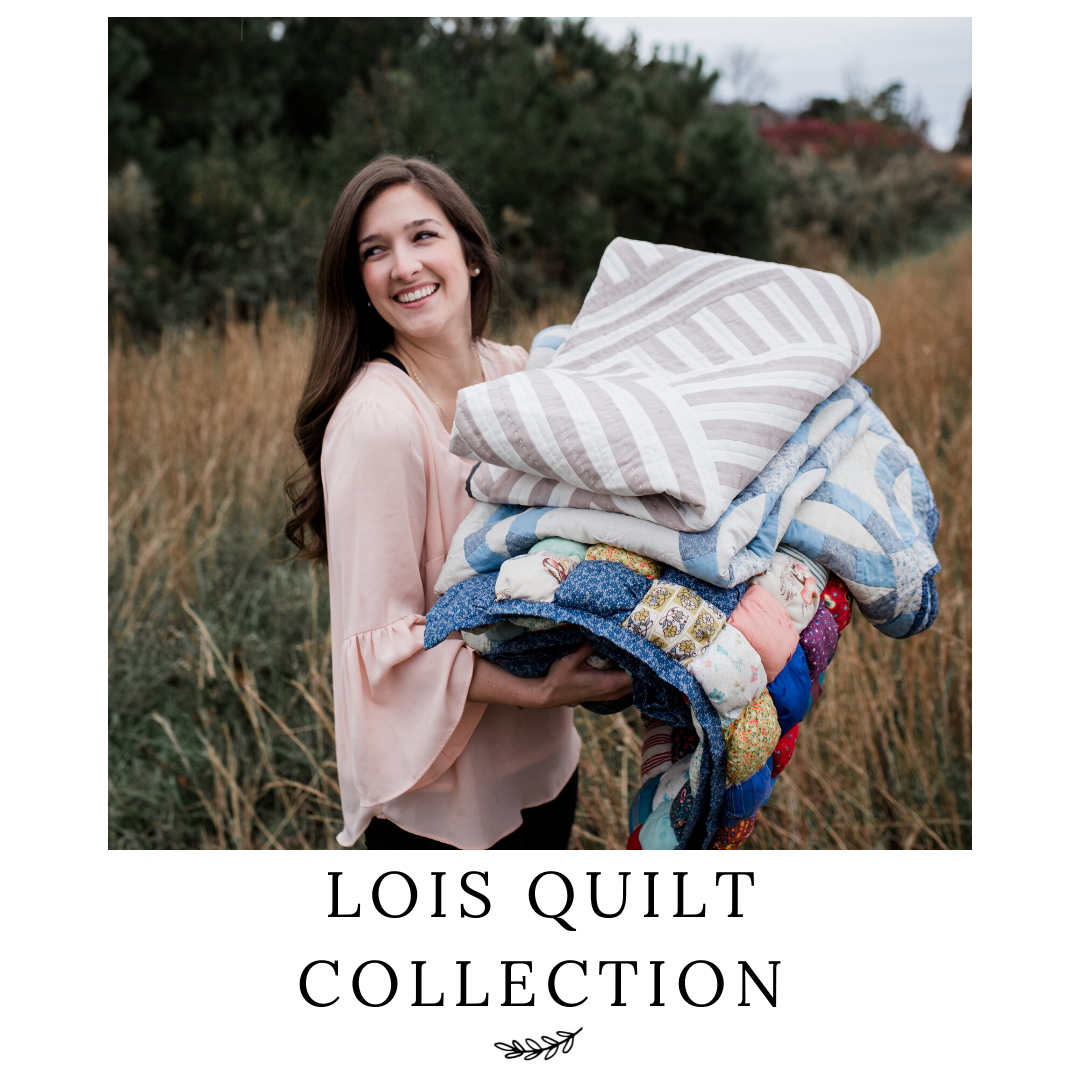
The Ombre Puff quilt pattern is the third quilt in the Lois Quilt Collection. The Lois Quilt Collection is a collection of my own quilt patterns inspired by the quilts that my grandmother made. I’m taking her quilts and adding my own modern ideas to them. Making these quilts and patterns is a way I can still collaborate with my grandmother, even though she has passed away. In a way, this has helped me cope with her loss by keeping her memory alive and well.
Ombre Puff quilt pattern

Or click here to download the Ombre Puff quilt pattern!
I designed this quilt pattern to work with scrap fabric. In fact, when I sewed my first puff quilt, I simply headed to my scrap fabrics and started creating combinations. If you love scrappy quilts, this is a perfect pattern for using your stash!
Since I only used my scrap stash, I had to retroactively calculate how many squares you can cut from a fat quarter and half yard. I’ve included those calculations in the pattern...so if you want to start fresh and use your latest, favorite fabric collection, you can do that too!
Because I was inspired by my grandmother’s quilt, I wanted to make the same size puff squares she did. I measured my grandmother's squares for this, and I got 3.5" finished for the puff squares. For each puff, you'll need one 4.5" square and one 4" scrap square. For my scrap squares, I used a various assortment of scrap white/neutral fabrics. These 4" square will be on the inside of your quilt, so it doesn't really matter what you use.
Ombre puff quilt supply list
📢 |
Fabric for your puff quilt
|
.
- Fabric for the top of the puffs (see fabric requirements in the quilt pattern).
- Scrap fabric for the back of the puffs (see fabric requirements in the quilt pattern); this can be any sort of scrap fabric you'd like. You won't see this fabric once your quilt is assembled.
- Fiber fill (see fabric requirements in the quilt pattern; I use PolyFil stuffing.
- Quilt batting - I love Quilter's Dream cotton batting. Since the PolyFil makes the quilt pretty heavy, I decided to use a lighter batting.
- Safety pins - I find curved safety pins make basting easier.
- Painters tape - Also for basting. I like using this 3" wide roll.
- Needle for quilting - Used for hand quilting and binding. I prefer embroidery needles.
- Thimble for hand quilting/ hand binding - I like leather thimbles the best the best.
- Hand quilting thread - I use DMC Pearl Cotton #8 for hand quilting and binding.
- Sewing machine - I sew with a Janome 6700P, but I have some other recommended sewing machines.
- Sewing machine needles - I recommend 90/14 needles (for sewing through many layers of fabric)
- Sewing machine thread - I use Aurifil 50-weight.
NOTE: The PolyFil requirement is merely an estimate. I made the Small Throw size, and I used a little less than 36 ounces. Since it appears that Polyfil bags are sold in increments of 12 ounces, I rounded up for each size. You might need more or less filling depending on how you stuff your puffs. This is the PolyFil that I used.
My Ombre Puff quilts
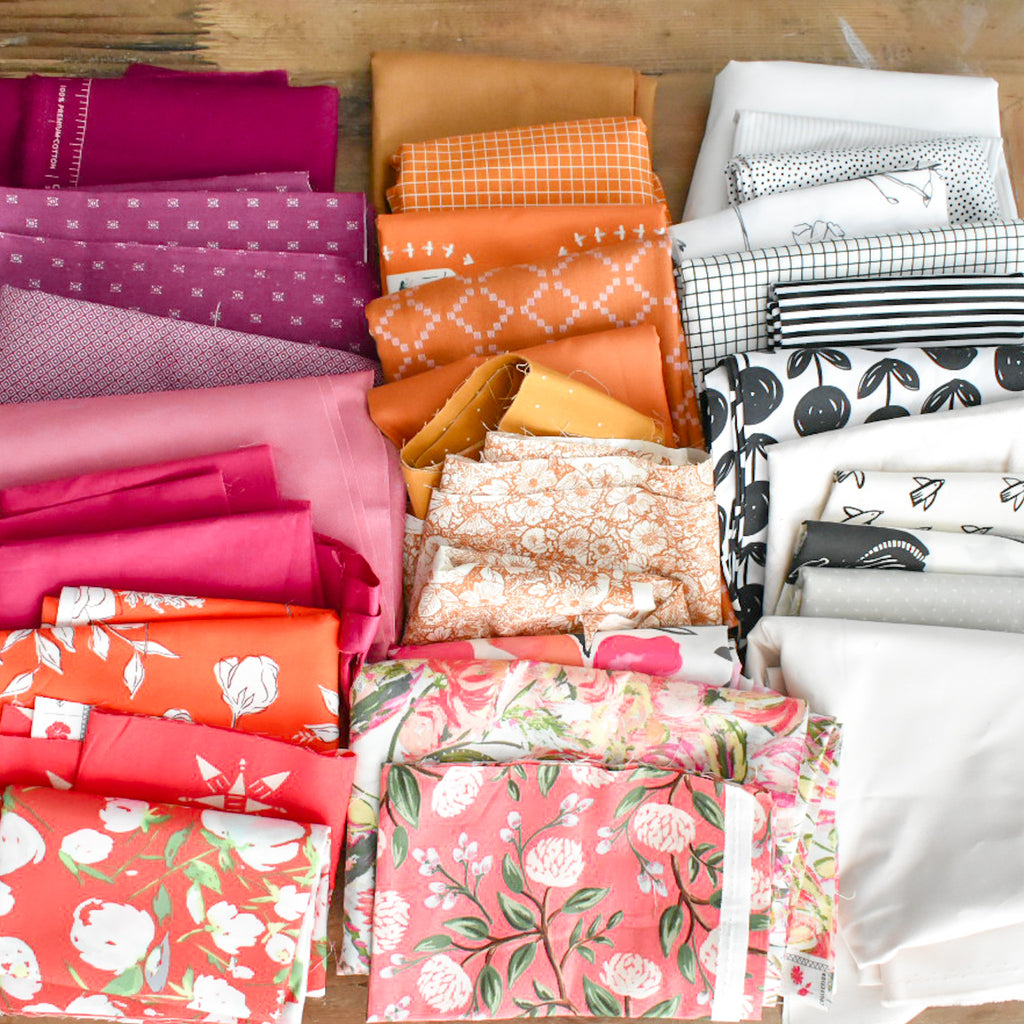
Like I mentioned, I shopped my scraps for my first puff quilt.
I tend to sew with very similar color families, so this was relatively easy for me. I have oodles and oodles of orange-y/ rust fabrics, so I knew that that'd be my starting point.
I decided to add in some eggplant purples and vibrant reds to brighten everything up. I loved adding some low volume scraps to the mix also. Overall, it's such a fun pull! If you want to know more about the fabrics I used, I list most of them in my Ombre Puff bundle blog post.
For my second puff quilt, I wanted to keep the colors a bit simpler, so I used a bunch of caramel and cream fabrics. They still created an ombre effect, but it’s a just a two-color gradient.
It’s been a while since I’ve made a puff quilt. (They’re definitely a labor of love!) I have some ideas for what I’d like to do. In the meantime, though, let’s talk about how you can make your own!.
How to make an Ombre Puff quilt (aka biscuit quilt)
Now that you’ve got the pattern, I’ll walk you though exactly how to make your puff quilt in six simple steps:
- Create your puffs.
- Sew your rows.
- Stuff your puffs.
- Baste your quilt sandwich.
- Quilt your puff sandwich.
- Bind your puff quilt.
Or, if you’re a video person, you can watch me make one in the video above!
💡 |
Get more guidance with the Ombre Puff Quilt-Along
|
Step 1: Create your puffs.
Once all your squares are cut, create the beginning stages of my puffs. Essentially, you'll sew the 4.5" square on top of the 4" scrap square. To do this:
- With the right side facing up, place the 4.5" square on top of the scrap 4" square. Align the top right two edges. Use a scant 1/4" seam (a seam that's just a smidge smaller than a regular 1/4" seam) and start sewing along the right edge.
- After a few stitches, take the bottom right corner of the top square and align it with the bottom right corner of the bottom square. Gather the fabric to the middle of the square and using two finger, pinch the fabric to create a pleat. Hold the pleat down as you sew over it.
- When you get about a 1/4" to the edge of the square, stop with your needle down, and pivot so that you'll sew down the perpendicular edge.
- Repeat Step 2 to create a pleat, and do the same for the third side.
- Leave the 4th side open. You will stuff the puff and close that up a little later.
❕ |
Extra tip
|
.

.

.

.

.

.

.

.

.

.
(Shout out to Peter for helping me with this step! He cranked out most of the puffs himself!)
.

.
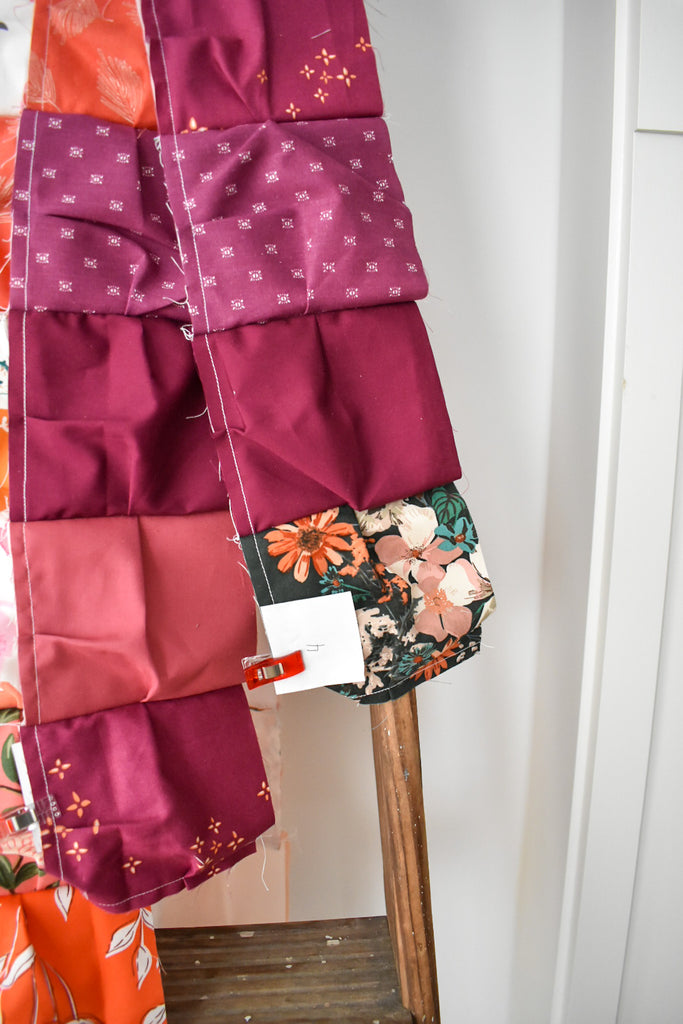
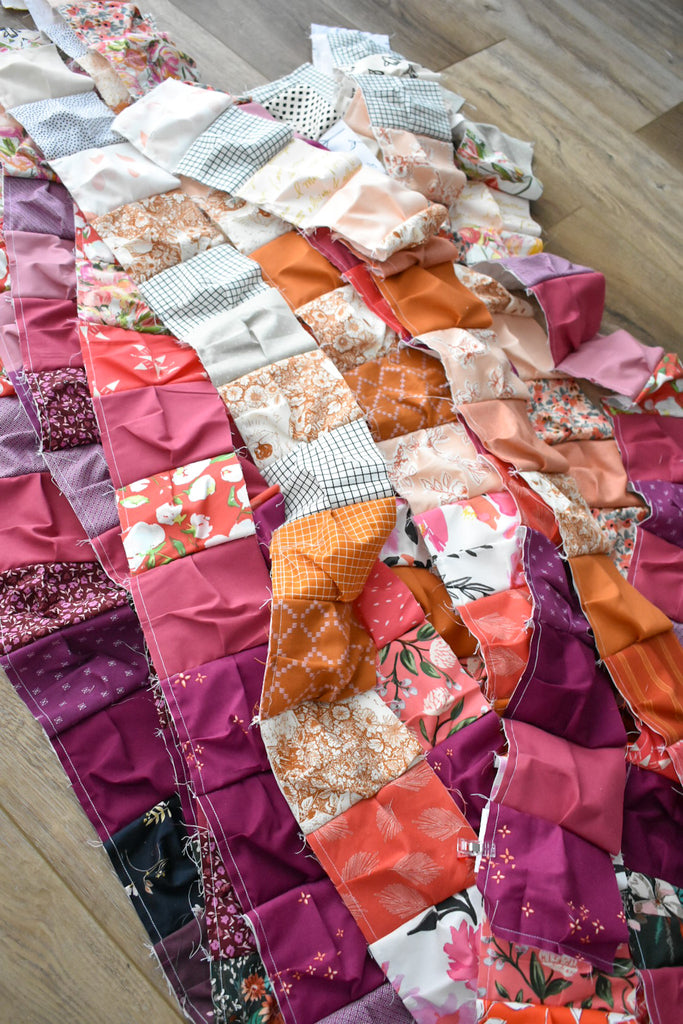
Step 2: Sew your rows.
Once all of your puffs are created, organize them into color families. Decide how you'd like the ombre gradient to fade across your quilt, and lay out your puffs accordingly. Once you're happy with the layout, organize and label the rows into piles.
Sew each row together using a regular 1/4" seam. This will ensure that you won't see the seams from the previous step. You'll want the open edge of the puffs to all be on the same side.
❕ |
Extra tip
|
..

.

.
.
.

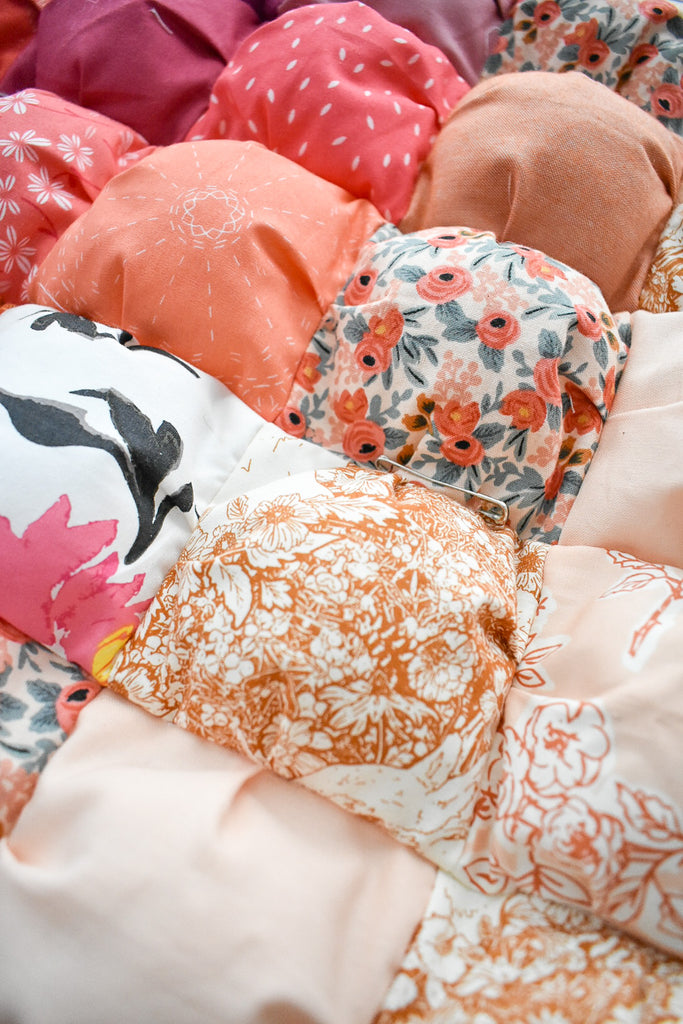
Step 3: Stuff your puffs.
Now it's time to stuff those puffs! Starting with your first row, take a hand full of batting and stuff the first puff. There's no right or wrong amount of batting, but I found that using less batting makes for an easier construction...and also a more plush and flexible quilt.
- Starting at the top of the row, and using a scant 1/4" seam, sew up the 4th edge of the first puff in the row. Remember to create a pleat.
- Continue to stuff and sew up the puffs.
- Once the first row is complete, use a regular 1/4" seam to sew the next row to it. Remember to sew the edge that is opposite of the open edges of the puffs.
- Repeat Steps 1-3 until all of your rows are assembled and your puffs are stuffed.
.

.

.

.

.

.
Baste your quilt sandwich
Now you've got a puff quilt top! Just like with any other quilt, we need to create a quilt sandwich using your puff top, quilt batting, and backing fabric.
- Piece together your backing, as necessary. Tape it face-down to a floor or flat surface.
- Place your batting on top of the backing. Smooth out the wrinkles.
- Place the quilt top on top of the batting.
- Using curved safety pins, pin your quilt sandwich (backing, batting, quilt top) together. Use about 1 pin for every 2 puffs. You'll want it to be nice and secure.
.
.
Step 5: Quilt your puff sandwich.
I decided to quilt my quilt exactly how my grandmother did, which was using ties. This was a first for me! I loveeeeee the handmade touch that this adds. Not to mention, the ties are pretty discrete. I used four different colors so that I could blend the ties accordingly.
- Thread your needle (but don't tie a knot at the end). Insert the needle through the back of the quilt so that it come up at the intersection of 4 puff squares.
- Create an "x" by stitching through the quilt a few times.
- End with the two thread tails on the back. Tie those tails together using a square knot. I like to tie 3 square knots.
- Repeat for each puff intersection. (You might be able to get away with less ties, but I wanted to make sure my quilt was extra secure).
💡 |
Improve your hand tie skills
|
.

.

.
Step 6: Bind your puff quilt
You can bind this quilt like you normally would...however, I wanted to replicate how my grandmother did the binding on her puff quilt. I was a little intimidated by this at first, but once I figured it out, it was super easy! She used her backing to fold onto the front of her quilt to create the binding. Here's what you'll do:
- Before you trim away the backing/ batting, stitch 1/4" around the perimeter of the quilt. Remember that your bobbin thread will show on the back of your quilt, so choose a thread that coordinates with your backing.
- Trim the backing/batting 1" from your quilt top.
- Then, trim the batting so that it aligns with your quilt top.
- Fold the backing fabric so that the raw edge aligns with the edge of the quilt top. Then, fold it again so that it covers the top stitches from Step 1.
- Machine stitch or hand stitch this fold down. You can find my hand binding tutorial here and my machine binding tutorial here.
- Mitered Corners: I cover mitered corners in my video tutorial for this quilt....they're at minute 10.
.

.

.

.

.

.

.

.

.

.

.

.

.

.
I love this quilt SO much. It gives the perfect amount of weight and snuggle and I hope that you love it too!
.

.

.

.

.

.

That's it...you've made a puff quilt!
Alternative puff quilt techniques
The puff quilt tutorial above explains exactly how I made my first Ombre Puff Quilt. But for my second, I decided to do things a little bit differently:
- I explored different fiber fill options, trying to find a more sustainable option.
- I quilted with machine tacking (aka clasp stitching) instead of hand ties.
- I used a traditional binding instead of Granny's fold-over method.
- I created an ombre binding from my fabric scraps.
You can find out more about these alternative techniques and get more details on my second puff quilt in this Ombre Puff blog post.

I still think the puff quilt tutorial above gives great results, so don't feel like you have to try any of these alternatives! But if you're wondering about doing something a little differently (I've gotten lots of questions about how to avoid hand ties!)...maybe these ideas will inspire you.
Conclusion: Share your puff quilt!
I would LOVE to see your Ombre Puff quilts! This pattern is so special to me, and it makes me so happy whenever I see someone make their own version. 🥰 Please tag me on social media and use the hashtags: #ombrepuffquilt , #loisquiltcollection and #loandbeholdpatterns
I can't wait to see what you create!
-Brittany

In case you missed it...
- Ombre Puff Quilt Pattern - free PDF download
- Ombre Puff Video Tutorial
- Ombre Puff Quilt Along materials
- Fabric bundles in the shop
This post may contain some affiliate links meaning I may receive a small commission from each sell. Rest assured, I only share my favorite items with you!