Petite Plaid Quilt Pattern: All the Details + the Cover Quilt

The Petite Plaid quilt pattern is out now! In this post, we're talking all about the pattern itself…and all about the autumn-inspired plaid cover quilt!
Behind the Petite Plaid pattern
First, let's start with a little backstory. Almost two years ago, in November 2024, I released the Upscale Plaid quilt pattern. I had so much fun designing the oversized plaid for that quilt. It took a lot of tweaking to find just the right scale and the perfect plaid positioning. I absolutely loved the oversized plaid design we landed on…and lots of you fell in love with it too! I’ve seen so many beautiful Upscale Plaid quilts in our community. I guess we’re all mad for plaid! 🤪

Well, it wasn’t long after releasing Upscale Plaid that I wondered about taking the plaid motif in the opposite direction. What if, instead of an oversized plaid pattern, I made a tiny plaid pattern? And so, Petite Plaid was born.
Of course, just like its sister pattern, Petite Plaid took tweak after tweak to find the right scale and the right number of strips for each block. It paid off, though! The final design is everything I wanted:
- a small repeating plaid…
- made with quick and rewarding construction methods…
- looks great as holiday decor…
- or as a cozy quilt for any time of the year!
Petite Plaid quilt pattern 101
Now that you know a little about how Petite Plaid came to be, let me break down some of my favorite features.
“PLAID” EFFECT
Petite Plaid’s standout feature is, of course, the plaid effect! With the right colors, your Petite Plaid quilt will look like the fabrics are woven together rather than just pieced strips.

It’s the same effect you’ve seen with Upscale Plaid, but many times over! An unfinished Petite Plaid block comes in at 13” x 13”. To give you an idea of what to expect, the throw size uses 25 quilt blocks…meaning your plaid pattern repeats 25 times in one quilt.
That means you really need to get the plaid effect right…and just like with Upscale Plaid, choosing the right colors is key. You need to pick fabrics that help create the woven illusion. Otherwise, you’ll end up with a perfectly nice quilt block…but it won’t look like plaid!
To make things easier for you, we’ve created a guide to choosing colors for Petite Plaid. I’ve had much fun dreaming up color palettes for our Petite Plaid samples, and I’ll think you’ll have fun too once you have the hang of it! (Or you can always skip the pull and use one of our curated quilt kits.)

By the way, Petite Plaid is a perfect quilt pattern for solid, lightly textured or small scale fabrics. The piecing does all the design work and creates tons of visual interest, so basic solids still pack a visual punch!
QUILT SIZES
In the Upscale Plaid quilt pattern, the plaid motif scales up or down with the quilt size. But in the Petite Plaid quilt pattern, the plaid motif stays the same across all sizes…there’s just more of it. Larger quilt sizes have more plaid repeats, while small sizes have fewer.
Sizing is another thing I love about the pattern. Petite Plaid has…(wait for it)...12 sizes! That’s the most of any Lo & Behold Stitchery quilt pattern by far (we keep saying that, don't we? 🤪 ). (Ruby Sue and Knitted Blooms tied for the previous record, with 9 sizes each.)

The Petite Plaid pattern includes instructions for these quilt sizes:
- Pillow (13” square)
- Wall Hanging (13” x 25.5”)
- Baby (38" square)
- Lap (50.5" square
- Table Runner (25.5" x 100.5")
- Small Throw (50.5" x 63")
- Throw (63" square)
- Large Throw (63" x 75.5")
- Twin (75.5" x 88")
- Full (88" x 100.5")
- Queen (100.5" square)
- King (113" square)
One quick note: The Lap and Table Runner sizes use the same number of blocks, but the pattern tells you how to arrange those blocks for each project.
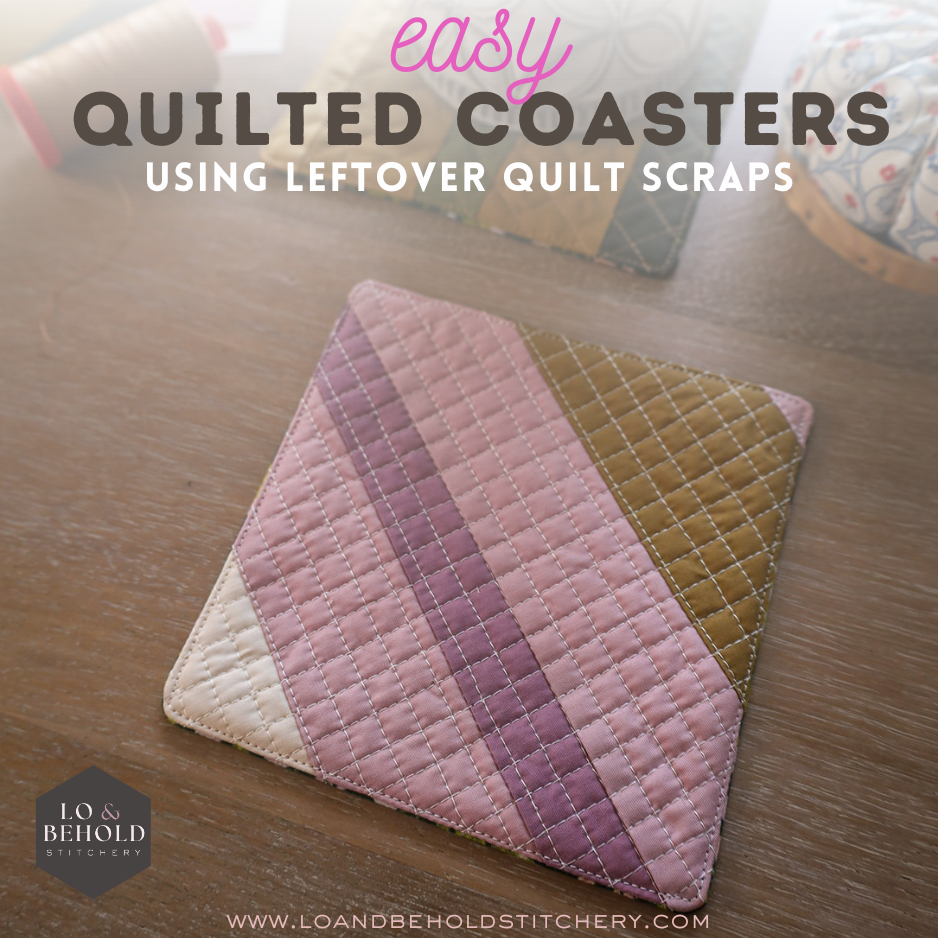
And have you heard about the bonus coaster tutorial? My newest coaster design uses leftovers from Petite Plaid’s construction to make the cutest little coaster. And speaking of construction…
CONSTRUCTION TECHNIQUES
I really wanted Petite Plaid to be an enjoyable project. I love tiny piecing, but I know it can get tedious! So even after I’d nailed the design I wanted, we spent a long time thinking about how to best construct the blocks.
This is where you’ll see some of the biggest differences between Upscale Plaid and Petite Plaid. With Upscale Plaid, not everything could be strip pieced due to the construction methods…and not all the seams could nest either. Petite Plaid has smaller pieces and more seams, though, so I knew Petite Plaid had to be more than just a shrunken down Petite Plaid. In fact, it became my personal challenge to make strip piecing and nesting seams work.


It took some time, but we cracked the code. 🤓 Petite Plaid uses strip piecing and nesting seams throughout, and it makes for such a satisfying sew.


Because of the strip piecing, Petite Plaid comes together much faster than you’d expect. Don’t get me wrong, Petite Plaid isn’t one of our fastest patterns…but the blocks look much more complicated than they actually are.

And speaking of complicated…Petite Plaid has a lot of seam intersections, and to make the plaid effect work, you really need all those seams to match up. Nesting seams make it so easy to get perfect seam alignment throughout your quilt. Again, the result is that Petite Plaid is easier than it looks!
Then once all of your strips are cut apart into rows, it is such a great pattern for chain piecing. I caught up on a few podcasts while I made this quilt.

DIFFICULTY LEVEL
We’ve rated Petite Plaid as an Intermediate difficulty pattern. Yes, it’s simpler than it looks, but Petite Plaid does have lots of small pieces and it requires some precision and consistency.
The pattern instructions should help a lot with that precision! And we’ve included some overage on the strips sets, which gives you room to square things up as you sub-cut.
In other words, Petite Plaid isn’t super challenging, but will go more smoothly if you have a handful of quilts under your belt already.
We also require a scant 1/4" for this block. Anytime a block has lots of seams and especially if we are pressing seams to one side (versus open), it's always a good idea to test your block and tweak your seam allowance as needed. The nice thing about this pattern, even though you need a scant 1/4" seam allowance, consistency is the most important factor. If you're curious about this conversation, I have an entire deep dive blog post about it. Click over to read it here.
FABRIC REQUIREMENTS
I hope this brief tour of Petite Plaid has you excited to make your own! Here’s a look at the fabric requirements:

Petite Plaid - The Cover Quilt
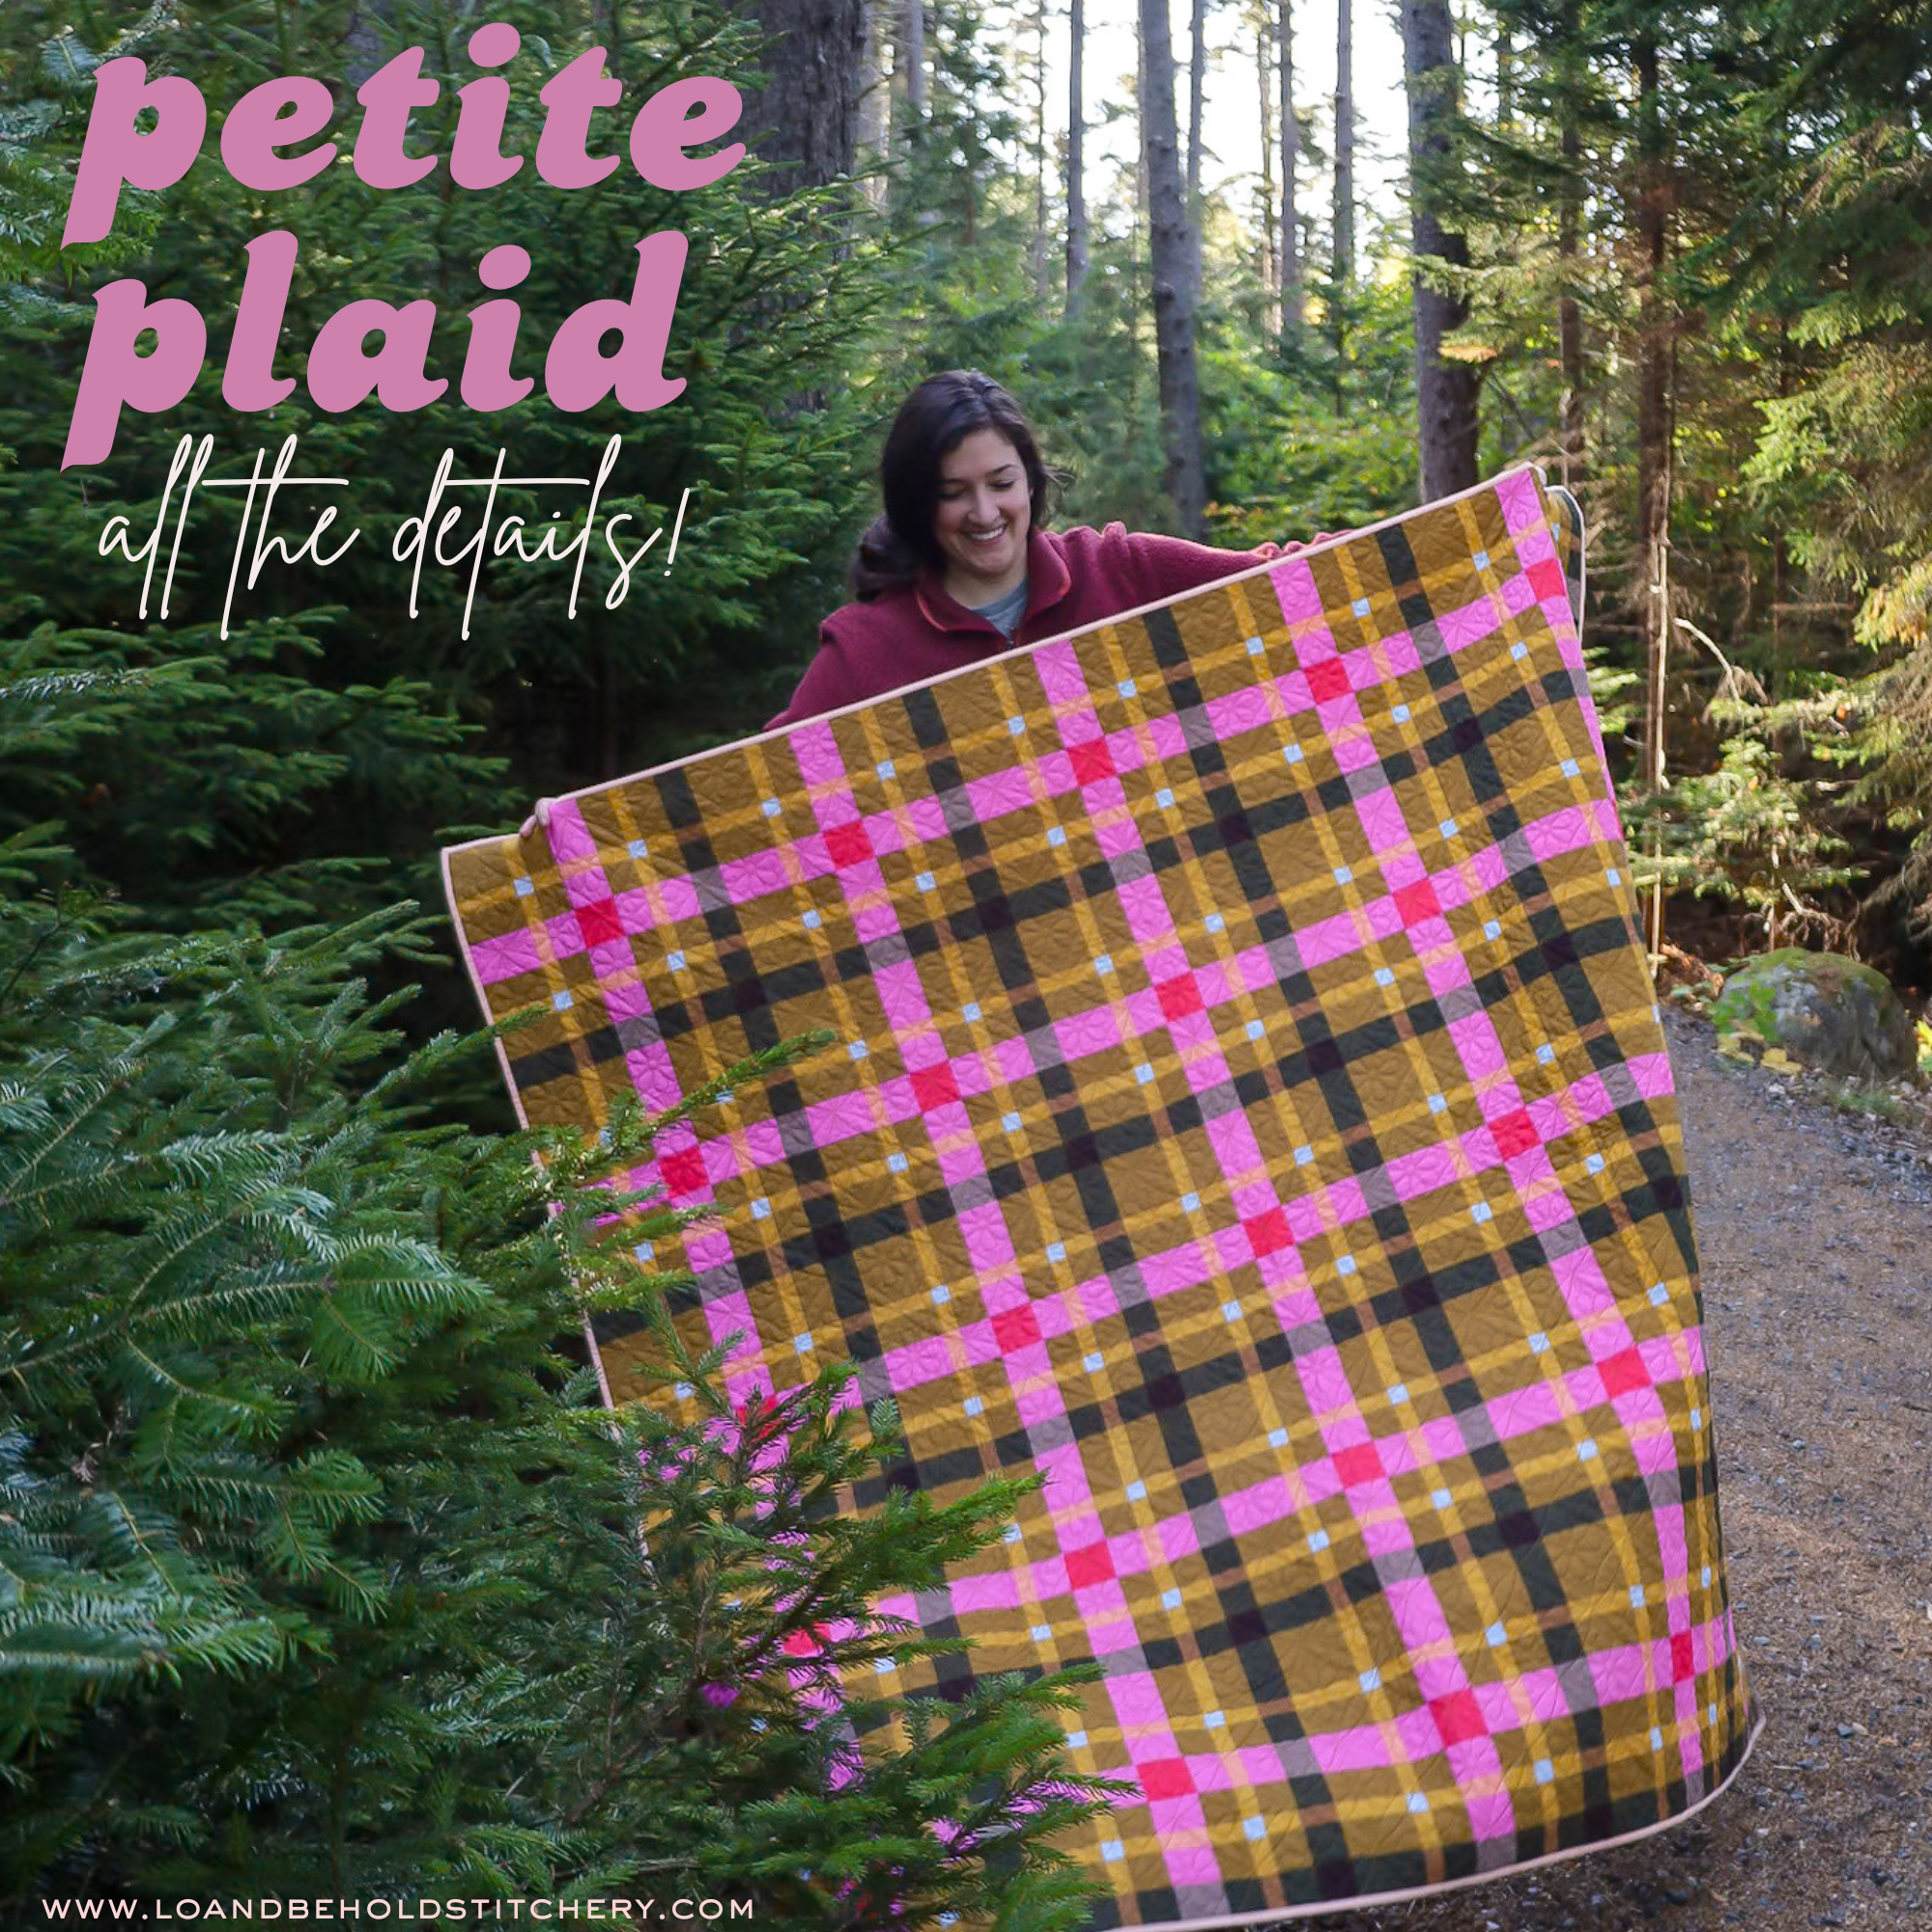
Now that you know a bit about the Petite Plaid pattern, I want to introduce you to the cover quilt! I’ve shared some glimpses over the last few weeks, and I’m so excited to tell you more…because I am absolutely smitten with this quilt!
FABRICS
I made the cover quilt in the throw size, which finishes at 63” square. All sizes of Petite Plaid use the same number of colors, just in different quantities, so I had to pull 10 colors for my quilt top.


We released the Upscale Plaid pattern right before Christmas two years ago, and I decided to go all-in with holiday hues for that cover quilt. For Petite Plaid, I wanted to lean into the season too…but this time, we’re right in the middle of fall, so I got to play around with autumnal plaid!


I began by experimenting with various dark-but-warm neutrals. I loved that direction, but it felt like it was missing something. It was too much generic fall, not enough Lo & Behold…if you know what I mean.
I decided to try adding some classic Lo & Behold colors, like hot pink and light blue…and I instantly fell in love!
For my final pull, I used all PURE Solids from Art Gallery Fabrics. I used Golden Bronze as the background (and the foundation for that moody autumn vibe, which I also used as the background in this Golden Retro Blossoms quilt). Then I anchored my palette with
- Honey (A1)
- Rock Candy (B1)
- Forest Night (C1)
Once I’d picked those, I just had to create the plaid effect by imagining my colors would intersect. I went with these colors:
- Grapefruit (A3)
- Flamingo (B2)
- Nutmeg (B3)
- Caviar (C2)
- English Toffee (C3)
For my A2 color, I decided to add a little contrast by using Forget-Me-Not. With just the one contrasting color, the plaid effect still works…but I love the extra interest it adds!

I really like how all the colors work together in the finished quilt. The vibrant pink and blue fabrics mix with the darker, more earthy tones to create something that feels both moody and bright at the same time. In fact, as I was piecing the cover quilt, I kept thinking, “I would totally wear this as a flannel!” It gives that perfect fall flannel vibe that isn't too drab or predictable. It feels bright and modern with lots of deep moody neutrals. So of course we have quilt kits for this version in the shop.


The quilt top came together just as smoothly as I’d hoped, thanks to the strip piecing and nesting seams. I did use a smaller stitch length when I was strip piecing (and I suggest you do the same!). You have to cut through seams to assemble your blocks, and the smaller stitch helps to prevent unravelling.
I also stitched ⅛” around the perimeter of my quilt top once I had everything assembled, just to make sure it wouldn’t unravel at all during the quilting process. Then it was ready for longarm quilting!


BACKING, QUILTING, AND BINDING
I sent the Petite Plaid Cover Quilt to Blue Ridge Quilt Co. for quilting, and Megan used the Irish Wedding Ring panto (by Karlee Porter). The curved lines of the quilting add such a nice contrast to the orderly plaid, but the panto’s repeat and scale keep it feeling like a good fit with the quilt pattern.


For the backing on my cover quilt, I decided on Fair Peonies Traced from AGF’s Decadence collection. I wanted something organic yet simple to contrast with the order and complexity of the quilt top…and the line colors go really well with the autumnal colors of the top!

I used another PURE Solid for the binding: AGF Peach Sherbet. This peachy hue sort of bridges the gap between the golds and pinks of the quilt top. It helps the whole palette look more cohesive, without drawing any attention to itself.

The finished product is my perfect autumn quilt: earthy, warm, and moody…with some bright surprises!


Peter and I left for our Northeast road trip right after I got this quilt finished, so of course we had to take it with us! I got some photos in Acadia, and I loved how the cover quilt’s colors looked with the evergreens and fall foliage.

Make your own Petite Plaid Quilt
I already have several more Petite Plaid projects in mind…and I hope this blog post has inspired some ideas of your own! I’m really looking forward to seeing what you make with the pattern.
Keep in mind that Petite Plaid does require more accuracy in cutting and sewing than some of our other patterns…which is why we’ve rounded up some blog posts that might help! They’re full of tips and tricks that can come in handy with Petite Plaid:
And one more tip for you: Pay close attention when you’re cutting your strips. The strip widths vary, but they can look pretty similar at a glance! Make sure you keep everything organized so your blocks turn out correctly.

QUILT KITS
We have five Petite Plaid quilt kits in the shop…and this time, we’re offering them in some different sizes:
- Cover Quilt (throw)
- Nutmeg version (lap or table runner)
- Spiceberry (lap or table runner)
- Sugar Plum (small throw)
-
Wintergreen (large throw)
The following online shops also have kits!
- Piece Fabric Co. (Canada)
- Sew Curated (Canada)
- Olive & Elle Quilt Co.
- Going Coastal Fabrics
- Sojofabric
- Floyd the Fox (Denmark)
As usual, you can choose to add backing and binding to any of the quilt kits.

DESIGN YOUR OWN
I’d love to see the colors you come up with! As I mentioned earlier, Petite Plaid really depends on your color choices…so make sure you check out our guide to choosing colors for Petite Plaid!
Once you’ve read that, you can go color Petite Plaid on PreQuilt.
I can’t wait to see what you come up with. Petite Plaid is such a fun project to sew, and the finished quilt makes a big impression. Whether you use a kit or pull your own fabric, Petite Plaid is perfect for decorating your home, gifting, or just snuggling under the ultimate cozy design.


Happy quilting!
In case you missed it…
- Petite Plaid PDF pattern
- Petite Plaid paper pattern
- Petite Plaid Cover Quilt Kit
- Choosing colors for Petite Plaid


