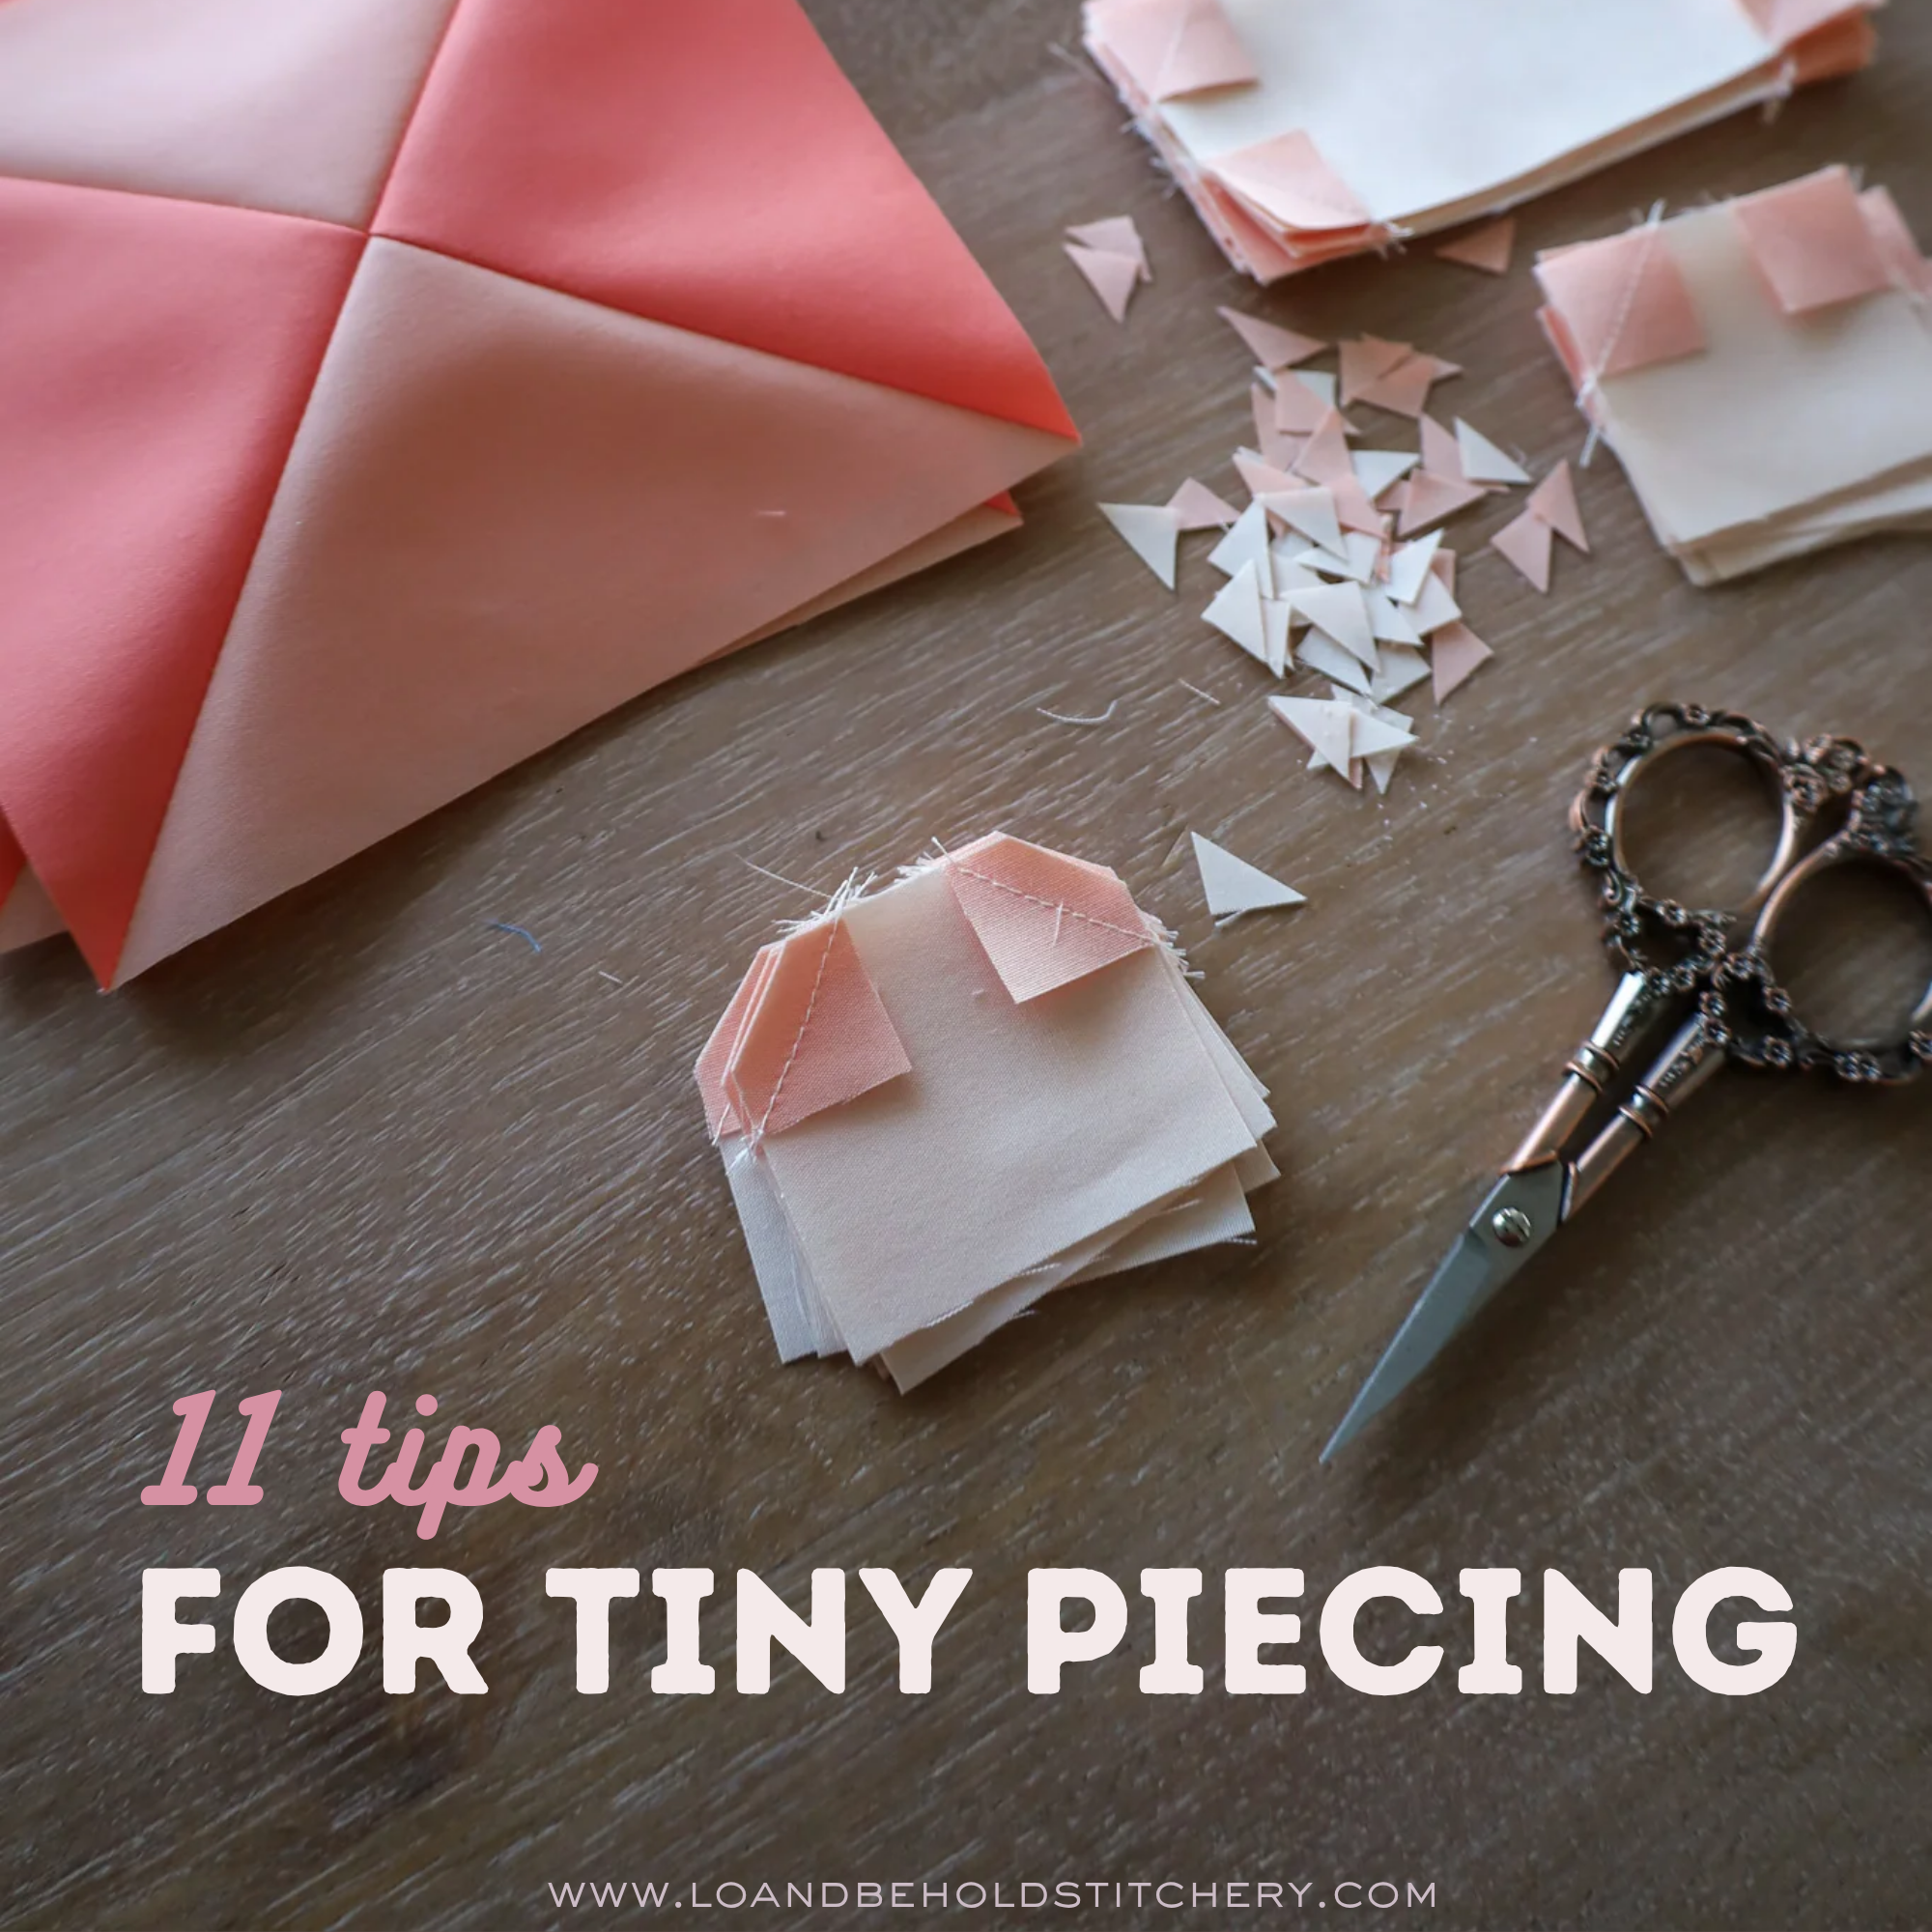
11 Tips for Tiny Piecing - How to Work with Small Pieces in a Quilt Pattern
If you’ve been following Lo & Behold Stitchery for a while, you may have noticed…I really enjoy using small little pieces in my quilts! I like how they let me make more intricate designs with a lot of interesting details. Plus, they’re just fun to sew!
Quilting with small pieces does take some extra skill and care, though…which is why I’m sharing my best tips for tiny piecing!
TABLE OF CONTENTS
- Why small piecing
- My top tips for tiny piecing
- Quilt patterns with small pieces
- You may also like…
- FAQ
Why small piecing?
Well, good question. When it comes to design, I love the look of more intricate, small pieces in my quilts. There's something about it that pulls you in and invites you to linger a little longer when you're looking at the design. And I love that about smaller pieces: it allows a level of detail that is SO interesting to me, more so than a quilt with larger pieces.
When I write my patterns, I spend a lot of time thinking about the smartest (and fastest and most accurate) way to construct the design. I like to use strip piecing whenever I can, for example, which gives you the look of tiny piecing…but without painstakingly sewing one tiny piece to another.
Sometimes, though there’s no way around it…you’ve just got to cut and sew a tiny square!

And while techniques like foundation paper piecing (FPP) and English paper piecing (EPP) can make it easier to work with small pieces of fabric, all the patterns in the Lo & Behold Stitchery pattern library are traditionally pieced (so far).
That means you don’t have to learn any special skills to make them…and it also means that cutting and piecing those small little units can get pretty fiddly sometimes. In fact, tiny piecing is one of the skills that can bump up a pattern up from advanced beginner to intermediate level. Precision matters a lot more with little pieces. They’re way less forgiving than long strips or big squares!
Don’t let that discourage you, though. Anyone can learn to sew with fiddly little pieces…especially if you use my tips!

My top tips for tiny piecing
1. PREP YOUR FABRIC.

I also recommend using starch or a starch alternative before you start cutting. Starch will help prevent any fraying…which is good, because you can’t afford to lose any fabric to fraying when you’ve already got a tiny piece to begin with! Starch also gives your fabric a stiffness that can be super helpful when you are cutting and sewing. I didn't always use starch but it's now one of my favorite sewing tools!
I know it's always exciting to start a new project and jump into cutting and piecing, but trust me when I say a little prep work will make a difference in your accuracy (and hopefully your frustration level!).
2. CUT CAREFULLY.
After you’ve pressed and starched your fabric, you can grab your rotary cutter and ruler…and start cutting!
Cutting small pieces is a lot like cutting big pieces…but like we talked about in the last step, you need to take care to be extra accurate. You can’t afford to cut too big or too small when you’re working with tiny little pieces! Take it slow, and really pay attention to the alignment of your ruler as you measure and cut.

Another tip that can help with cutting accuracy is using the lines on your ruler to cover your fabric piece, rather than using the lines on a cutting mat. Your cutting mat is self-healing, meaning that the lines can slowly shift over time making the measurements no longer accurate. But even with a newer cutting mat, it can be difficult to get an accurate cut while using the lines on your cutting mat. I've found that using the lines on your ruler to measure this is a GAME CHANGER (not even an exaggeration) when it comes to cutting pieces accurately.
You don’t just need to be careful for the sake of your fabric…cutting small pieces can also be more dangerous for your fingers! My post about safety tips for quilters has some great ideas that will protect your hands during even the tiniest cuts.
3. LABEL EVERYTHING.
Did you know that our newer Lo & Behold Stitchery quilt patterns include a project planner and fabric labels? These can help you stay organized with any project…but they’re even more helpful when you’ve got small pieces to keep track of!

Trust me, it’s (sadly!) easier than you think to mix up your 1.75” square pieces with offcut scraps left from cutting long strips. Keep everything in neat, labelled piles, though, and you won’t have that problem.

Even better…
4. KEEP PIECES CONTAINED.
Small pieces are so much easier to lose track of than big cuts or long WOF strips…especially if you have to move your project around (like to a quilt retreat or a sew-in) or if you have pets or small children in your sewing room.
Do yourself a favor, and keep your small pieces contained between sewing sessions! A sandwich-sized ziploc bag works great for most small cuts, or use a reusable food storage container for an even more sustainable option.
Once it’s time to start sewing, a small quilting design board can keep things organized on your table and stop those little pieces from blowing away.
5. USE PINS…OR GLUE.
I’m not super big on pinning generally, but I’ve found that pinning really helps with tiny pieces! Those little pieces are way more likely to shift while they go under your presser foot, and pinning can keep them in place. That will help you sew a more accurate seam…and get better results overall. (Just make sure you don’t sew over your pins. You don’t want one to break off and hurt you!)

For even more security, try a washable glue. I recommend using a sewing-specific glue stick (because they’re a little more narrow, which is better for small pieces of fabric), but any washable glue stick or liquid glue will do. Gluing takes a little more time than pinning, but it keeps your pieces exactly where you want them.
All you have to do is apply a little glue to your piece, stick it to the piece it needs to be sewn to, and let it dry for a minute or two. Pay attention to where you put the glue, though…like if you’re snowballing corners, don’t glue down the half you need to flip and press!
6. SWAP YOUR NEEDLE AND PLATE.
Once you head over to your machine, take a minute to make sure it’s ready for your fun-sized pieces.
Now is a great time to swap out your needle to make sure it’s extra sharp. (I like Microtex needles like these.) A sharper needle will do better at sewing through your fabric instead of pushing it down into your needle plate.
Speaking of your needle plate, it can also help to switch to a straight stitch plate if you have one (instead of the zig zag plate most of us keep on our machines). A straight stitch needle plate has a smaller hole for your needle, which means better support for your fabric…especially those small pieces. If you’ve ever struggled with fabric getting dragged down into your machine, it’s definitely worth getting a straight stitch plate for your tiny piecing!

7. ADJUST YOUR SEAM ALLOWANCE.
You’re ready to start sewing now, but don’t grab the good fabric just yet. First get some test pieces, and take a few minutes to test and adjust your scant ¼” seam.
Again, this is one of those things that may not matter so much if you’re making a simple quilt with larger cuts (like my free Patchwork Squares quilt pattern)...but when you’ve got little pieces, you probably have more seams in each block. And suddenly a slightly too big or slightly too small seam allowance can really add up (as you can see in the picture below).

Even if you’ve perfected a scant ¼” seam on previous projects, test it again! Different fabrics and threads can behave surprisingly differently; and different sewing techniques can render different results…so your scant ¼” seam settings on one quilt might be different from your scant ¼’ seam settings on another quilt.
Take the time to get your seam right, and you’ll end up with much more precise results…even with small, fiddly pieces!
8. CHAIN PIECE (OR USE LEADERS AND ENDERS).
In my experience, sewing tiny pieces is easier when you chain piece your units, as the pieces give each other a little more support, helping things go smoothly and not get pushed down below the needle plate or bird-nest. (Plus, chain piecing is usually faster, and it saves thread!) I’ve also found that chain piecing makes it easier to keep my accurate seam allowance on those small pieces, because I’m more or less keeping the same seam going.
Just grab your stack of pieces, put on some music, and sew one unit right after another, leaving your threads uncut between pieces.

When you start your chain (or if you only have one or two units to sew), grab a piece of scrap fabric, and sew over that first as a leader. Then just keep going with the rest of your chain. Then at the end of your chain, you can finish things off by using scrap fabric as an ender. You’ll get all the perks of chain piecing, and you’ll use up a little scrap fabric while you’re at it.

9. USE A STILETTO.
You know how we’re always making small adjustments to our fabric while we sew? With tiny fabric pieces, that gets a little trickier. Little pieces don’t have much area to grip onto…and even if you can get your fingers on them, you’re going to be scarily close to the needle! So when I’ve got small pieces on my sewing table, I also like to keep a sewing stiletto handy.
You don’t need anything fancy…just something long and thin to use instead of your fingers! (I’ve used tweezers and chopsticks in the past, but lately I’ve been enjoying That Purple Thang.)

A sewing stiletto will make it easier to adjust those tiny pieces…and it will make it safer too! You can keep your fingers at a nice, safe distance, while still having plenty of control over your fabric.
10. GO SLOWLY.
As you sew those small pieces, take it easy! Slowing down will help a ton with accuracy…and as we’ve talked about, accuracy matters a lot more as your pieces get smaller.
So take your time, really focus on getting your seam allowance right, and enjoy the challenge!

Just don’t enjoy the challenge for too long before you…
11. TAKE BREAKS.
Working with tiny pieces (whether you’re pinning, sewing, or pressing) can really stress your hands, so build plenty of break-time in your project.
If you can, it’s even better to split your tiny piecing up over several different sewing sessions. But most of us like to get in the zone when we sew, which means you need to plan for breaks instead.
If you’re not the kind of person who will naturally take breaks, go ahead and set yourself a timer, and then do a few minutes of gentle hand stretches when the timer goes off. Sure, you’ll lose a few minutes here and there…but your hands (and Nurse Brittany!) will thank you. And if that’s not enough motivation, remember this: It’s easier to get an accurate seam allowance and good seam pressing when your hands aren’t cramping up on you.
Before you know it, you’ll have turned those tiny pieces into a beautiful quilt!

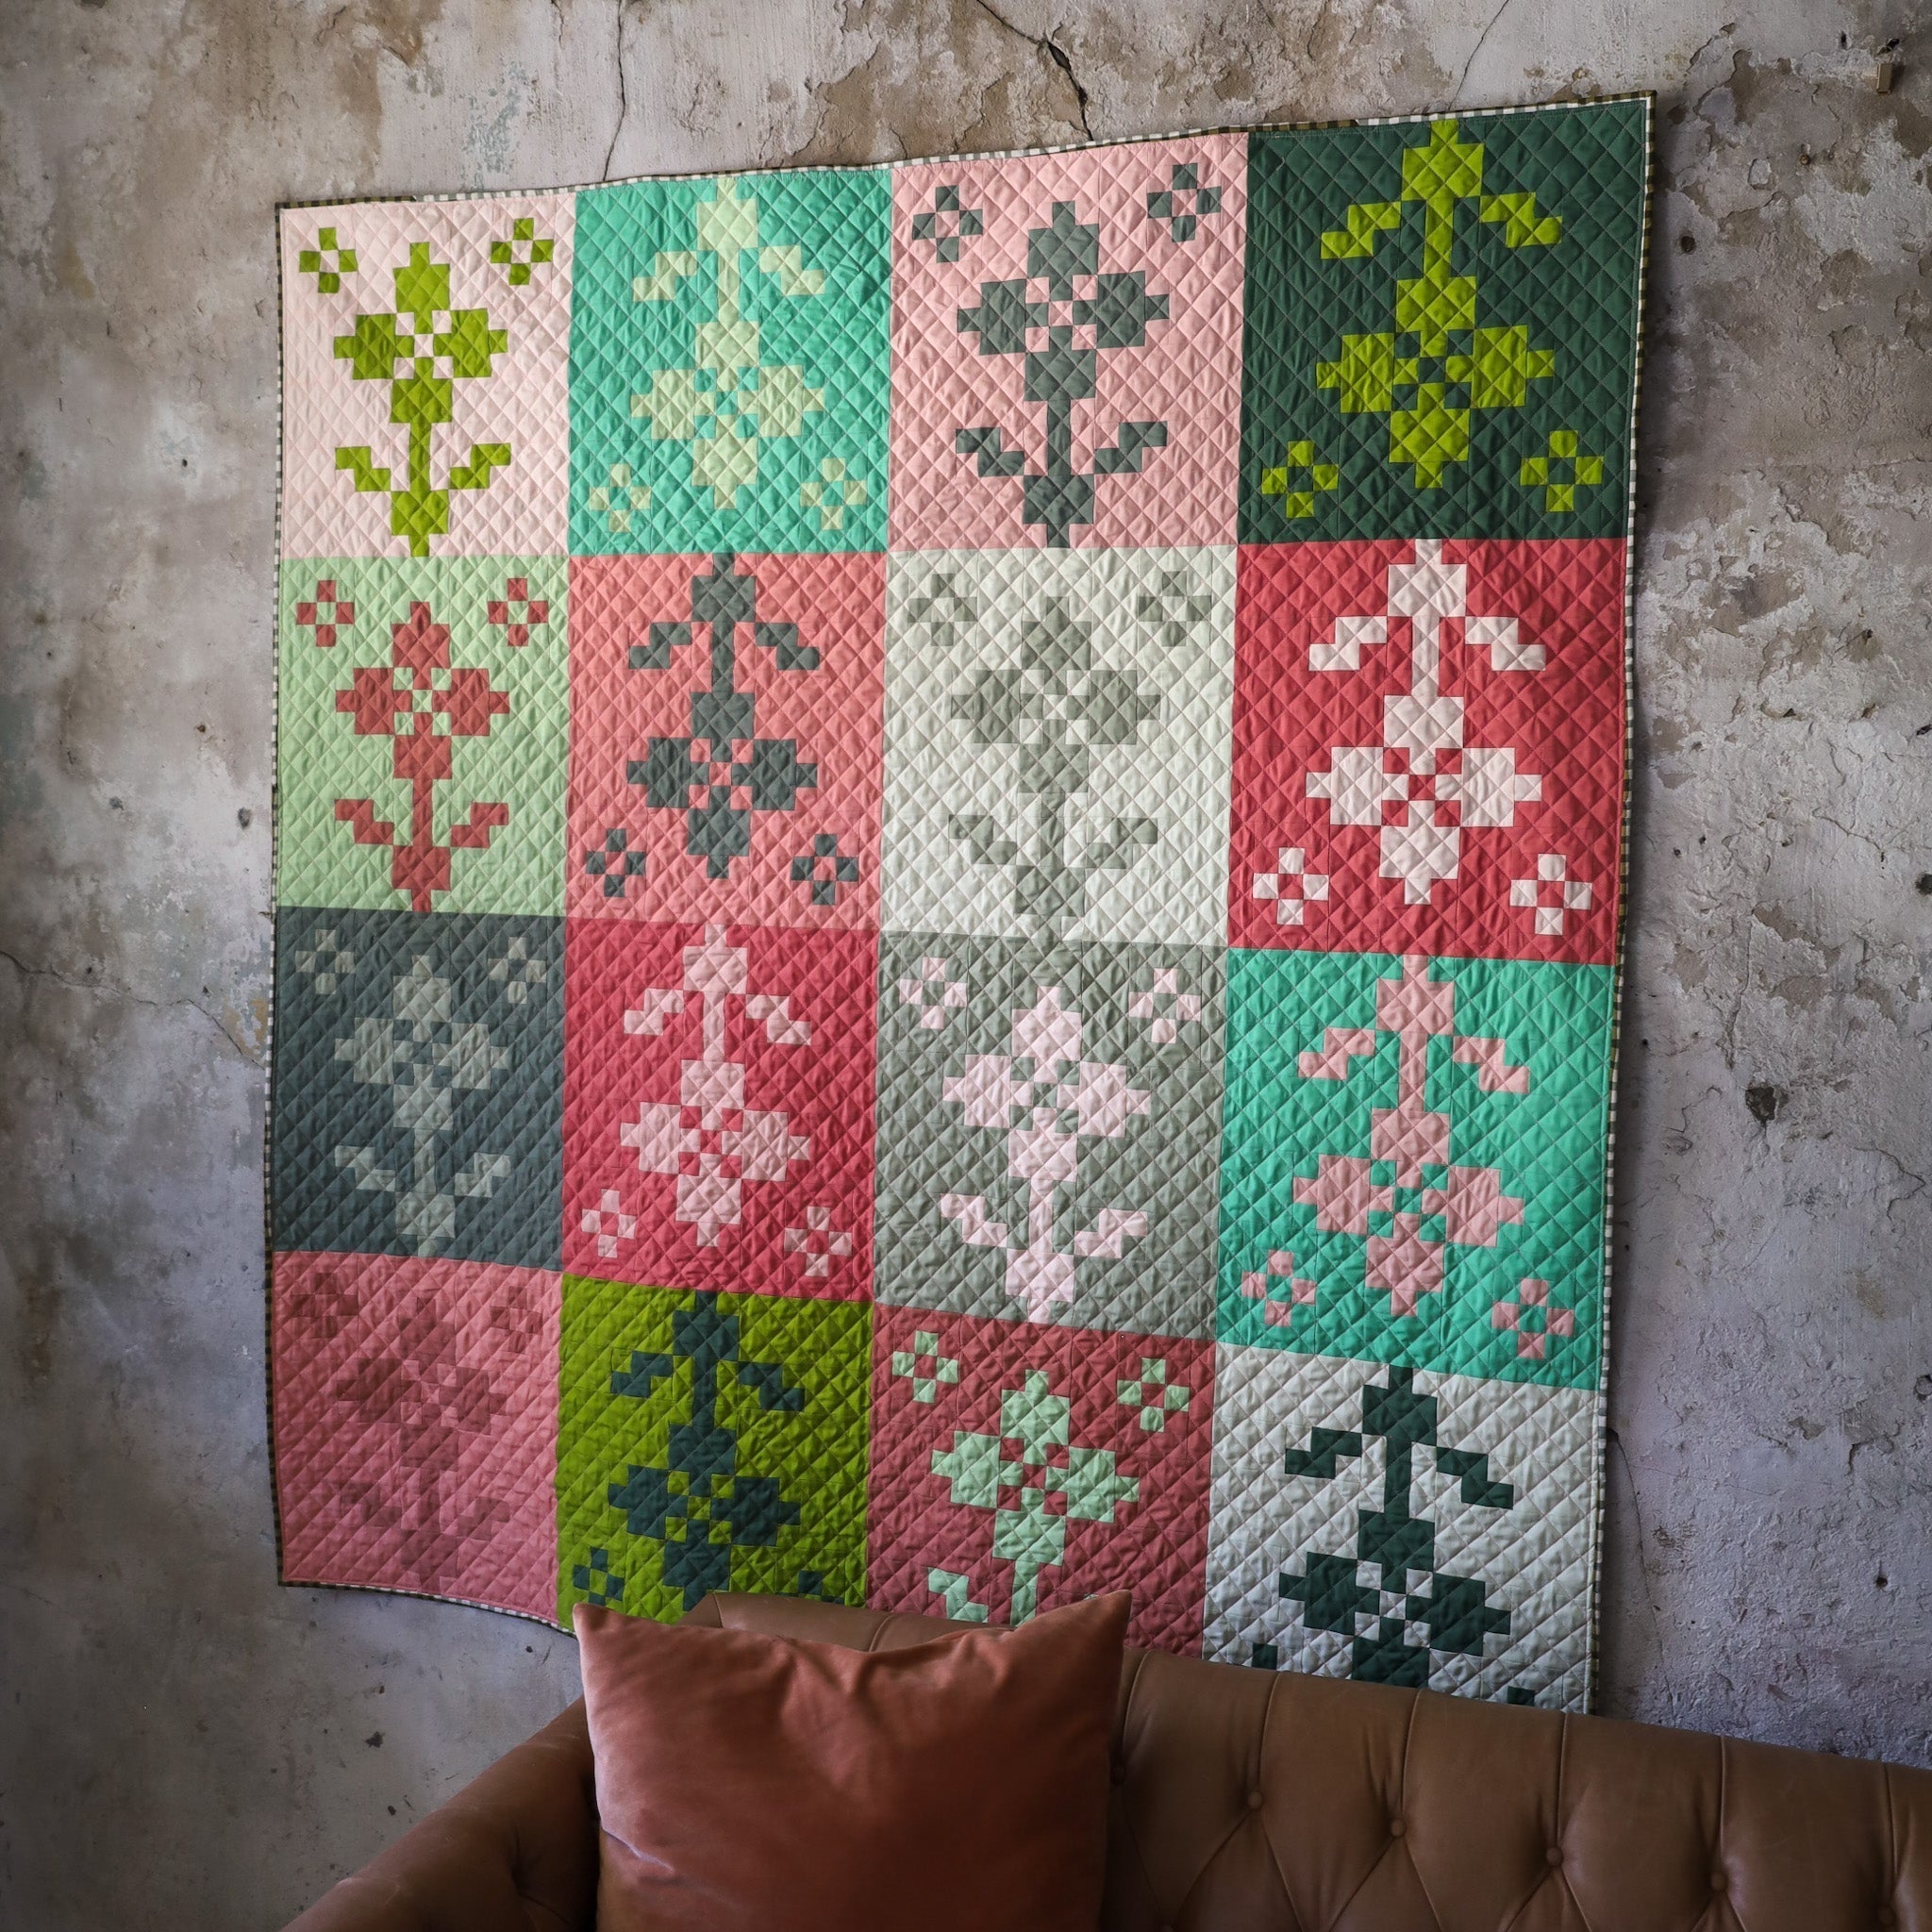
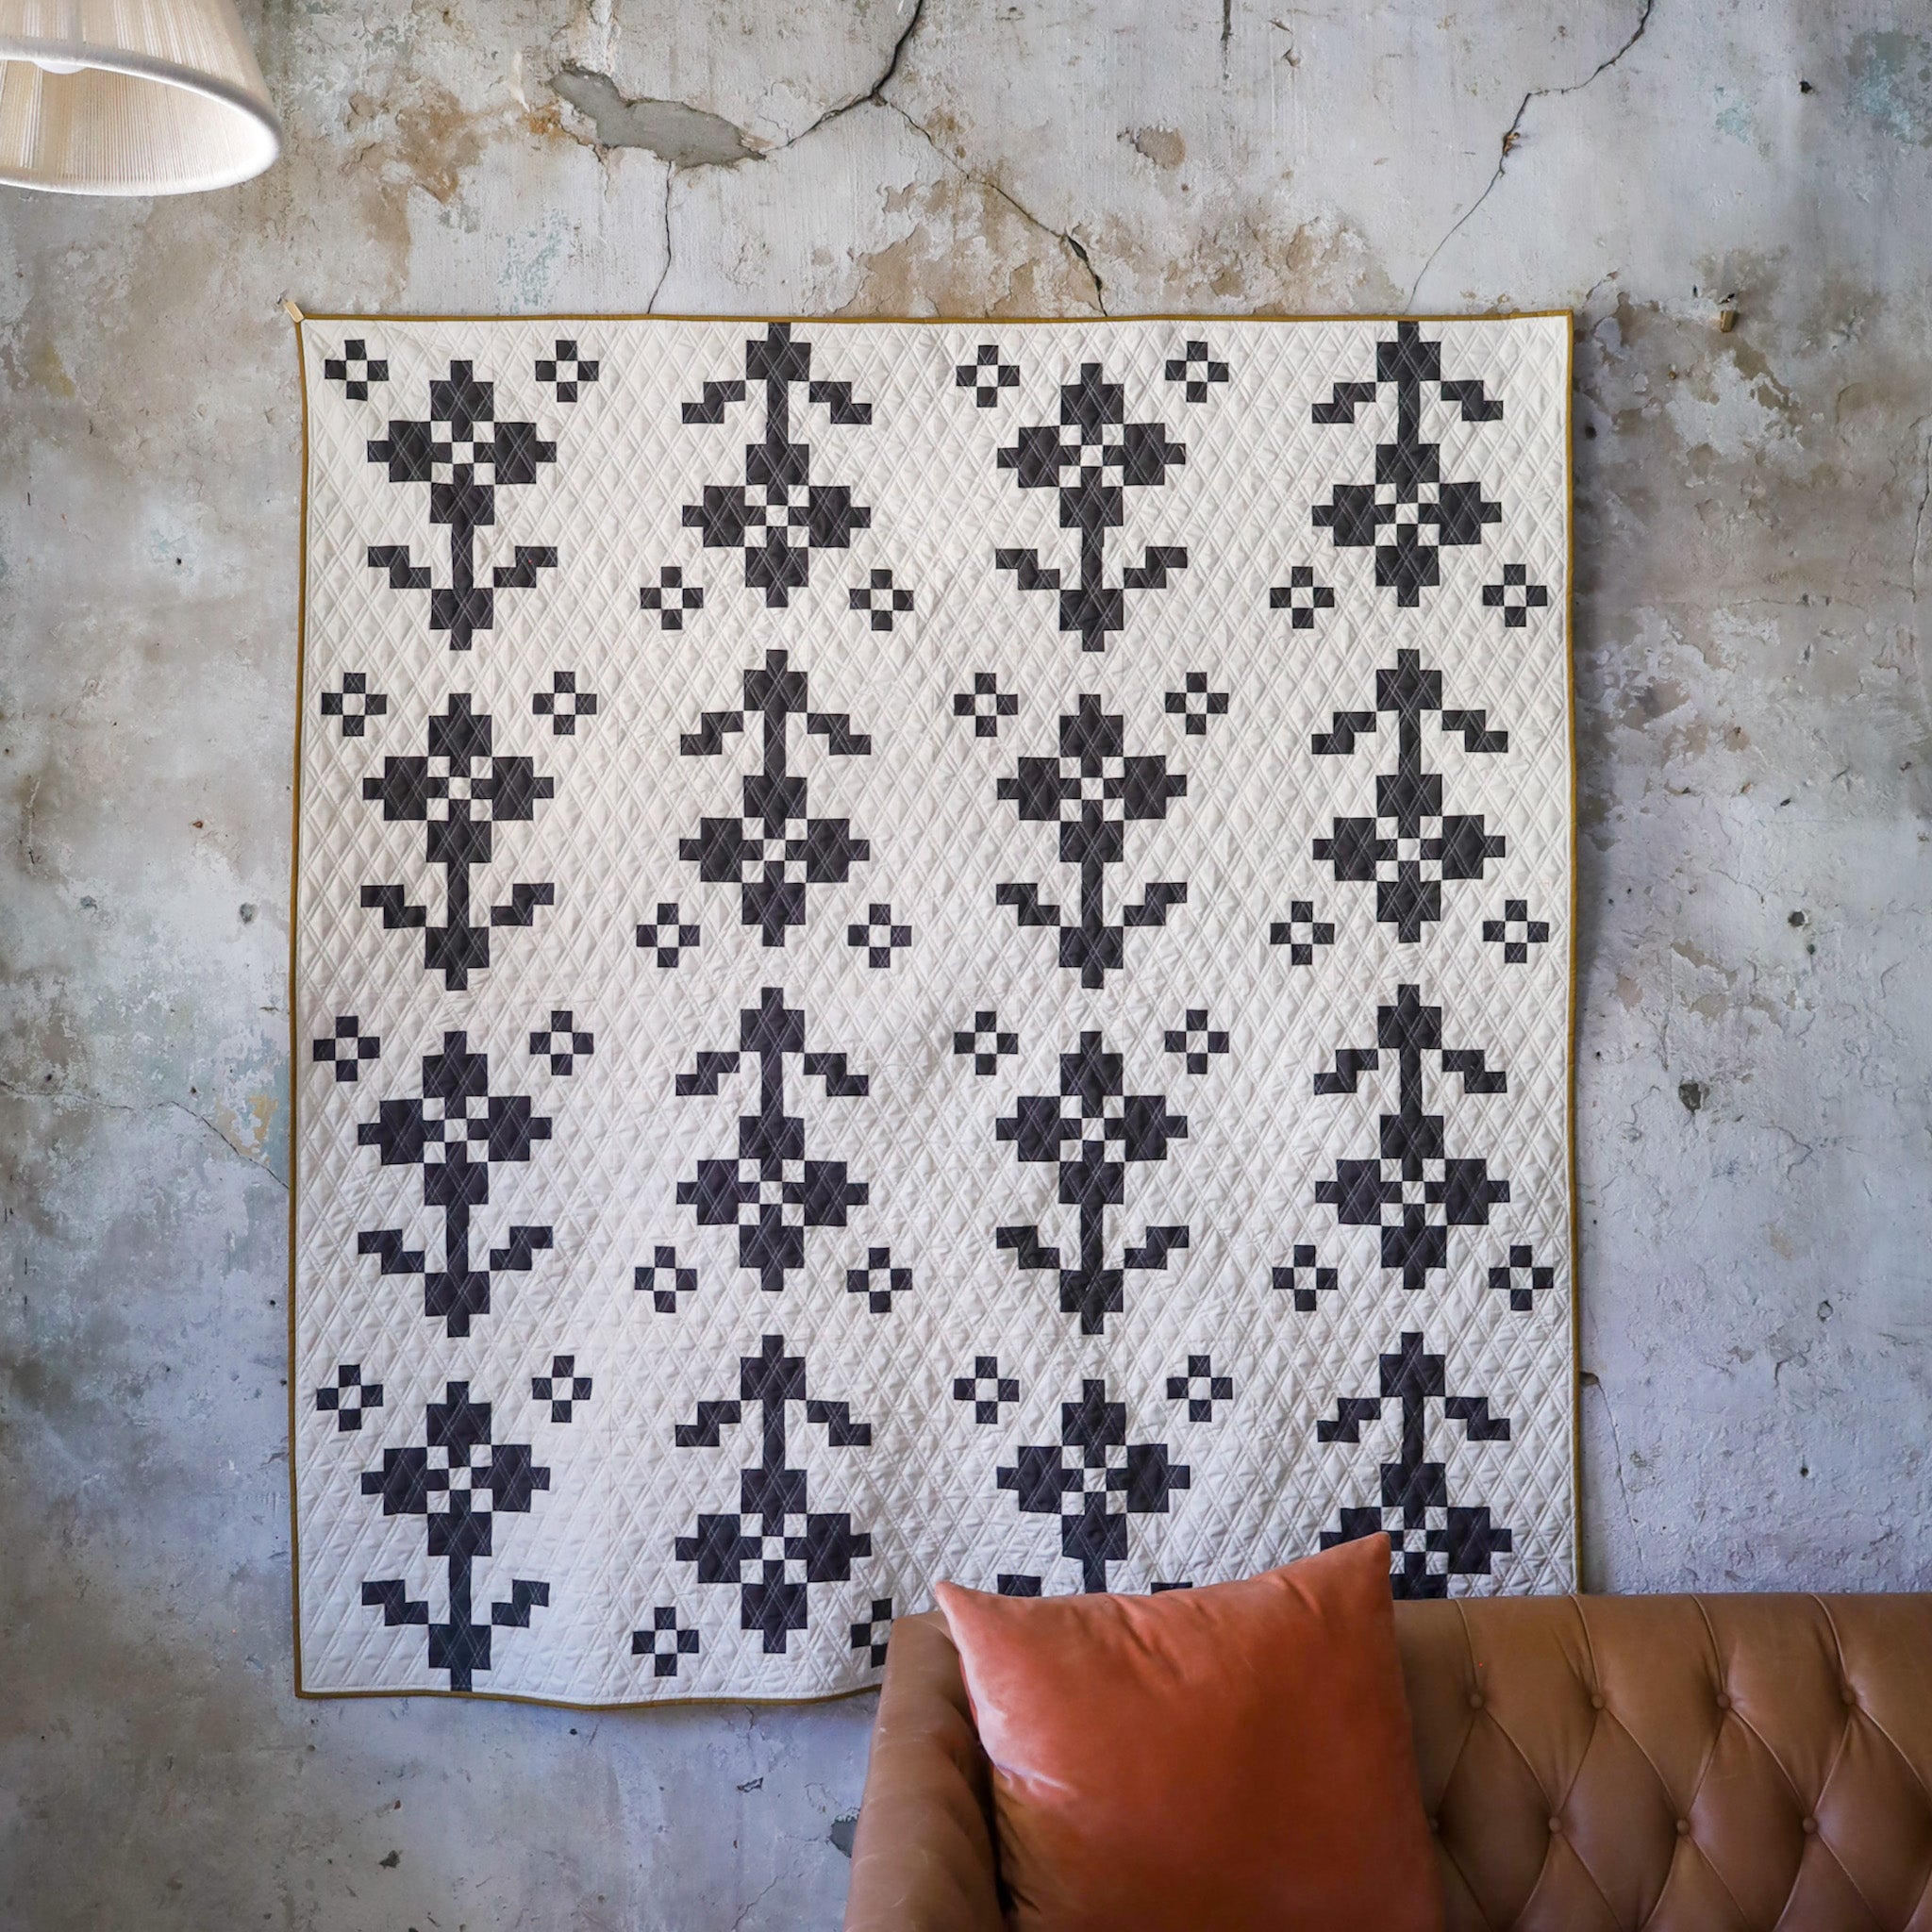
Lo & Behold Stitchery patterns with small piecing
Ready to try some tiny piecing of your own? These quilt patterns have cuts 1.75” x 1.75” or smaller, which make them perfect for practicing your precision:
- Pansy Patch
- Homespun (has the smallest pieces of any Lo & Behold pattern!)
- Knitted Blooms
- Retro Blossoms
- Upscale Plaid (some sizes)
- Heirlooms Hearts
- Deco
- Knitted Star
- Model Farm (some sizes)
I hope you enjoy sewing with little pieces as much as I do. Happy tiny quilting!

You may also like…
- How to Sew Long Seams on Quilts: 12 Tips for Even the Longest Seams
- How to Cut WOF Strips for Your Quilt Project: Tips for Perfect Strips
- Working With Yarn-Dyed Wovens in Quilts: My 5 Top Tips
- 6 Tips for Flat Seams - How to Get the Flattest Seams in Your Quilt
Frequently asked questions about tiny piecing
HOW SMALL OF PIECES CAN YOU USE IN A QUILT?
For most people, sewing a ¾” piece in a quilt (which means the piece would finish at ¼”) feels technical and challenging. It’s definitely doable, but you’ll want to make sure you’ve dialed in your seam allowance, and you should make some test blocks first.
If you want to make your quilt entirely from small pieces (like for a postage stamp quilt), I’d stick to 1½” squares. They’ll finish at 1”, which is still very small, but also very doable!
WHAT IS A MINI QUILT PATTERN?
A mini quilt pattern is a small size of quilt (smaller than a baby quilt). A mini quilt can be anywhere from a few inches big (like my free mini heart block) to about 30” on one side (like the Ruby Sue wall hanging).
Fun fact: Mini quilts don’t necessarily use smaller fabric pieces than a big quilt! In most cases, you cut and sew normal-sized pieces, just fewer of them.
Sometimes a mini quilt does use smaller pieces when it’s a scaled-down design (like the smaller sizes of Upscale Plaid or Model Farm). But in my experience, that’s less common.

WHAT CAN YOU DO WITH TINY FABRIC SCRAPS?
You can use tiny fabric scraps to make scrappy quilt blocks or crumb quilts, as stuffing (like inside a pillow or pet bed), or for non-sewing art projects!