How to Prepare Fabrics for Quilting - Prewashing, Starching, & More
I get a lot of questions about how I prepare my fabrics when I start a quilt: whether I prewash or use starch…that sort of thing. The short answer? It depends! The longer answer? Well, that’s what we’re going to talk about today!
I’ll break down all the different ways you can get your fabric ready for quilting…and I’ll tell you the steps that I actually take with most of my quilts.
TABLE OF CONTENTS
- How to prepare your fabric
- Prewashing (or not)
- Pressing and starching
- Folding yardage
- How I prep my quilt fabric
- FAQ
How to prepare fabric for quilting
It seems like the question of how to prepare fabric for quilting should have a simple, obvious answer…but the answer is actually kind of complicated! As with many things in quilting, there are no hard and fast rules, and different people have very different preferences (and sometimes super strong preferences, at that!).
For example, when I asked our newsletter subscribers if they prewashed their fabrics, 75% said they never prewash, but a full quarter of our quilting community do prewash at least sometimes! And guess what…they all end up with beautiful quilts!

So while there is no one right way to prepare your fabric for quilting, typical steps might include:
- Prewashing
- Ironing/pressing
- Starching
- Folding (for yardage)
And by that point, you’re ready to start cutting!
But let’s dig deeper into each of those steps, including the whys and hows…starting with prewashing!
Prewashing fabric
Prewashing is just what it sounds like: running your fabric through the washing machine before you actually use it.
Should you prewash your quilt fabric?
Prewashing fabric has some upsides and downsides, so you’ll have to decide whether or not it’s worth it for you.
| Prewashing Pros | Prewashing Cons |
| 👍 Can reduce bleeding 👍 Removes any dust or dirt 👍 Pre-shrinks fabric for stability |
👎 Takes extra time 👎 Can result in a less crinkly quilt 👎 Removes starches and stabilizers 👎 Causes fabric fraying |
The biggest benefit of prewashing is that it gets rid of excess fabric dye before you start sewing. This (hopefully) means your finished quilt is much less likely to have any color bleeding…something reds, blue, and purple fabric are all known for causing. So if you’ve got a high contrast quilt, like red and white, you might want to prewash to make sure that your red and white quilt doesn’t end up red and pink.

There are other ways to help with bleeding, though. I always throw in a bunch of Shout Color Catchers when I wash my quilt for the first time. Usually, it works just fine…so I feel comfortable skipping prewashing. But if you don’t want to take the risk, prewashing is a good idea.
Prewashing can also help remove anything on the fabric, like dust and dirt from transit. If you’ve got allergies, prewashing probably makes a lot of sense! But prewashing also removes things you might want on the fabric…like the starches and stabilizers that fabric manufacturers use. Personally, I think these stabilizers make fabric much easier to cut and sew, because the fibers are a little stiffer and easier to handle. You can always add starch later, though, so it’s not a huge deal if you wash them out.
And finally, prewashing will also “pre-shrink” your fabric. If you don’t love the look of a crinkly quilt, this is a big plus! Or if you’re mixing fabric substrates (like linen and cotton) in the same quilt, pre-shrinking will make sure your finished quilt doesn’t shrink at different rates and cause damaging pulling on your seams. That added stability is a big plus!

If you decide that prewashing does sound like a good idea, keep in mind that it causes fabric fraying (especially in looser weaves like linens or yarn-dyed wovens), which could leave you with too little usable fabric if you’re not careful.
You also need to watch out for shrinkage. If you prewash and your usable WOF shrinks to less than 42" width-wise, then you'll have less fabric than what the pattern assumes, and you may need to buy more. Or if you need an exact yardage amount, but it shrinks by a few inches lengthwise, you’ll also need more.
💡 |
Tip: Precuts and washing
|
So what’s the best way to prewash your fabric?
How to prewash your fabric
While you definitely can just throw quilting cotton in the washing machine and hope for the best (and many people do!), there are some things you can do to prevent fraying. Just putting your fabric in a mesh laundry bag makes a big difference! You can also staystitch around ⅛” away from the raw edges of your fabric (using a zig zag stitch is even better, if your machine has one).
Then, when you actually start washing, I recommend you:
- Use a mild detergent.
- Set the wash to a cool cycle.
- Dry on low heat.
- Remove fabrics from the dryer immediately.
Some people like to dry their fabrics about ¾ of the way through, and then remove and press it while the fabric is still a bit damp.
Even fresh from a complete dryer cycle, your fabric will come out a bit wrinkly. That’s where our next prep step comes in!
Pressing and starching
Whether or not you prewash your fabric, you’ll want to give it a thorough pressing to get out all those wrinkles.
You don’t need a fancy ironing setup, by the way! I’ve used and enjoyed this cheap Sunbeam iron (though something like this Rowenta iron makes a nice upgrade). Mostly, it comes down to technique.
As you press your precuts, remember to press, not iron. That means you want to move your iron up and down as much as possible instead of back and forth. You don’t want to stretch out your fabric, and the smaller the piece, the more likely it is to warp. (Looser weave wovens, like yarn-dyed wovens, are also more likely to distort.)
When you press yardage, you’ll end up moving your iron around the fabric more. Still, you should try to move the iron with the grain of the fabric, which will help avoid any stretching and warping. Make sure you iron out any existing fold…because we’re going to make a new fold later!

You can iron quilting cotton on high heat, and it’s up to you if you want to keep your fabric dry, use steam (from the iron or by using a spray bottle), or use starch!
Should you starch your fabric?
Like prewashing, starching comes down to personal preference! These are some of the things to consider as you decide:
| Starching Pros | Starching Cons |
| 👍 Adds stiffness for easier handling 👍 Minimizes fabric fraying 👍 Prevents bias stretching |
👎 Extra time and cost 👎 Potential residue on iron and board 👎 Reports of bugs being attracted to starched fabric |
The big reason to starch is to make your fabric easier to handle. Stiffer fabric is usually easier to cut and sew. It frays less, and well-starched fabric is even less likely to warp out of shape…which is super useful when you’re working on the bias. So when you’ve got an intricate quilt pattern with lots of small pieces or bias edges, starch can make a huge difference in your piecing.

The downsides? Starching takes time, and it adds another cost to your project. Plus, depending on the kind of starch you use, you may end up with some gunk on your iron and ironing board (though you can usually clean it off). And depending on where you live, you might find bugs really like your starched fabric…so don’t leave it sitting out in the open.
How to starch your fabrics
If you like the sound of starching, first you need to figure out what kind of starch you want to use! I actually use something like Mary Ellen’s Best Press or starch alternatives like Soak Flatter Smoothing Spray. (I like the smell of these better than traditional starch…or the lack of smell, since I mostly use the unscented versions.) I don't notice a residue with these, but it's important to coat the fabric evenly to avoid possible visible spots on your fabric. And even if you see a visible liquid spot or two they should wash out in your finished quilt.
Other people swear by homemade starch recipes using diluted vodka or cornstarch, which can help keep the costs down. Like so much of what we’ve been talking about, there’s no one right answer! Experiment to find out what you like.
No matter what you use, you’ll want to spray your starch on right before you press. (Pro tip: It’s worth getting a really nice spray bottle for this bit.) The heat from the iron should dry your fabric and leave you with crisp, beautifully starched fabric.
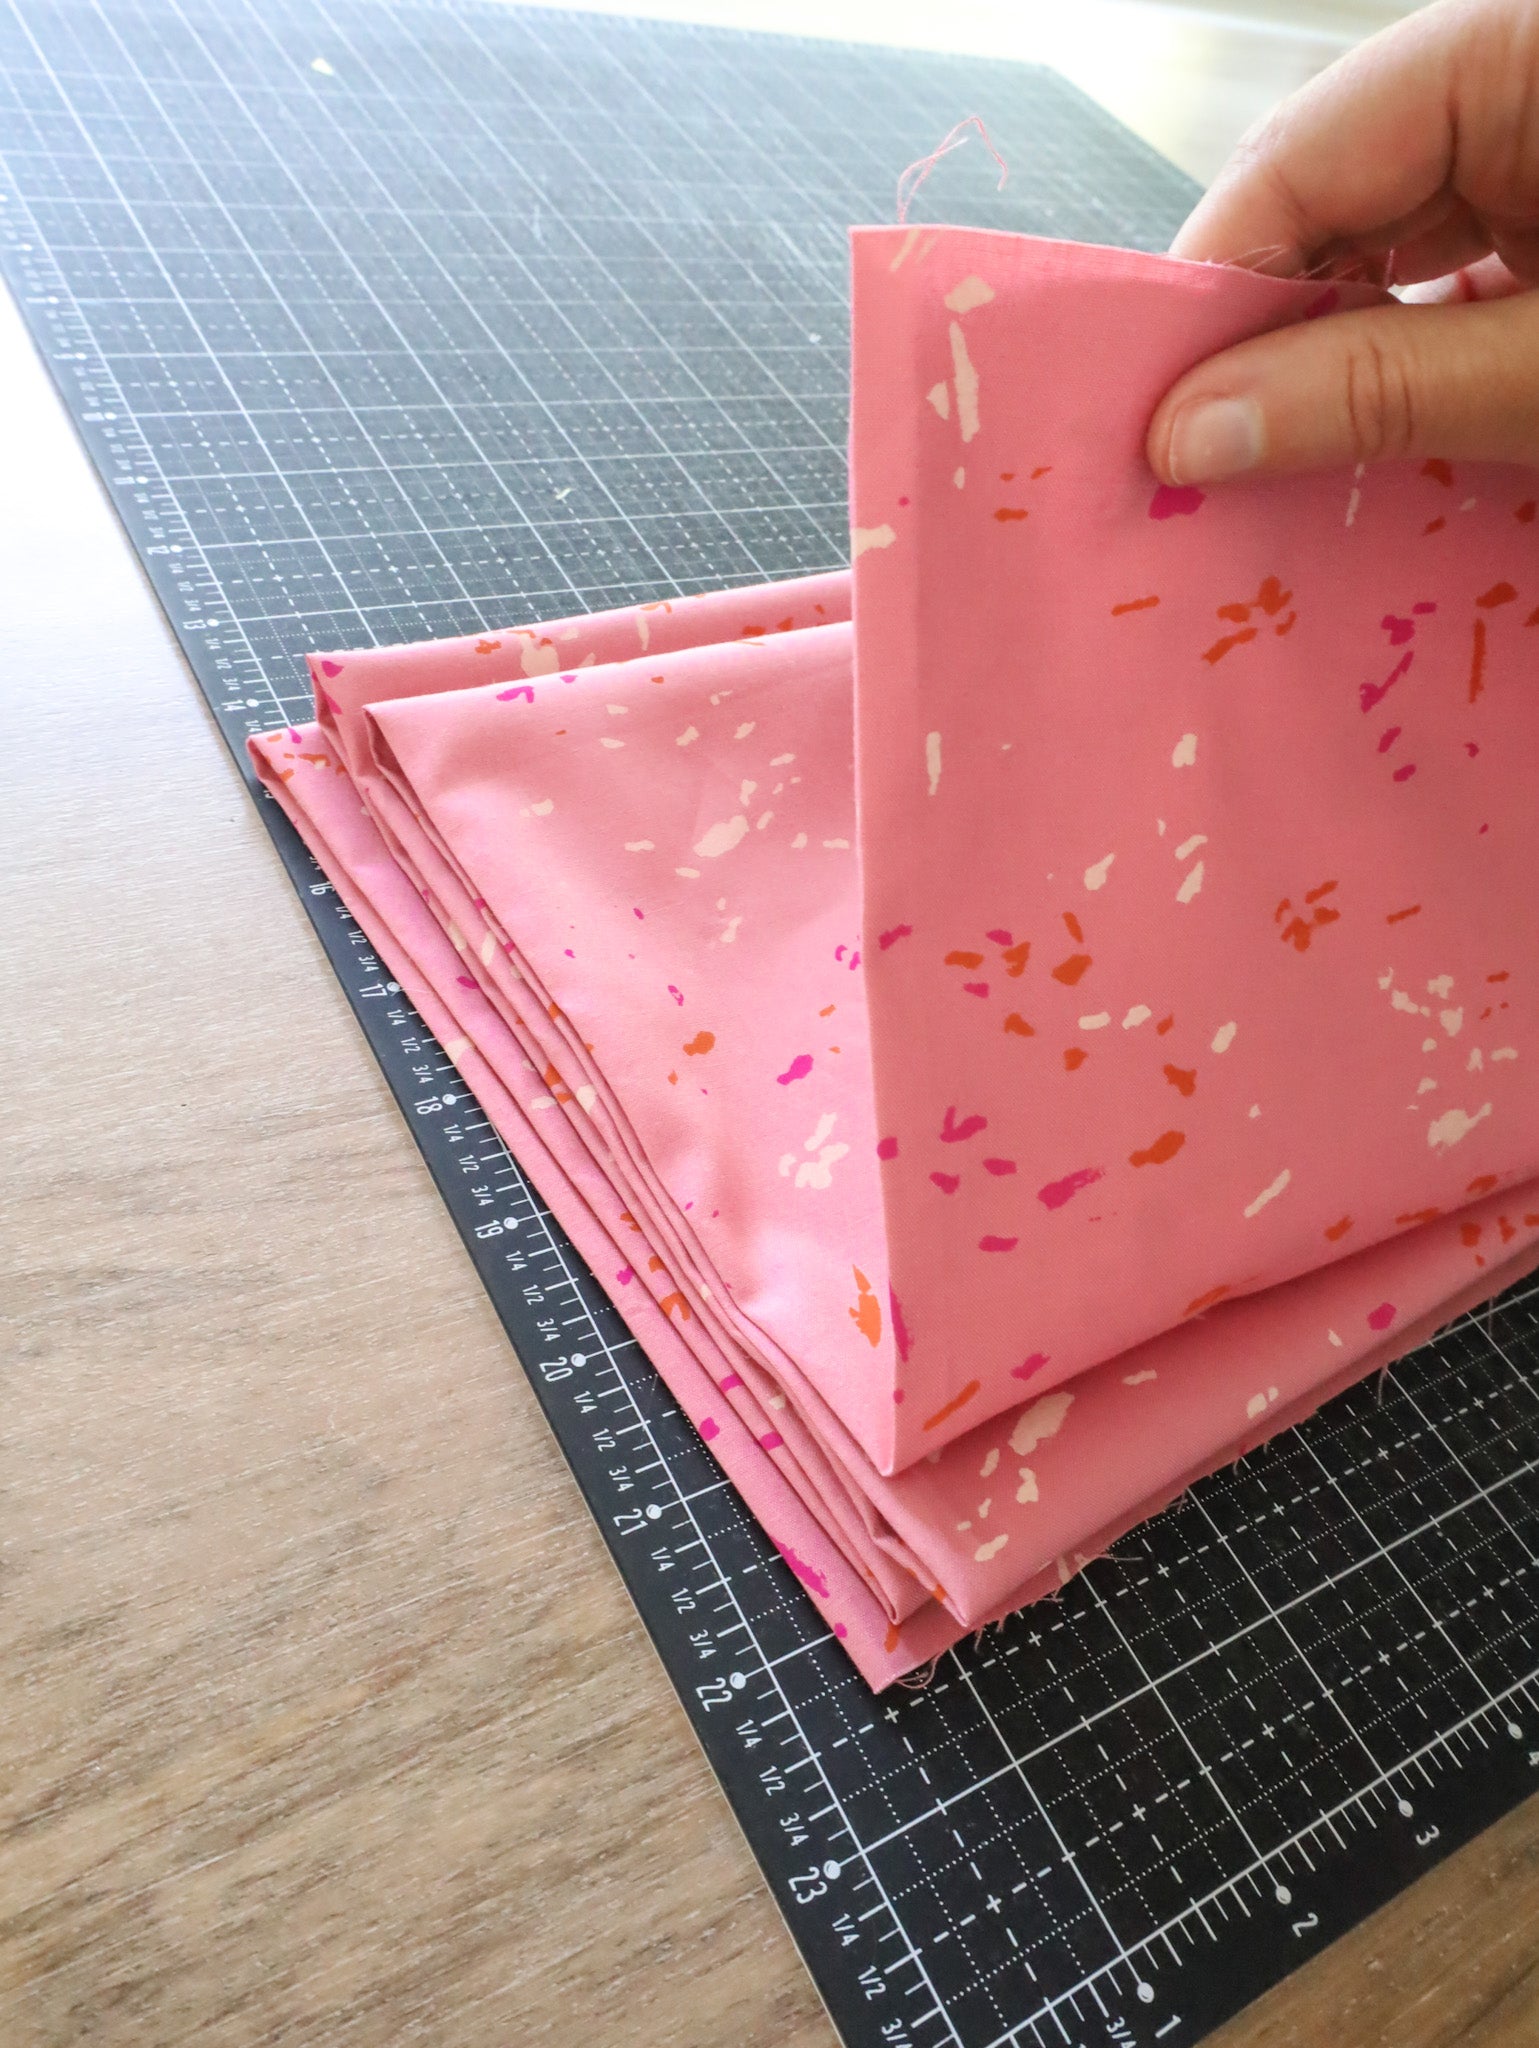
Folding yardage
If you’re working with yardage, you’ll also need to refold your fabric. If you washed your fabric, you probably won’t even have a clear fold left. If you didn’t wash, you may have a “ghost” fold even after pressing. But since fabric on a bolt isn’t always folded completely straight, we’ll want to make a new fold either way.
💡 |
Detailed instructions
|
Once you’ve ironed your yardage, match selvedge edge to selvedge edge. You may need to move the edges around a bit until the fabric around the fold is smooth, without any ripples. That means you’ve successfully folded it on grain! Once everything looks nice, go ahead and press a new crease where you’ve folded the fabric.

If you’ve got a lot of yardage (over a yard), you’ll probably want to refold and press in sections. Otherwise, it’s a lot to handle and keep neatly aligned.
At this point you may want to fold your yardage back and forth, accordion style. This makes it much easier to manage when you’re cutting WOF strips.
And with that…you’re done preparing your fabric, and it’s time to start cutting!
How I prep my fabric
Now that I’ve told you everything you can do, here’s what I actually do with my own fabric:
Personally, I almost never prewash my fabric. In most cases, I don’t think I need to…plus, I’m just so excited to get started that I don’t want to wait!
I always press my fabric to get out the wrinkles and make sure I’m getting accurate cuts.

I use starch on a lot of my quilts, especially any that involve small pieces or bias edges. (And you know me…a lot of my patterns have small pieces!)
If I’m making WOF cuts, I always take the time to neatly refold my fabric before I begin cutting.
But again, that’s just how I do things! Now that we’ve covered the different ways to prep your fabric (and the pros and cons of each), you can figure out what works best for you and your quilting style!
Happy quilting!
You may also like…
- How to Cut WOF Strips for Your Quilt Project: Tips for Perfect Strips
- 7 Fabric Types for Quilting — & How to Use Them Together Successfully
- 6 Tips for Flat Seams - How to Get the Flattest Seams in Your Quilt
- Working With Yarn-Dyed Wovens in Quilts: My 5 Top Tips
FAQ about preparing your fabric
How do you prepare fabric for quilting?
To prepare fabric for quilting, you’ll at minimum want to iron before you cut. You may also want to wash or starch your fabric, but those steps are optional.
How do you keep fabric from fraying when you cut?
Starching can help prevent fraying when you cut. Using a fresh, sharp rotary blade (or freshly sharpened scissors) can also keep fabric from fraying.
When making a quilt, do you wash the fabric first?
You can wash your fabric before you start making a quilt, but you don’t have to. It’s mostly up to personal preference. If you want to have a less crinkly quilt or you’re super worried about fabric bleeding, you might want to wash. Otherwise, plenty of quilters skip washing the fabric.