Scrappy Windows QAL - Weeks 3-5: Sections
- Week 1 Blog Post (Cutting)
- Week 2 Blog Post (Planning & Organizing)
- Scrappy Windows Quilt Kits
- Scrappy Windows Blog Post
- FREE Scrappy Windows pattern
- Shop Scrappy Windows kits
Schedule

Week 3
There are a couple of ways that you can proceed with making this quilt, but I decided to structure the quilt along similar to how I created my first Scrappy Windows quilt. Depending on what size you are making, you might decide to follow this schedule as well, or if you are making a smaller size, you can create all of your pockets this week, sew them together next week and add windows the following week.
I'm going to stick to the schedule, since I'm anxious to see this quilt top come together but feel free to proceed however you wish!
So for the next 3 weeks, we're creating sections for our quilt. Here is our Scrappy Windows Video Tutorial that we'll be referring to with minute marks listed below.
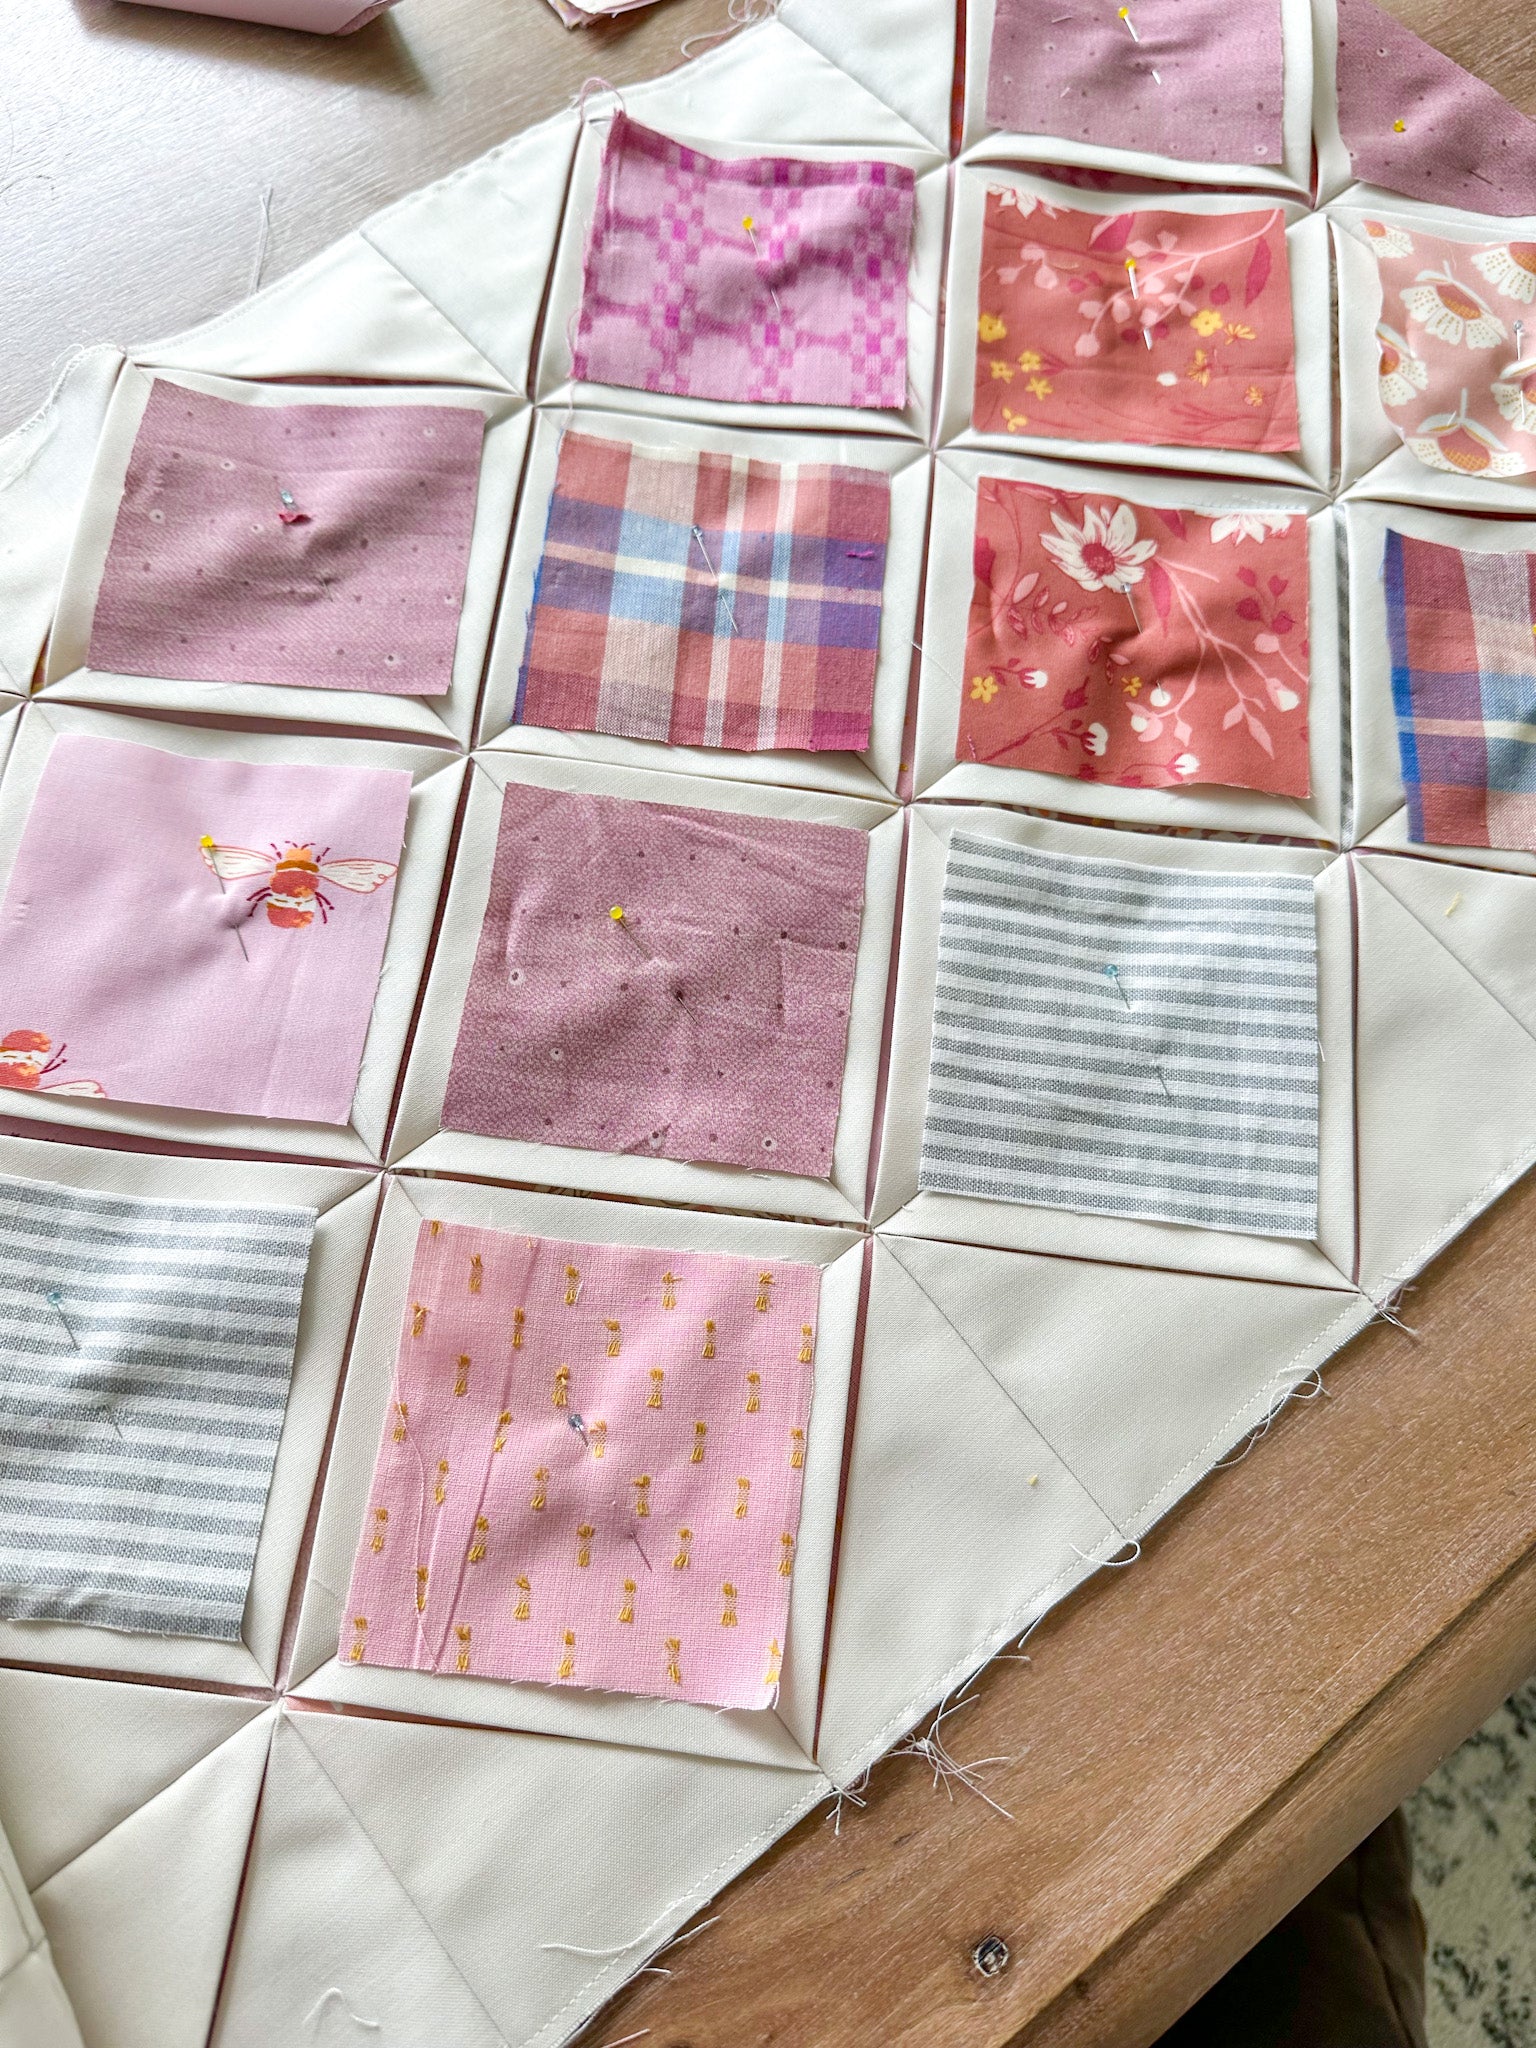
There are four main steps to create a "section" for this quilt:
- Creating Pockets (Minute 7:11)
- Creating Rows (Minute 9:19)
- Creating Sections (Minute 12:28)
- Adding Windows (Minute 15:20)
First and foremost, you'll need to decide how many sections you are creating. My first quilt was the Large Throw, so 20 pockets across and 22 pockets down. Since this was my first time making this quilt, I experimented with sections that were between 4-5 rows down. The size of your sections will really depend on your machine, sewing comfort level and what size you are making. You might even decide to create sections vertically as well (quadrants) if you are making a larger size. Don't forget that you'll eventually have to add the Windows between sections, so keep that in mind as you are splitting it up. (Another quick thought: looking ahead, you can always stitch those final Window sections by hand!)
Creating Pockets
Referring to minute 7:11 of the video we'll start by creating pockets. A couple of highlights to note:
- Frame squares are folded so that the wrong sides are together. They stay like this when you place them on the Background squares.
- Use 1/8" seam around the perimeter of the Background squares. An alternative is to glue baste these squares in place, if that's more your speed.
- Sometimes these squares shift a little while sewing. Using a pin to hold in place can help. Otherwise, don't stress if your pieces get "off" just a little bit.
- I use a 1.8 mm stitch length to create pockets, rows and sections.
Create all of your pockets for each of the rows that you are creating in your sections.

Creating Rows
Referring to Minute 9:19 of the video, then you'll create your rows for the section. It's important to note that there was a small pattern correction early on when we released the pattern. It is very important that you arrange your pocket units so that they create a "zig zag" pattern and that the pattern alternates from row to row. Watch the video closely to see what I mean.

Here's an example using the Pillow size of the pattern. You'll see that the square on the left side of Row 1 has the Frame folds rotated so that they're from the bottom left to top right. The square to the right of it has the Frame folds rotated so that they're from the top left to bottom right. Then in Row 2, it's the opposite (or it should be, this is where the pattern correction came in.) We sent an updated copy of the pattern on August 7th, so if you signed up for the pattern after that then you have the latest copy.
When you sew these square together to create rows, you'll use a standard 1/4" seam allowance. This will hide your 1/8" basting seam allowance.
Here's a look at what the rows will look like once they're sewn together.

If you have a specific layout to your quilt, you'll want to make sure you keep your pieces in order from row to row. For me, this meant keeping the row labels tucked in with each row.
In the video, I demonstrate how I like to chain piece pockets. You can even take that a step further and chain piece your rows. I have a blog post about that, found here, if you want to give that a try.
BACKSTITCHING
You can backstitch at the beginning and end of your seams as you sew pockets together. I only really found this necessary for the rows that are on the outside of my section or quilt top. So I'll definitely backstitch the beginning of the pocket seams for Row 1. If I'm creating a section that has 4 rows, I'll also backstitch the ending seams for my pockets in Row 4.
PRESSING POCKET SEAMS
Remember that we're pressing all pocket seams to one side. So for Row 1, press all pocket seams to the right; for Row 2 press all pocket seams to the left. Alternate from row to row to create nesting seams. These seams are bulky, so you might find that steam helps.
QUILTING NEEDLES
Speaking of bulky seams, this is when you might notice that you're really sewing through lots of layers! If you find that your stitches are skipping or your machine is having a hard time sewing through the layers, I recommend using quilting needles.
Creating Sections
Referring to minute 12:28 of the video, now let's create a section. Here are a couple of tips for this step:
- In the video, you'll see me use clips to align my seams within my rows and they really do help keep things together as you sew!
- Backstitch at the beginning and end of each row seam.
- Press row seams open. Again, these seams are bulky. I found it helpful to finger press first, then use my iron to press the seam. Don't forget to flip the rows around and press the right side of the piece.
- Try not to stretch the rows as you sew.
- Use a walking foot if you need help moving the layers through your machine.

Notice the orientation of my Frame folds? You'll see "diamonds" appear as you sew rows together, which is where your Window pieces will go. :)
Adding Windows
Now it's time for the fun part! Refer to Minute 15:20 of the video for this step. It's time to add our Window pieces!
This step is probably best explained by watching the video. Know that you can sew your Window Frames using two different methods: One at a Time and Continuous Line. I definitely recommend trying both (seen in the video) to see which one you prefer.
A couple of tips for this step:
- This thread will be visible in your finished quilt. Consider using a thread color that matches the Frame fabric or a contrasting thread color if you want it to stand out.
- I use a stitch length of 2.0 mm for this step.
- If you have speed control, turn it all the way down.
- If your machine has the capability to stop with your needle in the down position, that's helpful.
- If your machine has the the capability to raise the presser foot automatically when you stop sewing, you might find that helpful too.
- Remember not to pull the Frame pieces too far. If you see any warping or distorting in your Background pieces, then you'll pulling too much. (You can see this a little bit on my quilt if you go back and look at photos. Overall, it isn't too bad and you can't really notice it now that it's quilted.
- Roll up the section that you aren't working with and clip it in place.
- IMPORTANT: Make sure your Frame pieces overlap to cover the corners of the Window pieces by at least 1/4". You want to make sure those pieces are nice and secure.


WEEKS 3-5
By the end of this week you should have your first section complete. If you aren't working in sections, then you'll want to have all of your pocket units created by the end of the week.
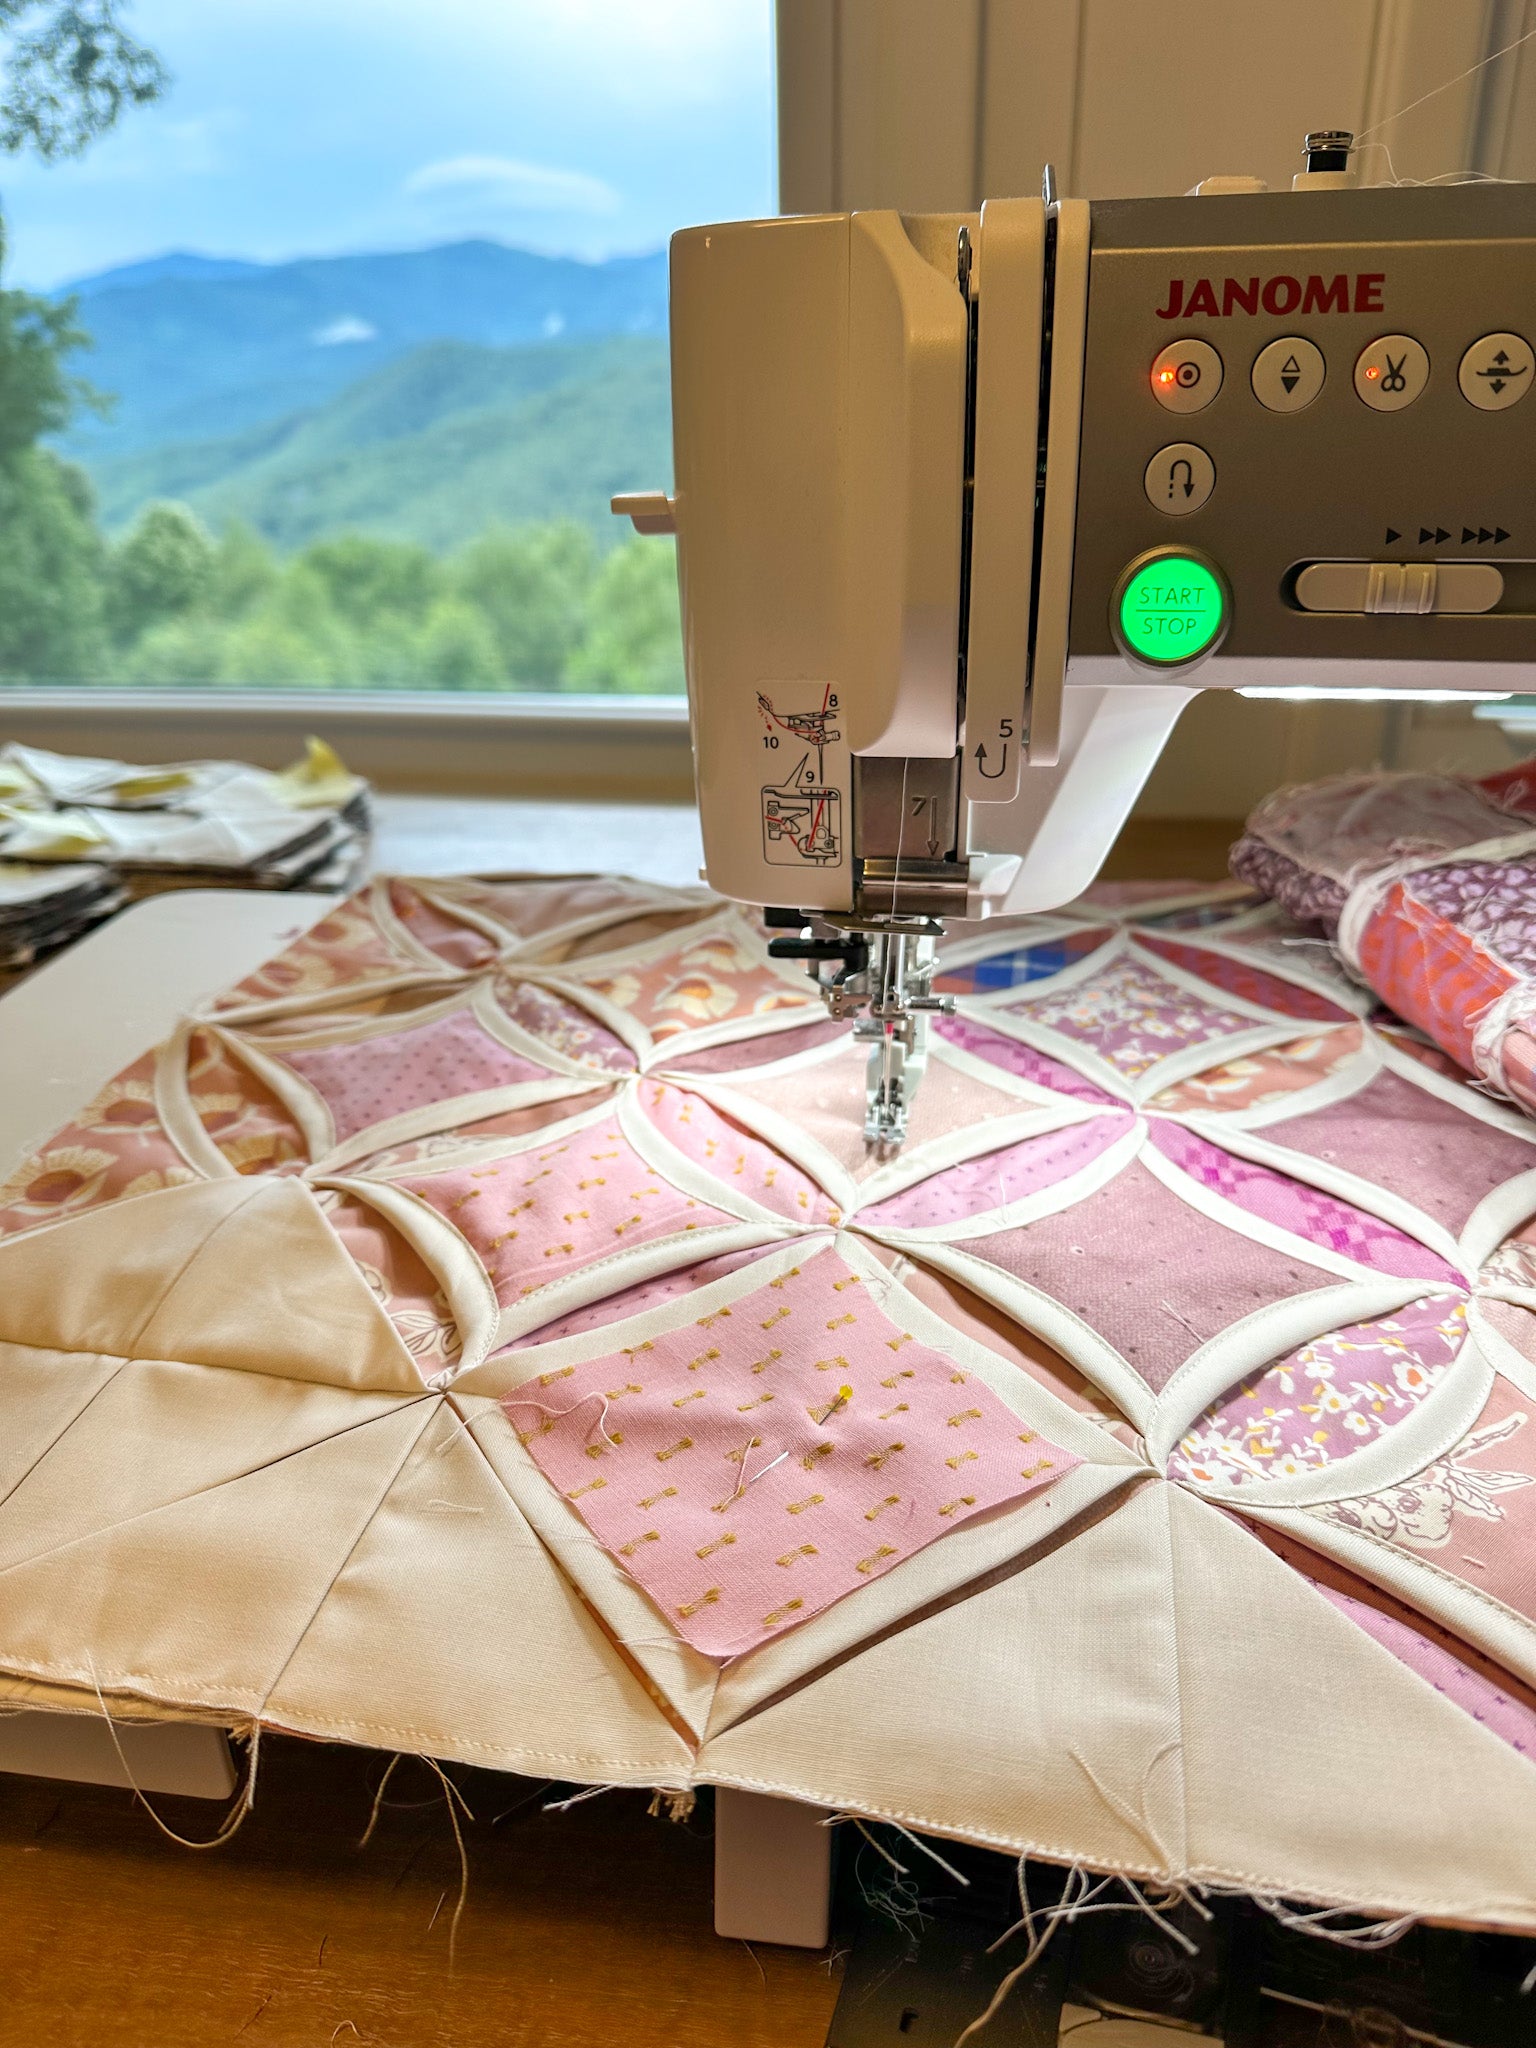
For the next 3 weeks, we'll be repeating these steps until we have all of our sections created. You won't hear from me again until September 23rd when we go to assemble our entire quilt top. But if you have any questions pop up, feel free to reach out!
In the meantime, we're opening enrollment for all three of our online courses on September 16th! This includes Beginner Quilting Academy, Triangle School and our brand new course, Curve College! I pour so much into these comprehensive online programs...I hope you'll check them out. :)
I cannot wait to see everyone's progress!
Don't forget to tag me on Instagram (@loandbeholdstitchery) and use the hashtags #scrappywindowsQAL , #scrappywindowsquilt, #loisquiltcollection and #loandbeholdpatterns !
Happy sewing!
