Scrappy Cathedral Windows Quilt - FREE pattern!

I don't know if you have a "quilting bucket list", but I sure do! And a cathedral window quilt was at the top of that list! There's something so elegant and perplexing about how they're constructed and I always love a good challenge of figuring things out and stretching my skills and this quilt did just that!
I first discovered a cathedral window quilt on a sampler quilt that my granny made back in the late 1980s. My favorite block on this quilt has always been the mysterious cathedral window block and I told myself years ago that I would one day learn how to make it.
Pictured below is myself and my aunt Kimmy holding the sampler quilt that my granny made...followed by some close-ups of the cathedral window block.


About 2-ish years ago, I set out to make my own cathedral window quilt but quickly became overwhelmed by the process and how much fabric it required. I did a few test blocks here and there but my interest level fizzled out a little bit. So here I am, all this time later, revisiting my dream and making it happen! And not only am I finally checking this quilt off my bucket list, but if it's on YOUR bucket list too, I'm excited to share that we've created a FREE pattern for this quilt!
I'm calling it "Scrappy Windows" because you can customize any portion of this quilt using scraps, precuts, yardage, etc. The free pattern gives you 5 different sizes of an edge-to-edge cathedral window design along with tons of inspiration ideas and simple step-by-step instructions. :)
Click here for the FREE pattern.
We'll be doing a Quilt Along starting August 19th, so signing up for the pattern will automatically sign you up to receive Quilt Along content, which will include a video tutorial! Here's our Quilt Along schedule:
- Week 1 - August 19 - Cutting
- Week 2 - August 26 - Layout, Organize, Press Frames
- Week 3 - September 2 - Section 1 (pockets, rows, windows)
- Week 4 - September 9 - Section 2 (pockets, rows, windows)
- Week 5 - September 16 - Section 3 (pockets, rows, windows)
- Week 6 - September 23 - Quilt Top Assembly
- Week 7 - September 30 - Catch up Week
- Week 8 - October 7 - Quilt & Bind
You can make whatever size Scrappy Windows quilt you wish. I'm going to be making a low-volume Baby size (using this kit). I have the weeks split up so that there are three sections; if you are making a larger size, you might want to split it up into more sections.
You'll want to have your fabrics picked out before we start cutting on August 19th, so be sure to check out our "Scrappy Windows" quilt kits in the shop!

I've been thinking about making this quilt for years and I've been slowly practicing various methods, sizes and designs for what I wanted my cathedral window quilt to look like. A few goals on my list included:
- Smaller windows for a more intricate look; overall, I like smaller piecing for my quilts. I find that it feels more "vintage inspired" and cozy. I tested out everywhere from 2.5" windows to 5" windows. I landed on 3.5" and I think it's perfect for both prints and solids. Plus I think it's a good size for moving the quilt top underneath your needle. Not to mention, 3.5" is great for smaller scraps if you want to use up your stash. Really, you can use whatever size squares you'd like for this pattern.
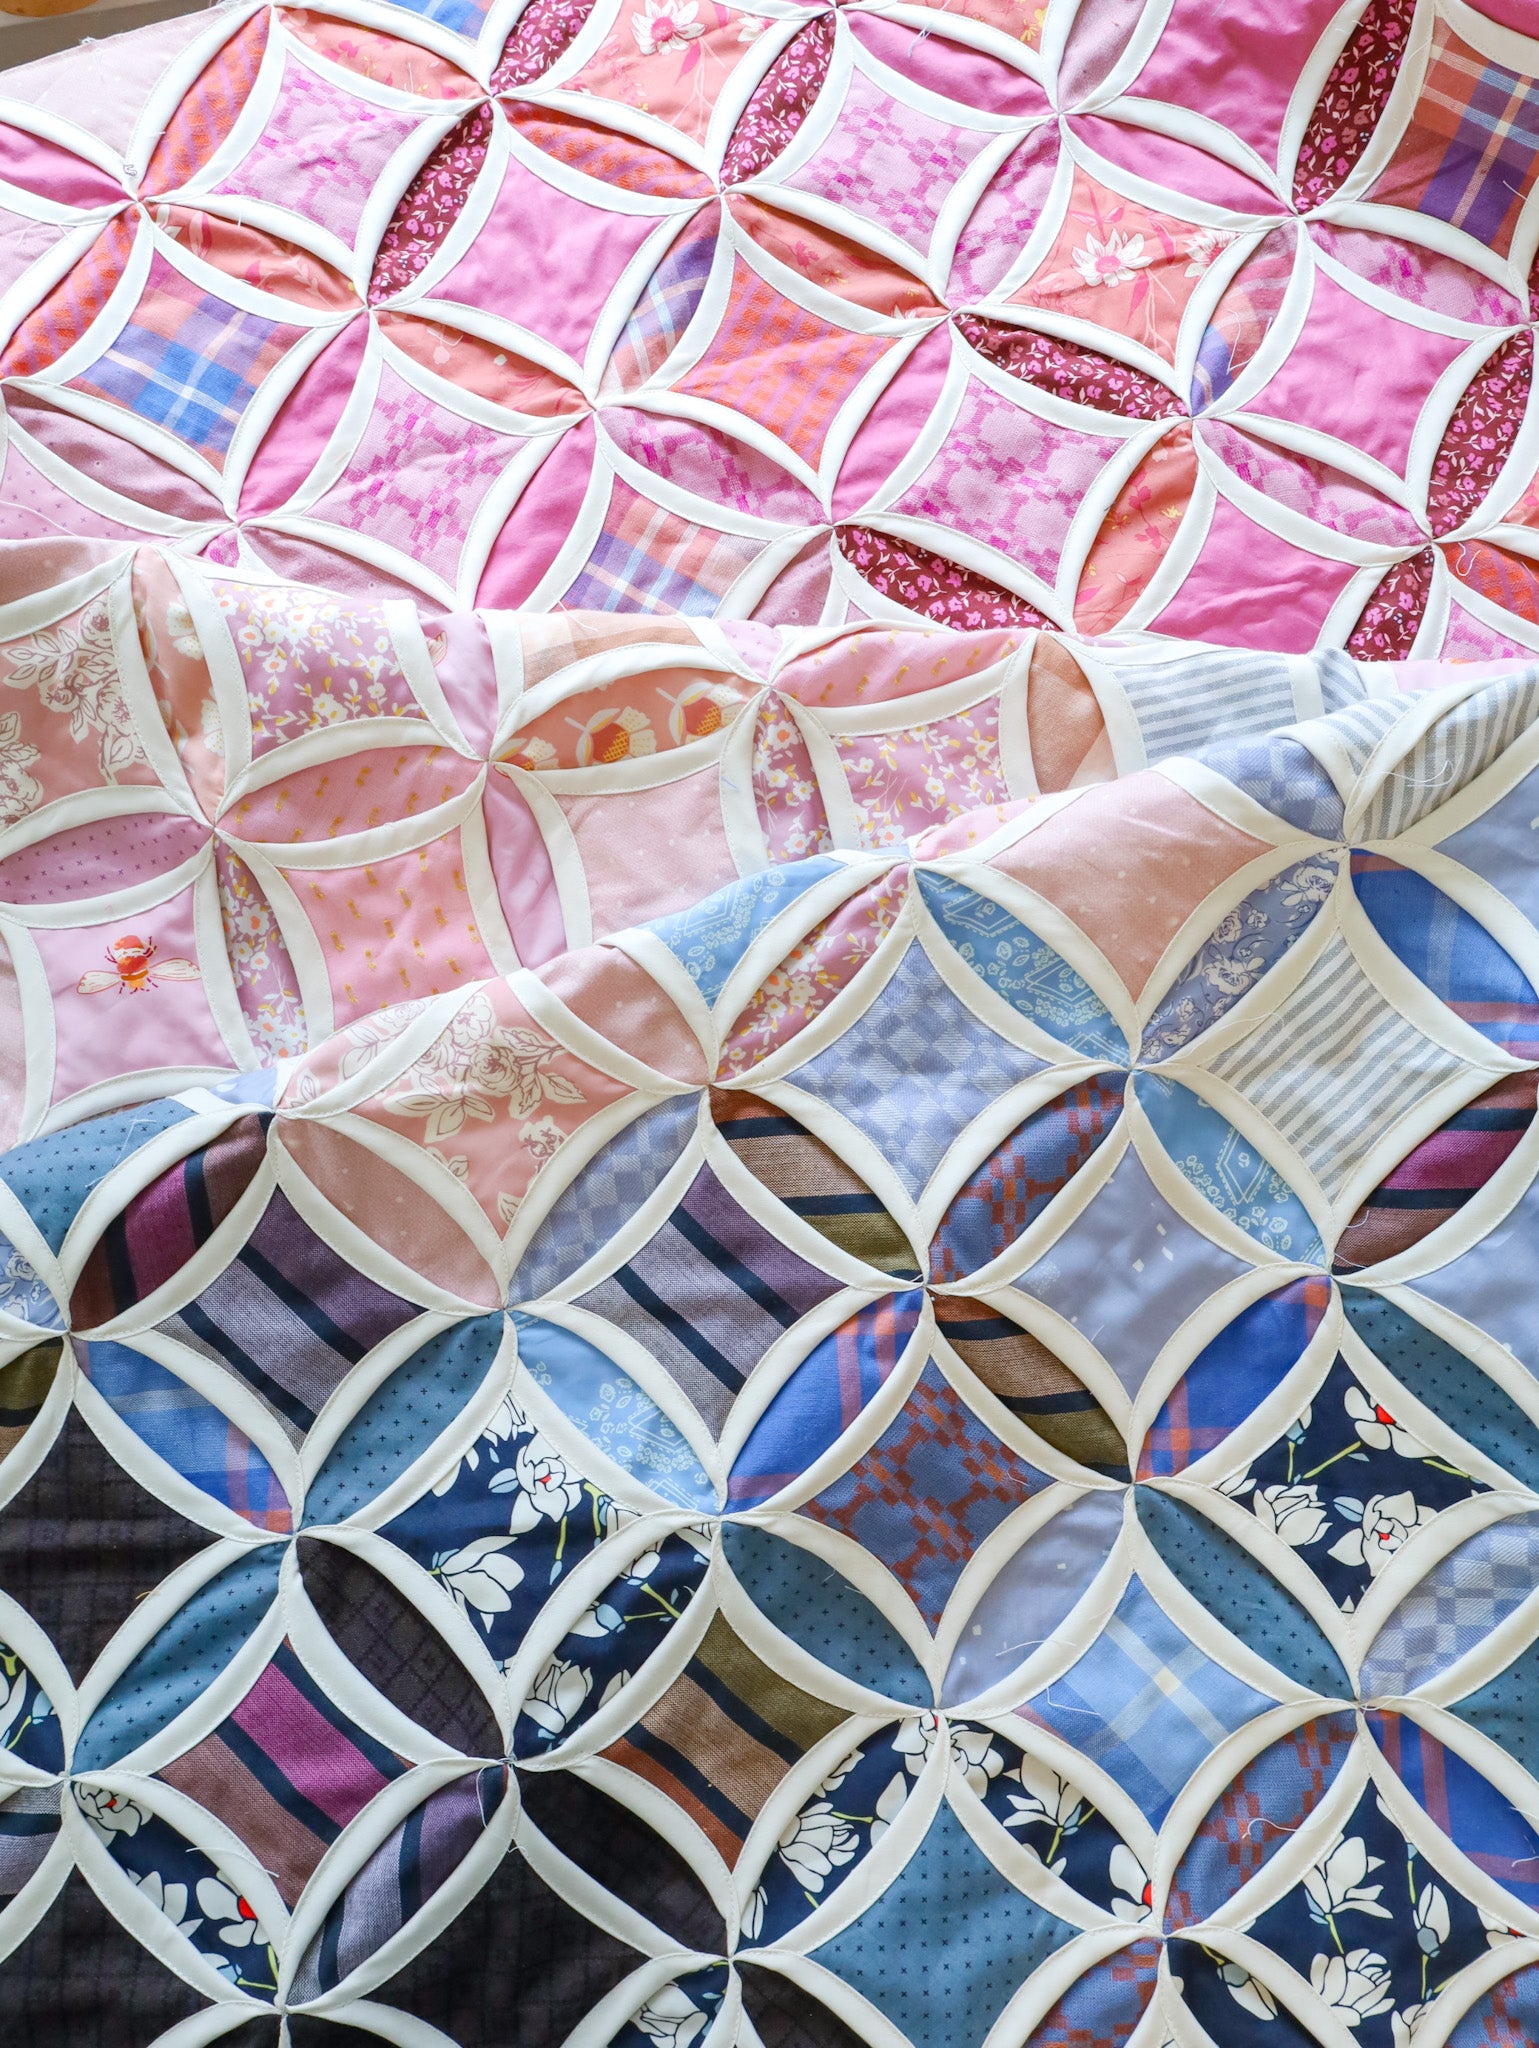
- Ability to change all fabrics, especially the background; traditional cathedral window methods typically have the Background (orange peel shape) the same as the Frames with the Window fabric being the accent. I really wanted to play with having all three components (Window, Frame, Background) as a stand-alone fabric that could be changed independently.
- Edge to edge windows; if you look at most of the quilts that I make, I typically like for the design to be edge to edge. I don't use a ton of borders or "setting squares"...I find that edge to edge feels a touch more modern, which I love. I wanted this quilt to feel the same way, which is why there are windows and half windows all the way up to the binding.
- Simplified construction; there are so many ways to construct cathedral windows. The method that my grandmother likely used probably started with a much larger square, which after lots of folding turned into multiple frames for multiple windows. My construction is much more simplified approach by creating "pocket units" which then turn into the frames on two edges of two different windows. Regardless of which cathedral window method you use, these quilts use up a LOT of fabric, but it creates a really nice "weighted blanket" effect.
You can find the FREE Scrappy Windows pattern here!
FABRIC REQUIREMENTS
Speaking of fabric, let's take a look at the fabric requirements.


Again, a big goal for this pattern was to be able to customize all components of the quilt. You can use fat quarters, precut 5 and 10" squares, or yardage. This means if you want your quilt to be completely scrappy you can do that! Or if you want a traditional 3-color quilt, you can do that too. The possibilities are truly endless!
You'll notice that the Frame fabric is really where you start to see those elevated requirements in the larger sizes. Since this quilt uses a special folding technique, most of the Frame fabric is hidden within your quilt. I really tried to think outside the box and come up with a way that would conserve fabric but it's just the nature of this quilt. You're going to use a lot of fabric, but I'd say it's worth it!
You'll also want to add batting as well. This quilt does have a "weighted" effect, so you could skip batting if you'd like. Personally, I didn't want to feel the bulky seams through the backing, so I opted to add batting. It'll definitely be a wintertime quilt, for sure!
Mock-Ups
The Scrappy Windows pattern includes so many fabulous mock-ups. Look at all of these beautiful possibilities!


Deciding on a Layout
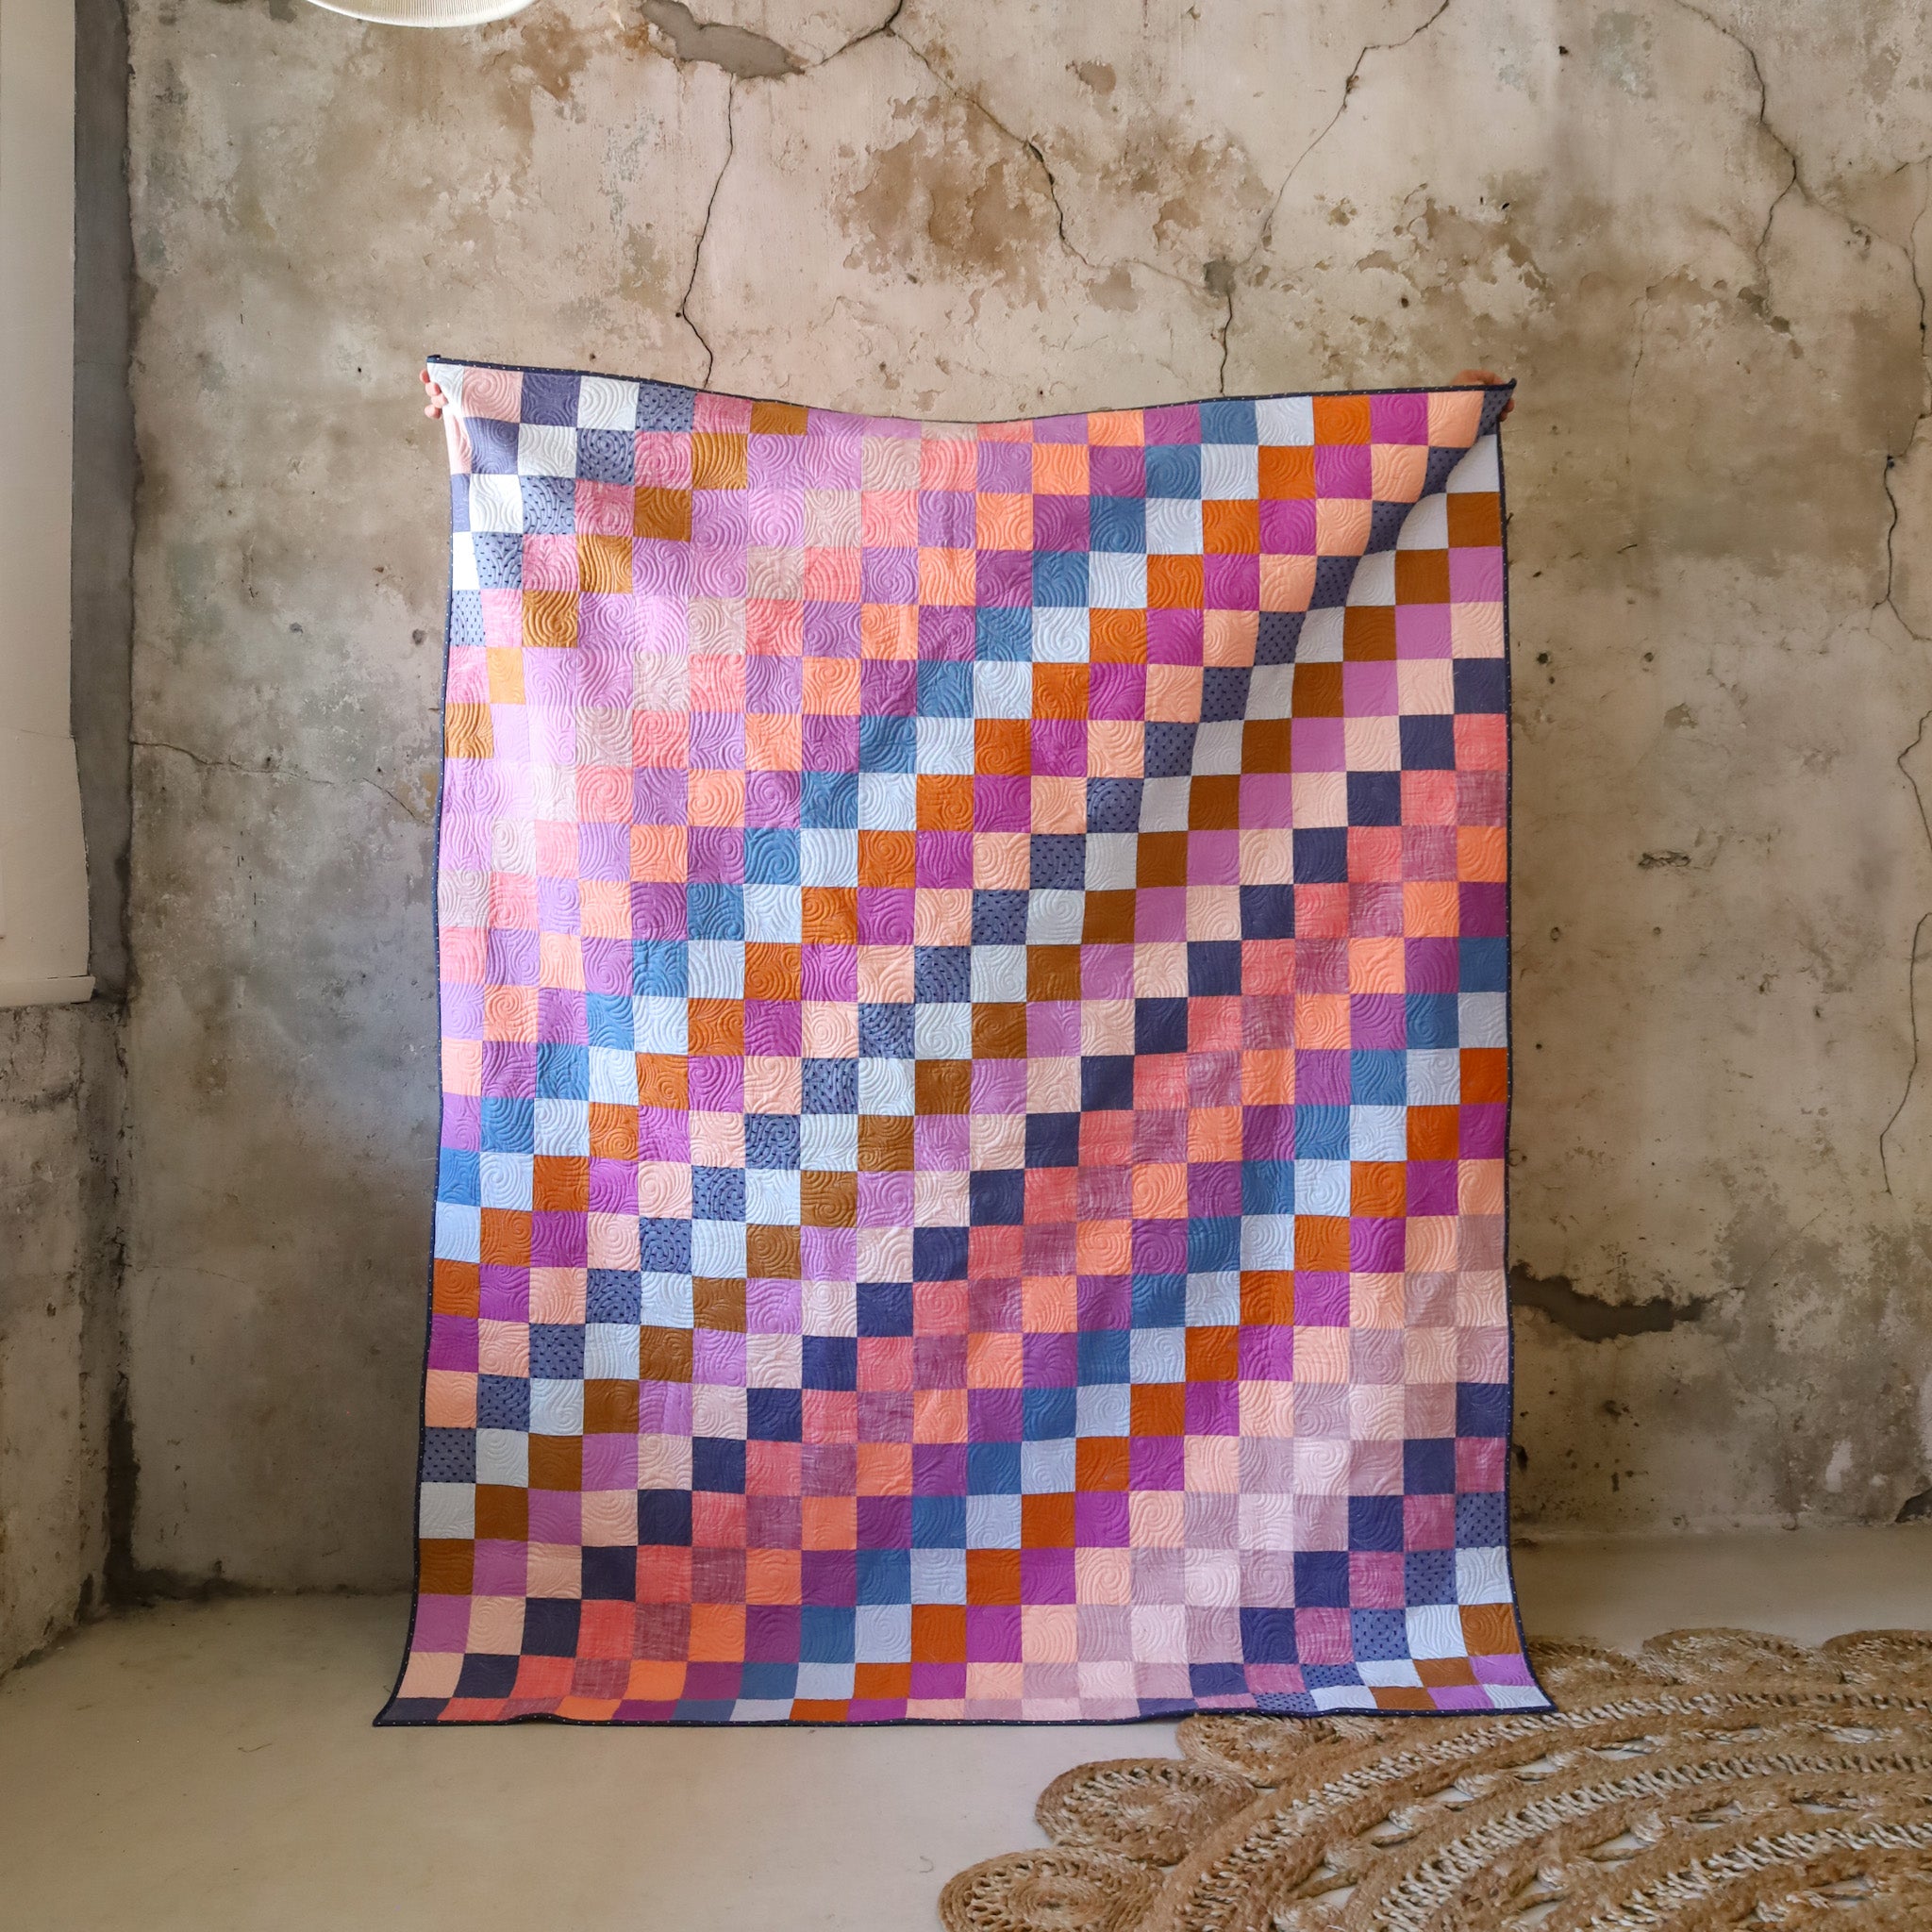
Similar to my Ombre Puff Quilt, I wanted this one to have flow-y ombre layout. I recently designed a bundle that had blues, purples and some blacks and I knew that I wanted those dusty muted tones to be the starting point for this quilt!


Find this exact kit for the Large Throw, Small Throw or Baby size in our shop!
So I positioned the darker plums and pinks in one corner, had them fade to lavenders and light blues with the darker black fabrics in the opposite corner. LOVE. This felt playful and random, yet extremely organized and satisfying.


If you're wanting to create something similar, I have a blog post called "Tips for Creating an Ombre Quilt" that might help!
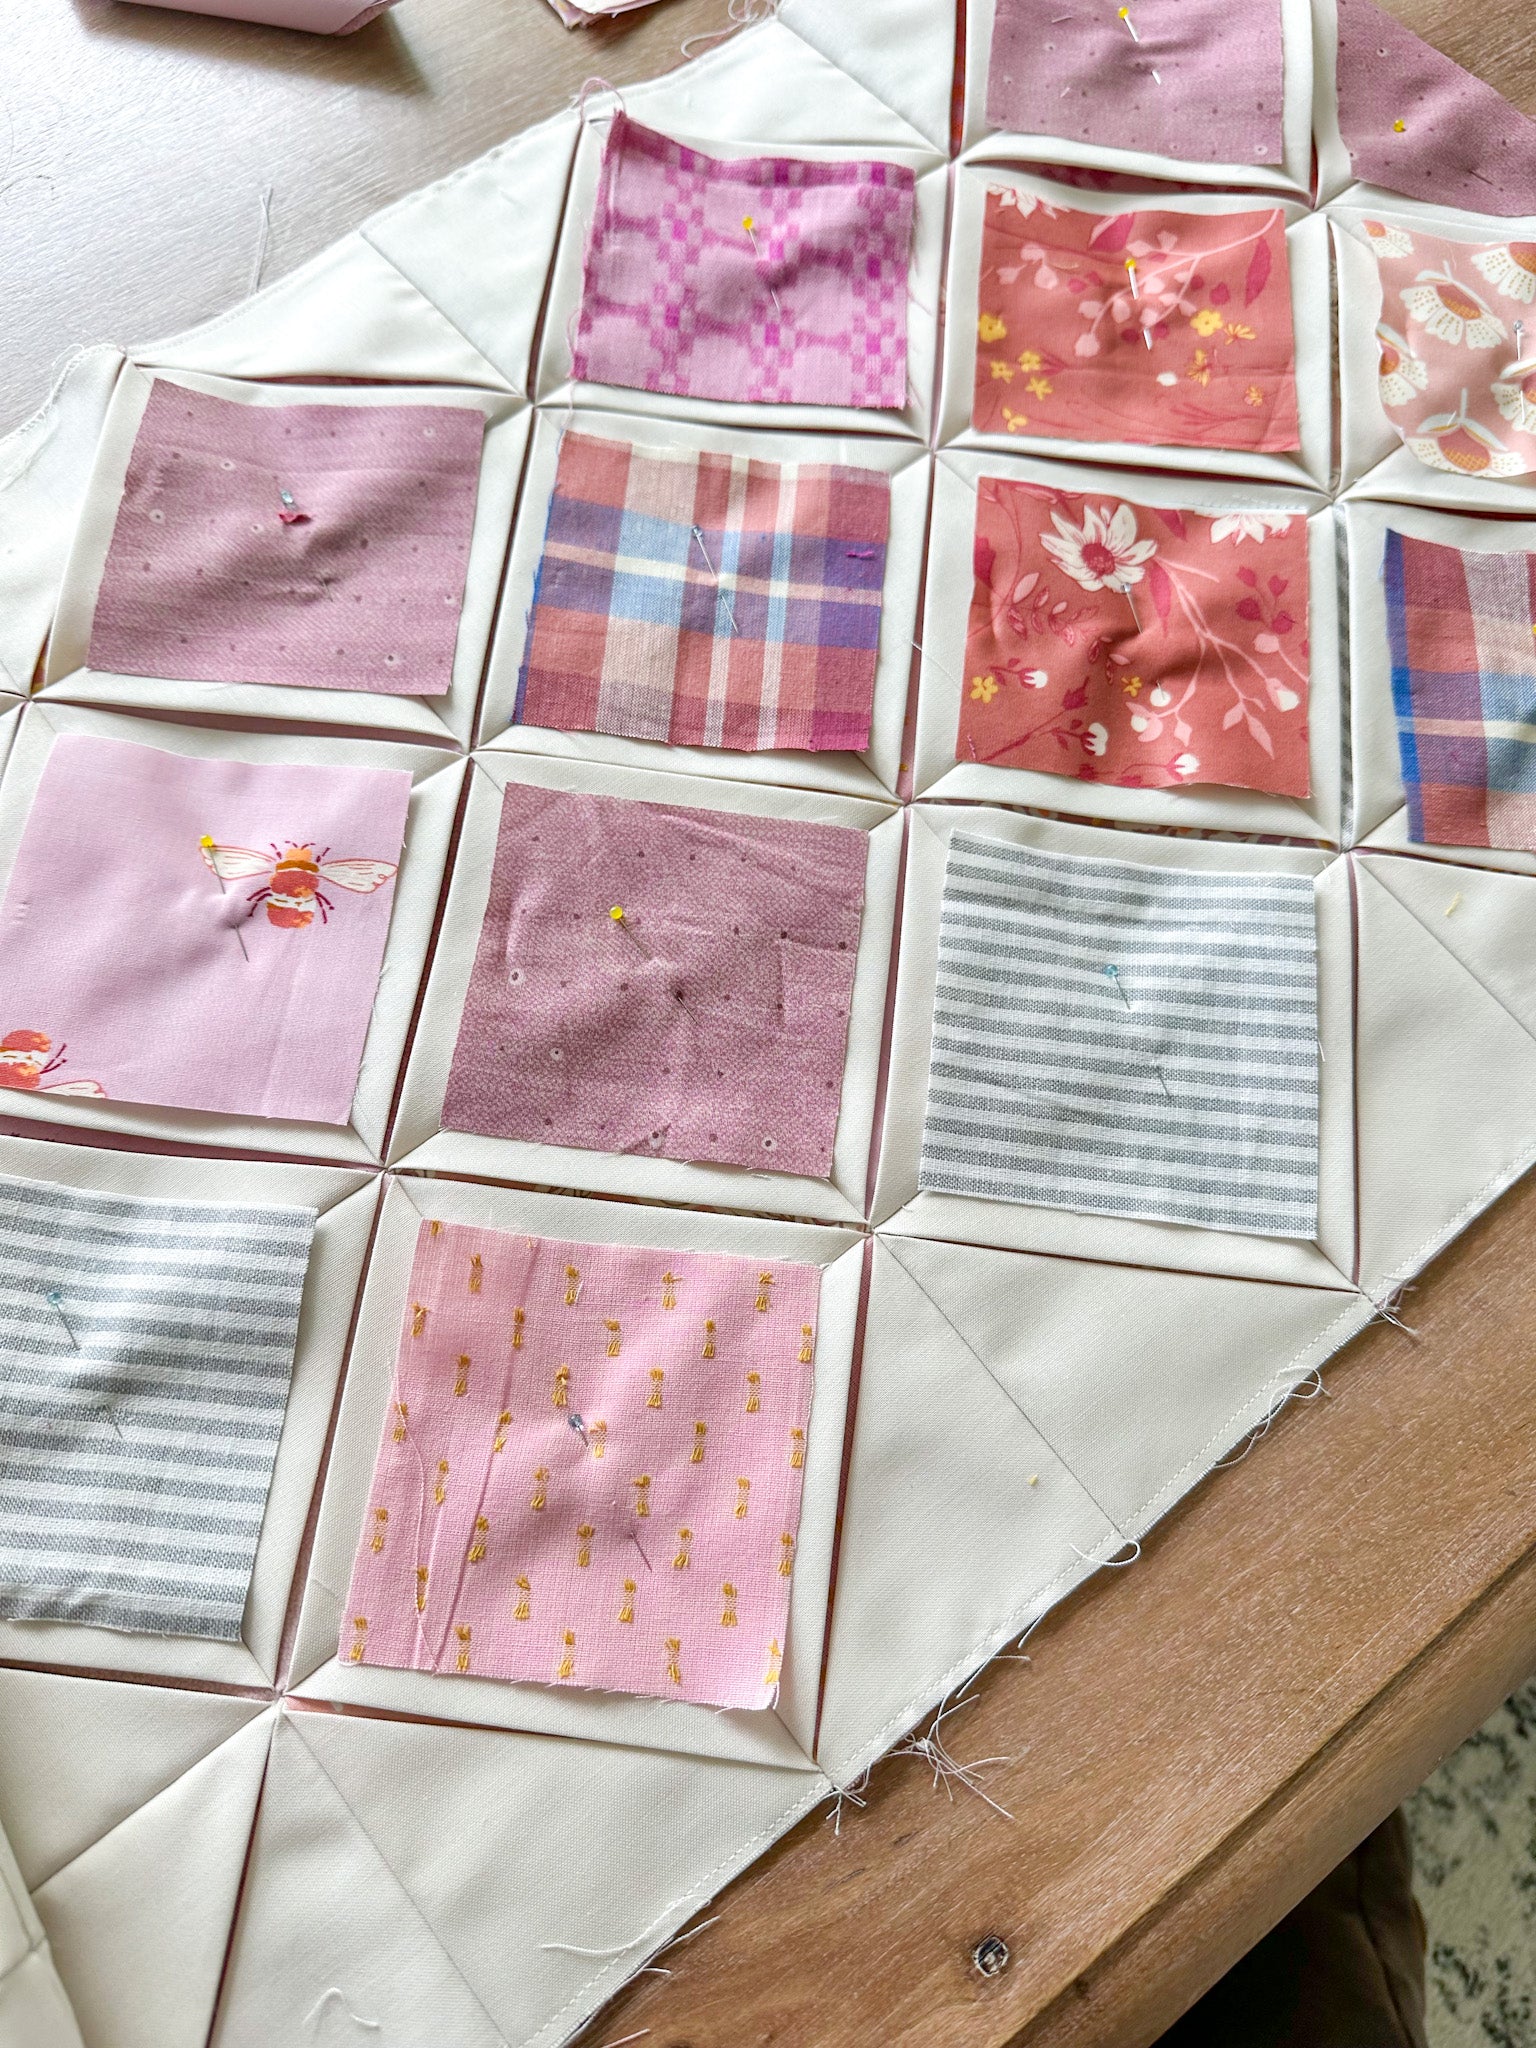
I combined my Window and Background fabric requirement, so for the Large Throw, I needed at least 24 total fabrics. I found that since I was doing an overall ombre layout, it was helpful to lay out my squares before I started creating my pocket units. So I laid out my Background Squares (all 110 of them) to decide where each would appear within my quilt. This was a big undertaking but so worth it to plan out! Then I added my window pieces at a diagonal to plan those as well. At this point, it feels SO busy and chaotic but remember that there will be the "Frame" fabric to separate everything.


Staying Organized
After about two hours of tweaking this layout, I finally had it figured out! I then picked up each row, careful to keep them all in the same order, labeled each row, keeping the Background rows and Window rows separate. I kept them organized until I was ready to sew my Pockets for each row. I found that this step was crucial, especially for the larger sizes!


This is where the Frame fabric comes into play. After you cut those squares, you'll fold them in half diagonally and use your iron to press a crease. Remember that this is the largest amount of fabric in your quilt, but it's probably the fabric that you see the least once your quilt is constructed. Wild, right?
These squares can get overwhelming, so I recommend splitting up the process and recruiting help if you need it! For the Large Throw, I needed 800+ squares pressed in half like this, so I recruited my hubby Peter to help with the task. :)


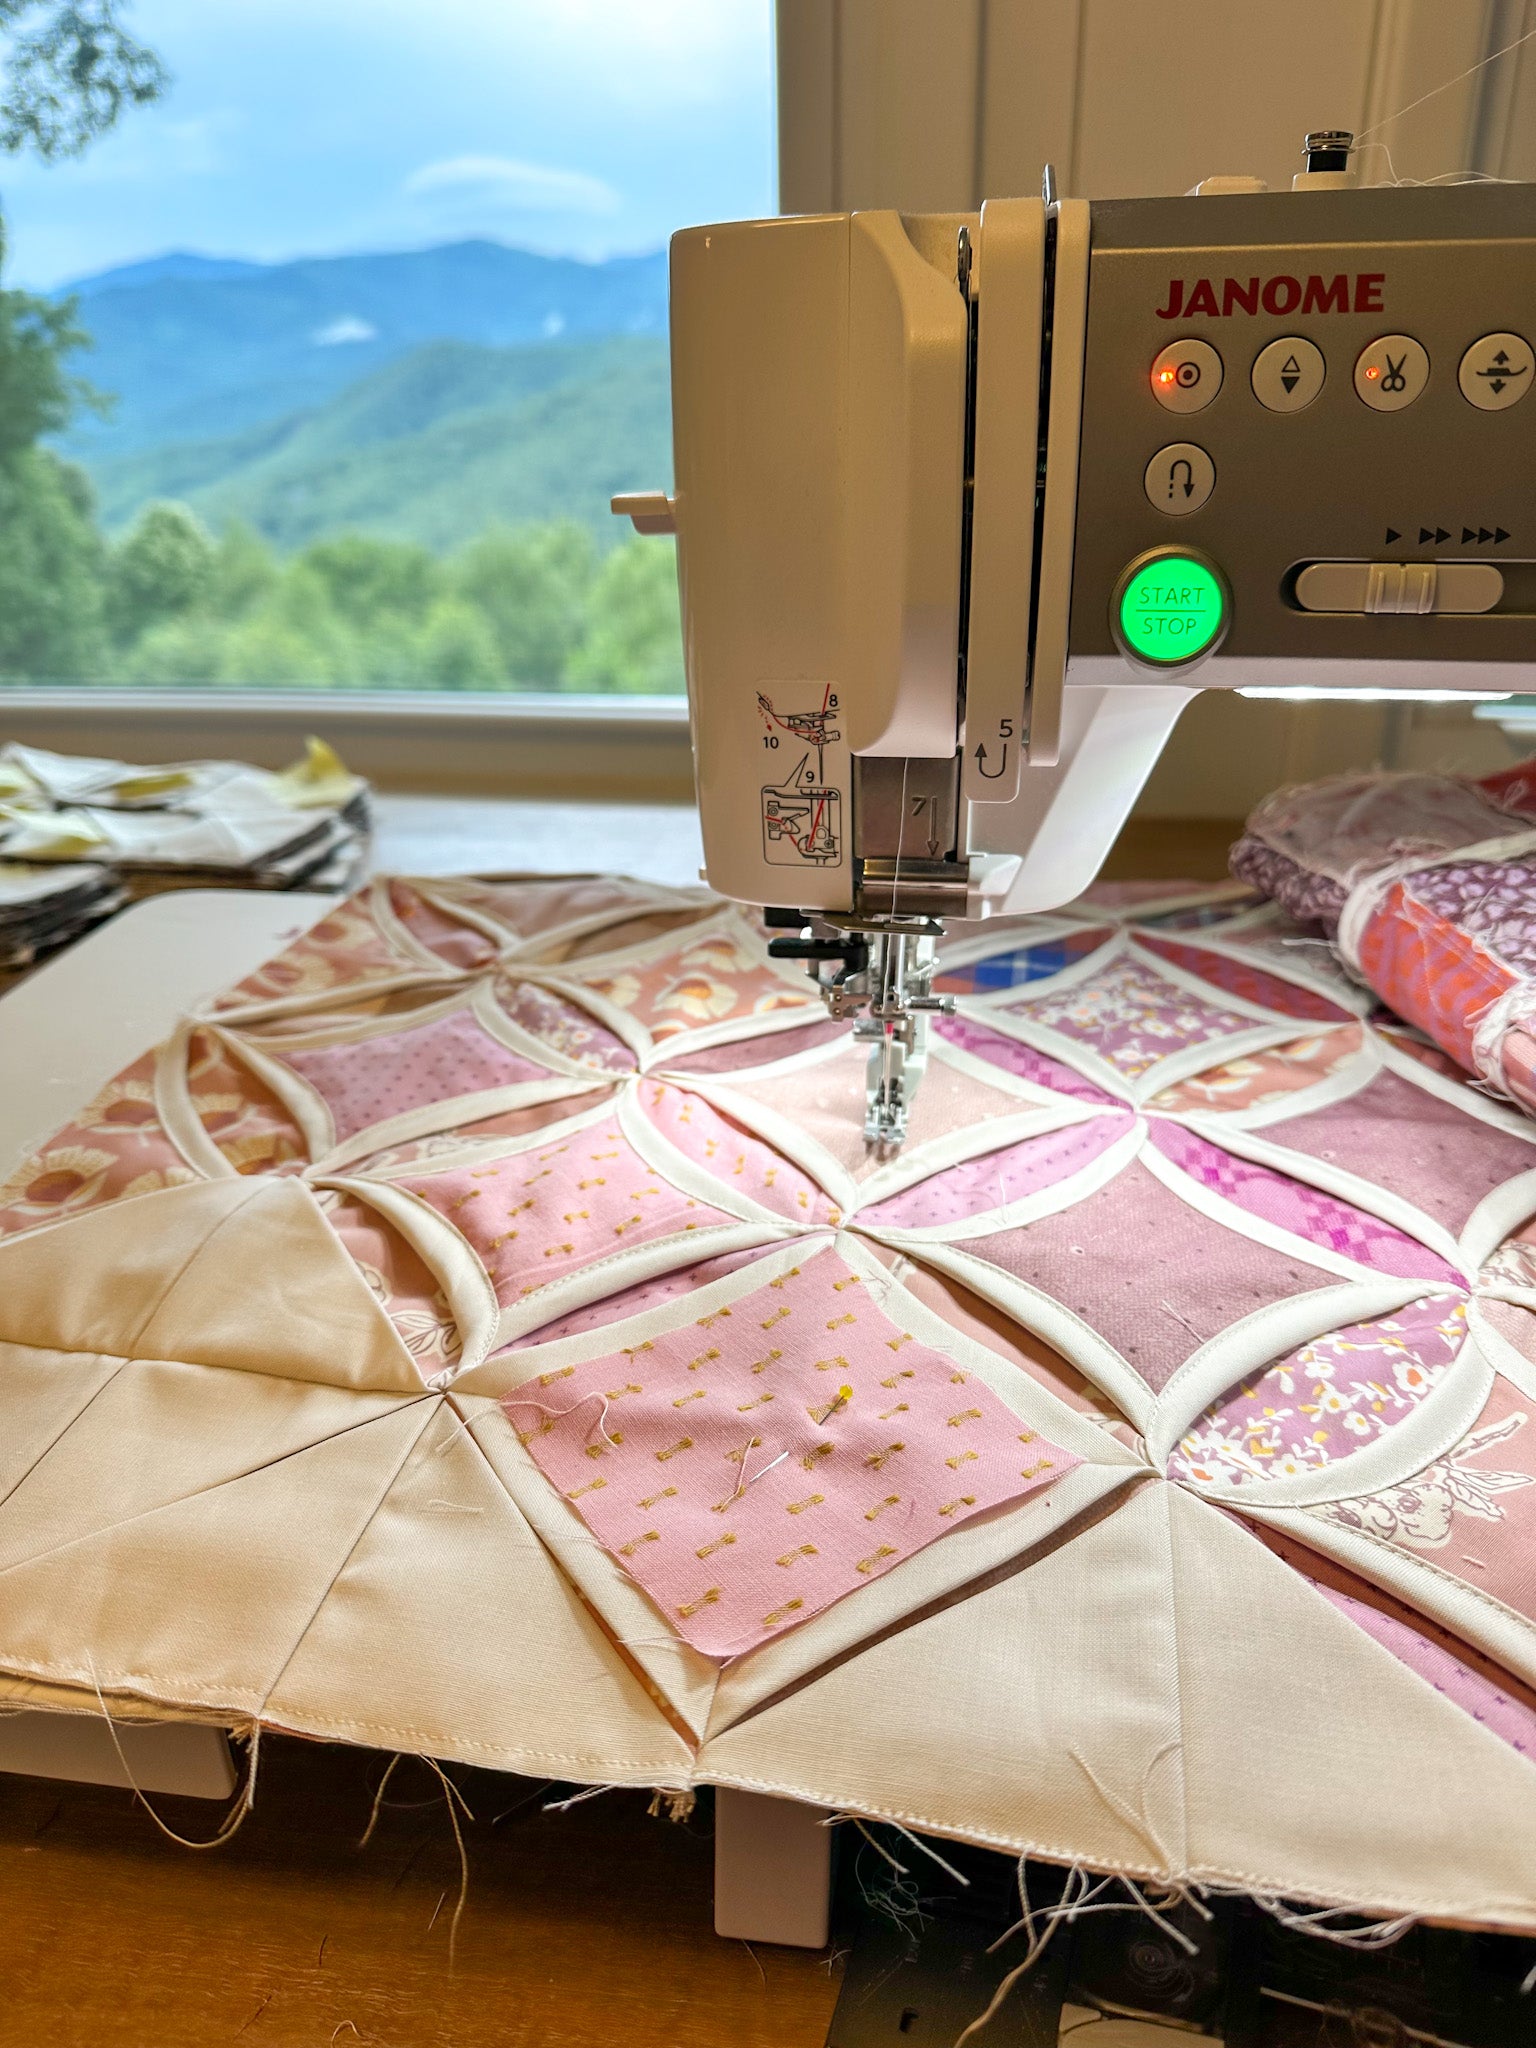
Stitch 1/8" around the perimeter of this unit to create what the pattern calls a "pocket". Moving forward, I created all of my Pockets for Row 1, sewed those together, then repeated for the rest of the rows until all of my rows were created. There are more details about this step in the free pattern found here.

Once you have all of your "Pockets" made, sew the pockets together in a certain configuration (again, it's in the pattern) to create rows like this:


Since I made a larger size, I decided to construct my quilt top in sections. So once I had about 4-6 Rows made, I would sew them together and add my Window pieces. Then I sewed my sections together and added those final Window pieces that were in between the sections.
You'll have raw seams underneath this unit, which is slightly different from traditional cathedral window methods, but this just means you'll baste and quilt this quilt like you would any other quilt top.

I found that using these red clips help manage the bulk and weight of my section as I was sewing.


Special Considerations
Here are a couple of sewing machine settings that I found helpful when creating this quilt:
- The ability to stop with the needle in the down position; you'll be pivoting a LOT with this quilt, so this was extremely helpful! If you can program your sewing machine to automatically stop with the needle in the down position, that's great! If not, I recommend turning the hand wheel to put the needle down prior to pivoting.
- Using some sort of walking foot or "even feed" foot; I used my HP2 presser foot, which has an "even feed" component. Since there are so many layers in this quilt, this kind of foot really helps move everything through the machine evenly.
- The ability for your presser foot to automatically rise when you stop; this isn't required by any means, but you will be raising and lowering your presser foot quite a bit. An alternative to this is a knee lift!
- Quilting needles; you'll definitely want a sewing machine needle that is meant for sewing through many layers of fabric. a 90/14 Quilting Needle is perfect; you might also find that you need to change your needle more frequently than normal, since you are sewing through so many layers.
Other tips that I found helpful:
- Read the Scrappy Windows pattern cover to cover before you get started. There are lots of important details within the pattern that you don't want to miss.
- Working in sections really is crucial for the larger sizes!
- Take lots of breaks! This quilt is heavy, so take your time
- Enjoy the process! This is not a fast make, so you might as well slow down and have fun. :)


Basting + Batting Tips:
I basted this quilt on my table in two sections. I used curved safety pins in the Background fabric because the Window fabric has all of the extra fabric layers. I used Quilters Dream Select batting, which is a medium loft batting. If you want something lighter than this, you can use Quilters Dream Request batting or no batting at all.

Quilting Methods:
There are a few different ways you can quilt this quilt. If I was making a smaller size, I would've quilted my quilt while I stitched down the Frame fabric. But this would've meant that I couldn't construct the quilt in sections, which I feel is crucial to the larger size, so I basted and quilted after my quilt top was constructed, per usual.
Originally, I was planning to "clasp stitch" quilt, which is basically a zig-zag stitch back and forth in a small area. Some machines have this setting and some machines don't so be sure to check out your sewing machine manual to see if it's an option. I did this as my primary form of quilting for this puff quilt (click for details), and I had the entire Large Throw quilt quilted in just a few hours. It was amazing!
I tried this method for a few rows on this quilt. I hid the clasp stitch underneath the Frames so that it wouldn't be visible.

I also wanted to try "hand tying" this quilt and I actually didn't think I'd like it as much as I did. I stitched a little "x" at the intersection of each of the Frames and it added the cutest little handmade touch. I used a white pearl cotton (#8) thread for this and I stitched at each intersection of the Frames. (This will also be in the video tutorial for the QAL).

I opted to quilt the rest of my quilt with ties. They seem to take the same amount of time as the clasp stitch and I really like the embellishment that they add!
Another quilting option is to hand quilt in the Background section. Again, the Window fabric has all of the extra layers underneath, so I think the Background fabric would be a little easier to hand quilt through.
You could also machine quilt if you'd like, I would just want to make sure that I don't stitch over the Frame portions of the quilt.
Binding
I added my binding to this quilt just like I would any other quilt. The only difference is that I used 2.5" strips, when I usually use 2.25" strips. You also want to make sure that you cover up the Frame intersections as seen below to make sure that your half window is secured within your binding. I decided to hand-stitch my binding to the back of my quilt using 8 weight pearl cotton thread.
I also decided to stitch around the perimeter of the quilt top prior to trimming away the excess batting and backing.


Overall Thoughts
This is truly an heirloom quality quilt which will be used and passed down for generations. It is time-consuming yes, but it's on a completely different level than most of my other quilts. I love how intricate it is and I'm so thrilled to follow in my Granny's footsteps to recreate a quilt that she originally made. This is the fourth quilt to be added to the Lois Quilt Collection, which you can read more about here.


Quilt Along
I hope that you'll join us for the Scrappy Windows Quilt Along! If you already get our newsletters, or if you signed up for the free pattern, then you're signed up and ready to go! If you don't yet get our emails, then you can sign up here and we'll touch base with the Week 1 content on August 19th!
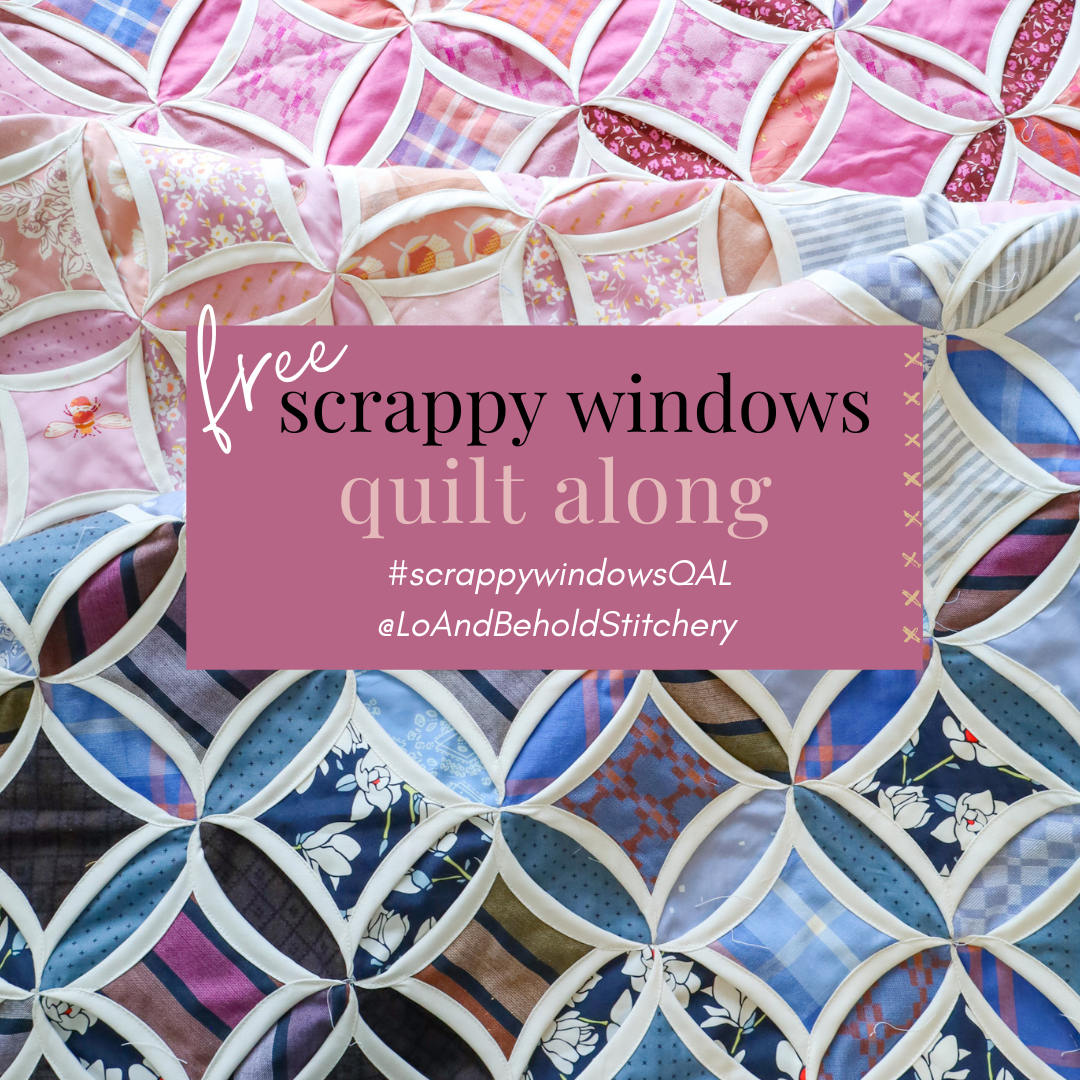

Feel free to save or screenshot the following image and share it to your social media account!

Again, you can find Quilt Kits for this quilt in our shop and the FREE Scrappy Windows pattern here. I cannot wait to see your Cathedral Windows quilts!