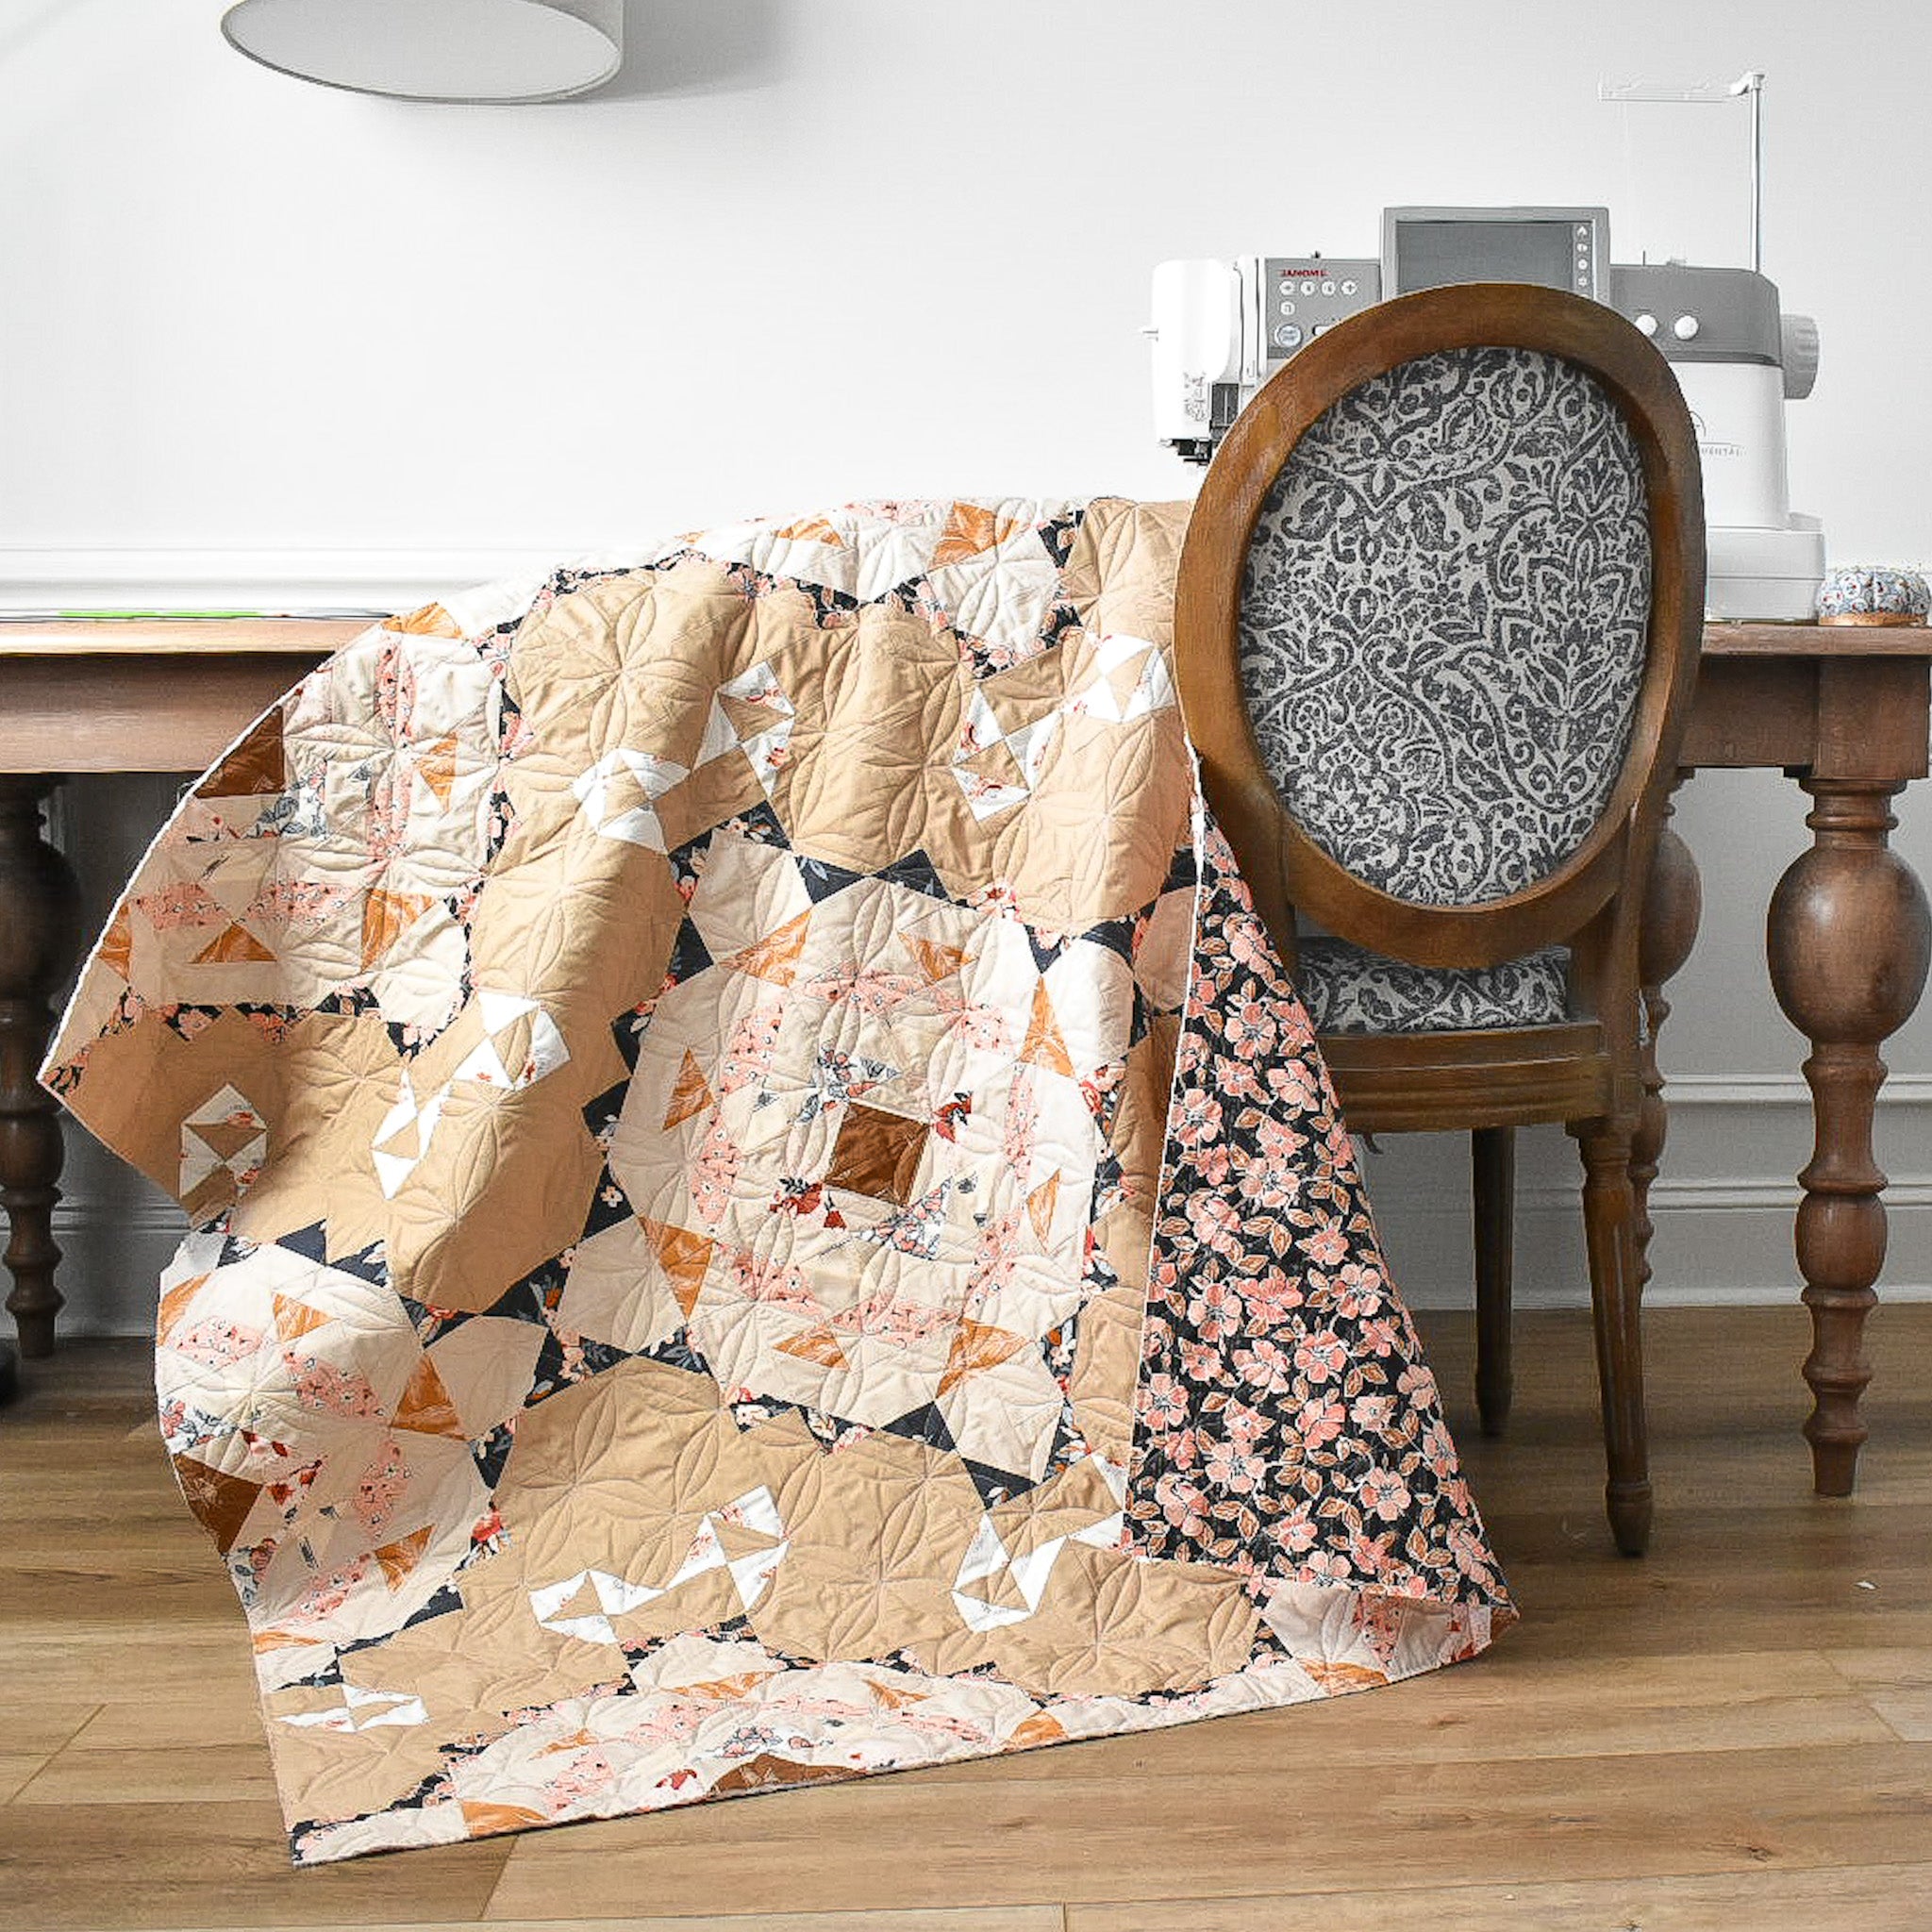
How to Repair Vintage Quilts - Vintage Quilt Blog Series, Part 1
This is the first installment of a three part series about vintage quilts. If you know me and my story, then you know that I've inherited several of my grandmother's quilts that she made several years ago. In fact, these very quilts are what inspired my Lois Quilt Collection, in which I put a modern spin on the traditional designs that she created. Right now, there are 3 quilts in the collection with more to come! My love of these treasured heirlooms is what inspired me to create this series to dive a little bit deeper into how we can love, repair and sometimes reuse our vintage quilts. This week, I'm going to talk a little about repairing vintage quilts. The other two installments will detail how to care for your quilt. Then finally I'll talk about ways that you can reuse a quilt that is beyond repair. Heres the timeline:
This post is all about how to repair a vintage quilt. Now, I'll be the first to admit that I am no expert on this subject; however, I did recently finish up a project that involved repairing an older, well-loved quilt. This post is going to give details about what I did for this specific quilt, but keep scrolling for REALLY great resources that you can refer to if you have a quilt that you are looking to repair as well. .

.
Several months ago, one of my neighbors kindly knocked on my door and asked for my thoughts about repairing her daughter's vintage quilt. Since I love heirloom quilts so much, I immediately knew that I wanted to fix it up....even though I've never done something like this before! I'm an emotional thinker.....I get extremely sentimental about certain things, and the thought of my neighbor having this revitalized quilt, made me super giddy and excited. I then asked to see the quilt, and reality struck. (hah!) I had my work cut out for me....
About the Antique Quilt
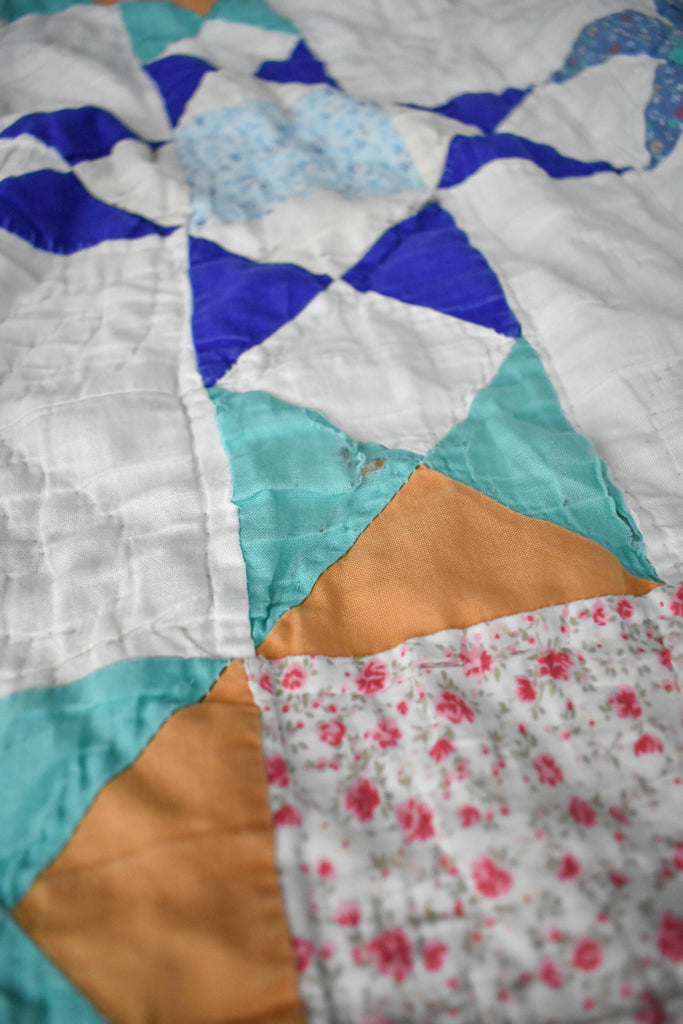
This quilt was almost 40 years old and was purchased from an Amish family's craft sale in upstate New York. It measured about 70" square and featured a classic Ohio Star quilt block. It was my neighbor's daughter's baby quilt, so it received a LOT of love over the years. The backing and background material felt like a stretchy gauze/muslin material. The main fabrics in the blocks felt like traditional quilting cotton. The binding was almost completely remove and there were various holes through the top and back of the quilt, which ranged 1" to 6".
.

.
What is your goal for the quilt?
Before I go any further, if you are thinking about repairing an older quilt, I want to pose a question. What is your goal for the quilt? Do you want it to be fully functional again? Or do you plan to keep it folded up neatly on a ladder or in a chest? The answer to this question will largely be determined by the state of your quilt and the degree of repairs that it needs, but it also needs to be realistic. I want to point out that if your quilt holds extreme sentimental value, or if you *really* want to keep as much authenticity to the quilt as you can, maybe consider retiring the quilt so that you no longer use it. You can also fold it and display it within your home. (I'll cover more about this in the coming weeks!) This family really wanted the quilt to be useable again, so that determined my approach. If this was a quilt that my grandmother made, I may or may not want to do minimal repairs just so that the quilt can be 100% from her. (Or maybe repairing the quilt would like a collaboration). There are different perspectives on this, so decide what your end goal is and go from there.
Again, I want to reiterate that this was my first time tackling anything like this. I pondered my game-plan for several weeks before I got started. The holes on the back were the biggest and most prevalent. I was faced with either patching up each of those holes individually or replacing the entire backing all together. I eventually decided to go with the latter because it would add durability and would be much quicker than patching everything up. Since I was replacing the backing, it made sense to replace the binding as well...and it needed it! For the holes in the quilt top, I did a mix of adding patches to the larger holes and doing a quick whip stitch to the smaller holes (which were mostly due to ripped seams).
.
.

.
Replacing the Batting and Backing
Since I decided to redo the backing and batting, I essentially had to re-baste the quilt. I briefly considered detaching the quilt top from the backing and batting, but that just seemed like WAY too much work. So, I proceeded with my normal quilt basting process, except instead of just a quilt top, I was basting the entire quilt to a new piece of batting and backing. For the backing, I used a subtle cream print by Sharon Holland for Art Gallery Fabrics called Bright Star Washed. The color was almost identical to the original backing, which was just a solid cream color.
As far as the batting goes, I didn't need to add another layer of batting, since the batting that was already in the quilt was still intact, but the owner of the quilt said that she wanted the quilt to be thicker, so I went ahead an added another layer. Since the old batting was still in the quilt, I used the thinnest Quilter's Dream batting that they offer. With the two battings combined, the quilt ended up having such a nice loft to it! You can read about my general basting process here. I tried to use as minimal pins as possible in efforts to decrease the amount of holes that I created in the delicate quilt top. This made quilting a little bit trickier, but honestly, I don't know any other way around it. Due to the weight of the existing quilt, I didn't think that spray baste would really do it's job, so I stuck with the pins. Thread basting is another alternative!
.

.
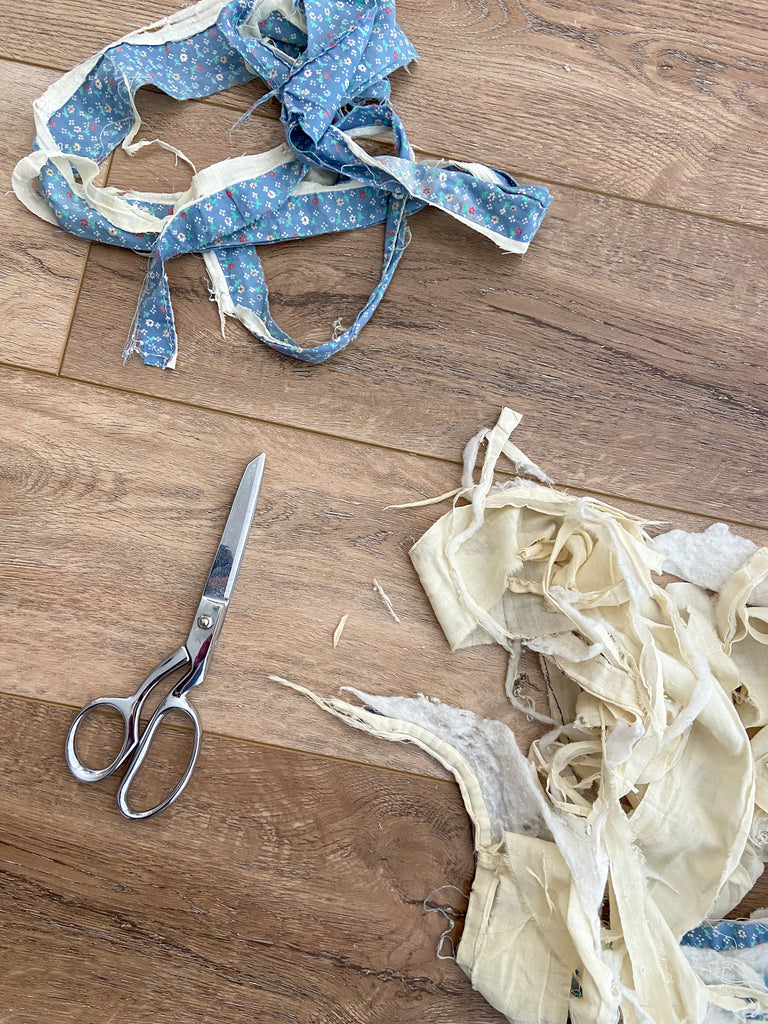
The entire perimeter of the quilt was falling apart. In some areas I had to trim away a substantial amount of quilt. I did end up saving the original binding to reuse for later. Keep scrolling and you'll see!
.

.

.
Re-Quilting the new Quilt Sandwich
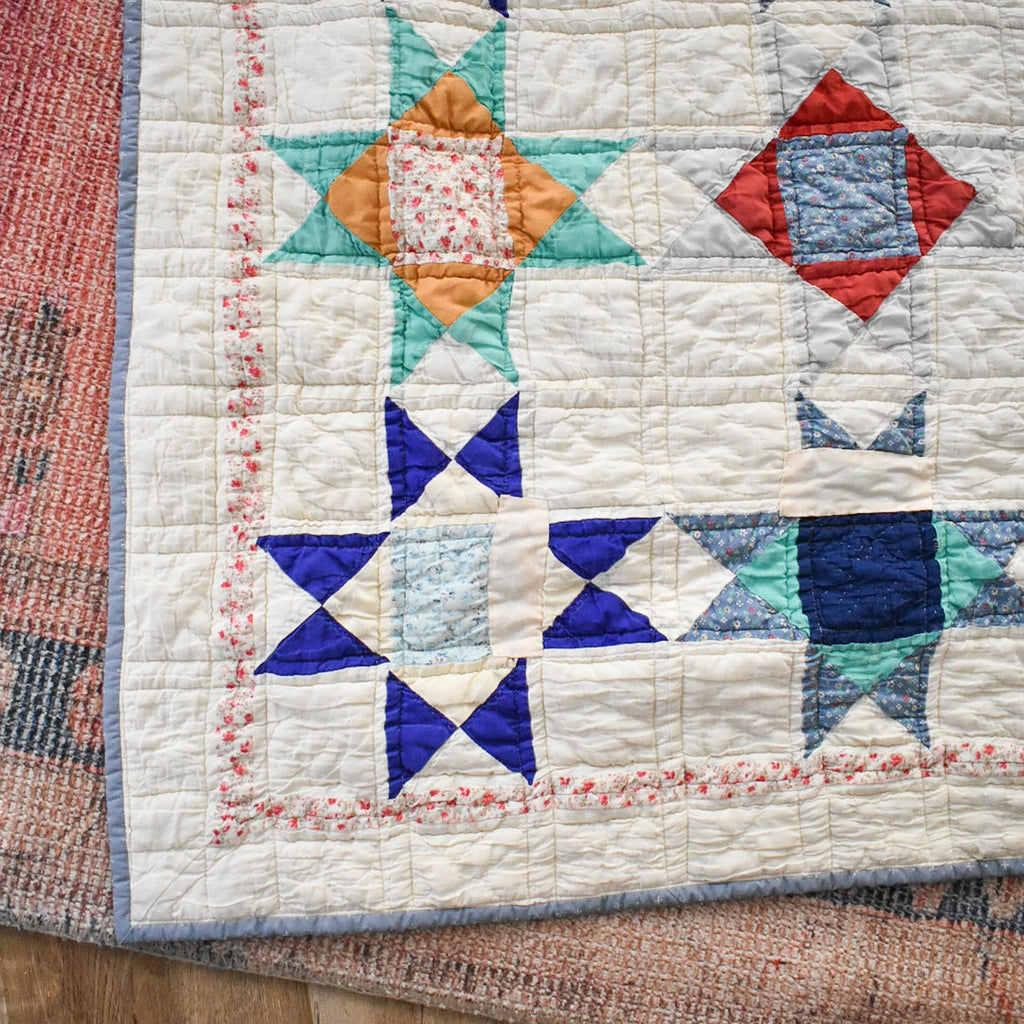
Once the new quilt sandwich was basted, I used my Janome 6700P and my even feed presser foot, and I quilted straight lines that were 1/4" away from the vertical and horizontal seams of the blocks. In hindsight, I could've patched up the quilt top FIRST, then re-quilted it....but my main priority was to stabilize the quilt so that that process would be easier. Since the quilt top was so warped and stretchy, there were some areas that puckered with my machine quilting. Again, my main focus was to get it durable and useable again. If you prefer a more minimal approach, you could hand quilt or hand-tie the new backing/batting.
.

.
Re-Binding the new Quilt Sandwich
I chose a new binding fabric that was similar to the original binding fabric. Since the batting was extra-thick now, I used WOF strips that are 3", which is a lot larger than my normal 2.25" bindings. This ensured that I had enough fabric to wrap around the edge of the quilt. I machine stitched the binding onto the front of the quilt, then machine stitched the binding onto the back of the quilt as well. You can find my machine binding tutorial here.
.

.

.
Repairing the Quilt Top
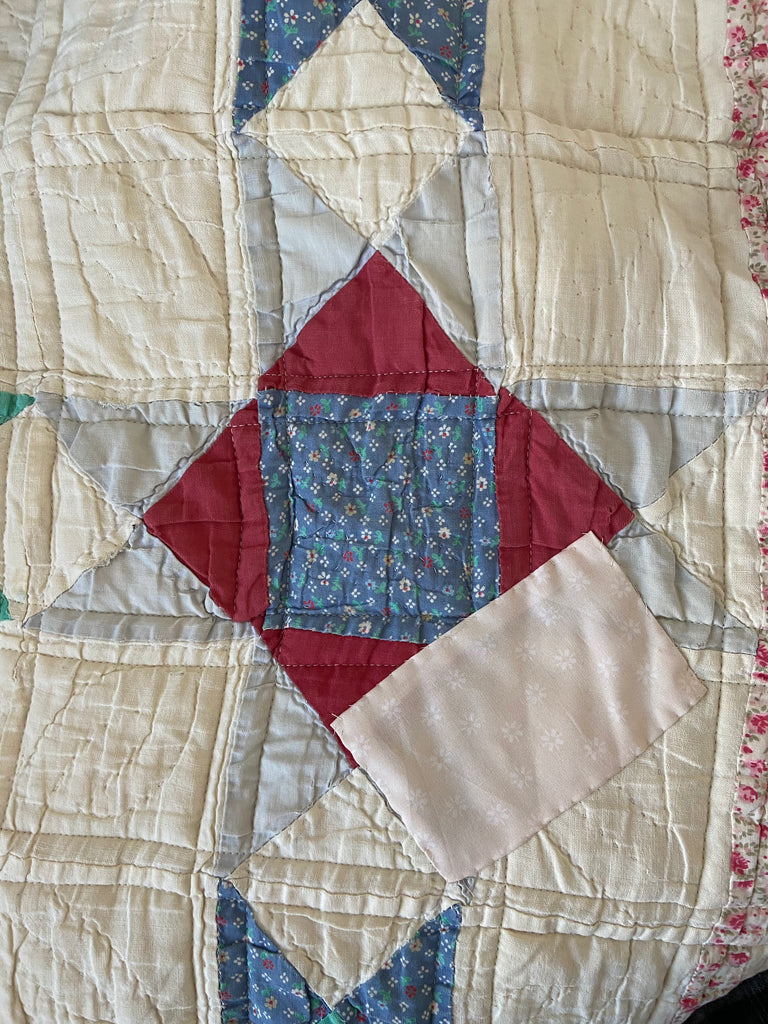
Like I said previously, I might have done this out of order, but with the edges of the quilt and the backing practically in shreds, it seemed like it'd be so much easier to handle the quilt once it was cleaned up a little bit. For the larger holes, I used patches. Essentially, I measured the hole, then cut a pre-washed square or rectangle fabric about 1" larger than the size of the hole. I turned in the edges of the fabric about 1/4" and ironed a crease around the perimeter of the patch. Then I placed the patch right side up over the hole and used a sewing needle and thread (50 weight Aurifil) to whip stitch around the perimeter of the patch. I am NOT a hand-sewer. I do not have the consistency nor accuracy to make my stitches look pretty, but using a matching thread helps the stitches blend in. You could also machine appliqué around the perimeter of the patch, just know that you'll see those stitches on the other side. Again, if I would've done this step before adding the new backing, machine appliqué might've been a quicker alternative!
.
.
If you want the patch to be more discrete, I've linked to a few resources that talk about re-applique, which is a technique in which us us a similar fabric to create a patch that matches the shapes within the quilt. I recommend checking that out!
There were a lot of smaller holes in this quilt as well. Basically every quilt block had at least one large hole (which got a patch) and 5-7 smaller holes. Instead of creating a patch for each individual 1-2" hole, I created sort of a whip stitch/ loose satin stitch, just to hold the fabrics in place. If possible, I made sure that the fabrics were folded underneath the seam before I did this. I was sure to include the layers of batting in my stitching to stabilize that area even more. I explained to the owner the the quilt should probably never be washed again. Only spot cleaning from now on!
.

I contemplated doing a tighter satin stitch to help secure the seam even more, but the fabrics were so thin and thread bare in some areas, I figured that this would likely just create larger holes in the quilt. A lot of this process is just spending time with the quilt and brainstorming solutions based on what you are seeing in the quilt. This is SO different from quilt to quilt, so trust your intuition with this process.
.
What do you do for a Hole through the Entire Quilt?
My childhood pup, Ginger, chewed a whole in this double wedding ring quilt that my grandmother made for my dad. I remember being SO heartbroken and devastated over this....at the time, a hole seemed like such a big deal! Granny didn't really seem phased by it though. She brought the quilt home, spent a couple of days repairing it and voila! I didn't know how she did it at the time (other than that pure granny magic), but now that I have a little bit of quilty knowledge, I think I have a theory!
.

.
The patch feels extra fluffy, which leads me to believe that she sewed a patch on one side of the quilt to cover the hole, then added some poly-fil batting (the same that she used for my puff quilt). This poly-fil batting likely hid the fact there was a huge chunk of batting missing from the quilt, which would've likely been felt through the patch otherwise. Then she sewed the second patch over the hole filled with poly-fill and voila! The area is ever-so-slightly more puffy than the rest of the quilt, but I definitely think she made the right decision!
The chit .
The End Result
Back to my neighbor's quilt repair! In the end, I probably spent close to 50 or 60 hours on this project. The new quilt was much heavier and overall, it felt so much more durable with a new backing! Some of the fabrics on the quilt top remained threadbare, but I tried to add as many patches as I could without patching up the entire quilt top. Knotting off my thread was a little bit of an issue, just because the fabrics were SO stretched out and threadbare. The background fabric was very "gauzy" and I had a really hard time getting a knot to stay in place. Burying the knot in the layers of batting definitely helped, but this sometimes took a few tries. Bottom line, I really like how it turned out and so did the owners. :) It was fun to breathe new life into a very old quilt!
.

.

.

.

.
.

.

.
Remember the old binding strips? I used those as a ribbon to roll up the newly repaired quilt to gift back to the owner. :)
.

.

.
Techniques and Resources for Repairing a Vintage Quilt
Before I started repairing this quilt, I spent a LOT of time doing research. There are so many helpful blog posts and videos out there....so I wanted to link to my favorite ones that helped me the most!
- Quilt Restoration Facebook Group - There are so many great photos, questions and comments within this group. Scrolling through the page, there are a lot of discussions around best practice for repairing older quilts. If you have any specific questions about something, or if you simply want to admire all of the older quits and be a part of the discussion, I highly joining recommend this group!
- Well Loved Quilt Repair - Carole of My Carolina Home offers a quilt repair service. She's located in Western North Carolina, but also accepts mail-in quilts. Her services are currently suspended due to COVID, but she plans to re-open this summer! She also has several informative blog posts about quilt repairs!
Note: If you are looking for someone else to repair your quilt but you do not wish to put your quilt in the mail, that is totally understandable! Upon writing this blog post, I've come across several companies that repair quilts. Consider searching the internet for quilt repair businesses in your city or state. Maybe you can find one close by!
- This blog post by Darcy Quilts is EXCELLENT in explaining different approaches to various types of damage.
- Quilty has a really great video on the Fons & Porter You-Tube channel that covers three different ways to repair an older, well-loved quilt. They discuss tacking, re-applique and bonding.
- Piecework Magazine has another quick example of how to re-applique certain pieces within the quilt.
As you can gather there are a lot of factors that go into a quilt repair! Start out by thinking about your overall goal....do you want durability, or would you rather keep as much of the quilt as "true to character" as you can? Then depending on the type of damage, choose the appropriate repair method. Next week, I'll be talking about how to care for older quilts, specifically regarding storage, washing and folding. :) I'll see you then!
Brittany
.
PS- Have you ever tackled a quilt repair? I'd love to hear about it!