Quick & Easy Envelope Pillow Tutorial - How to Make a Pillow from a Quilt Block
Sometimes I love making big, detailed projects (like my Homespun quilts)...but other times, I just want a quick project I can knock out in a couple hours. (In fact, I first published this tutorial back in 2020 during the first weeks of lockdown, when all I could handle were small projects.) And if that quick project gives me a beautiful piece of home decor I can use for years to come? Even better!
Quilted pillows are one of my favorite small projects…and today I’m going to show you exactly how I make them! You can use this tutorial with any pillow-sized quilt pattern, or really any orphan blocks you have sitting around.
Ready?
TABLE OF CONTENTS
- How to make a quilted envelope pillow cover
- Recommended patterns for quilted pillows
- You may also like
- FAQ about sewing quilted pillows
Tutorial: How to make a quilted envelope pillow cover
We’re going to make an envelope pillow cover with clean finishes (so it looks nice and lasts)…but don’t worry, you don’t need any extra supplies, and you can use your regular sewing machine, no special stitches needed.
Let’s get started!
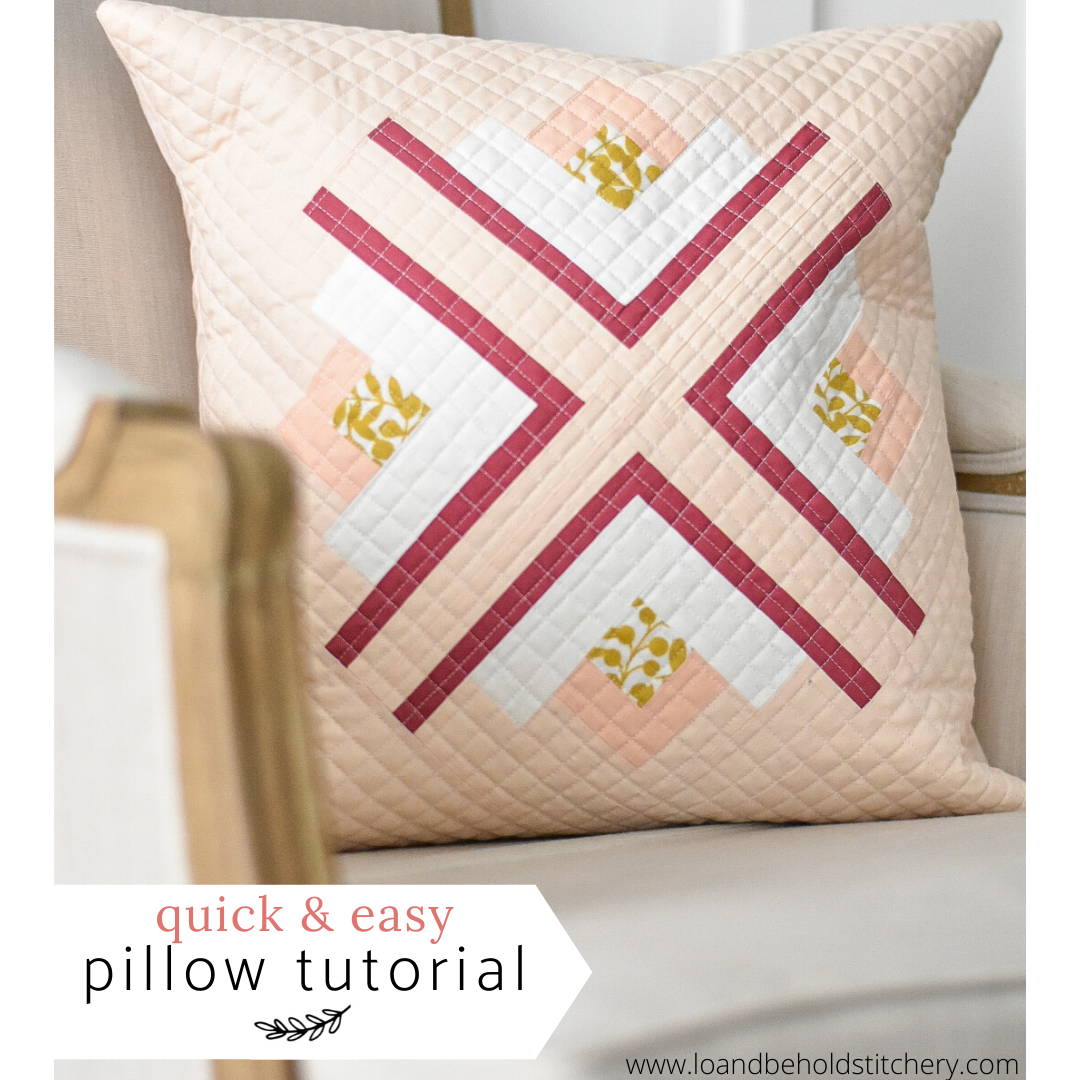
(By the way, I’m using the Model Farm pattern for my pillow. Below, I’ll share some other recommended quilt patterns that include pillow sizes!)
Step 1: Create your quilt.
Start by piecing your quilt top, and then go ahead and baste and quilt it as usual too. That means you’ll need both backing and batting layers. The backing layer won’t be seen, so feel free to use fabric from your stash.

You don’t want your quilt seams to come apart as you use and wash your pillow, so we’ll use the backing and batting to give them some extra protection. (Plus, the quilting will strengthen those seams too!)
💡 |
Making a pillow cover without quilting
|
You don’t need any binding, since your quilt edges will end up inside the pillow cover. So go ahead and trim your quilted fabric (as needed). And just like that, the top of your pillow cover is ready!

Now it’s time to work on the other pieces.
Step 2: Calculate your envelope size.
Different quilt patterns have different dimensions for a pillow size (see our guide to quilt sizes for more info on size ranges)...so rather than tell you exactly what size to cut your other pieces, I’m going to help you calculate the sizes yourself!
Start by measuring your finished quilt top (from step 1). In my case, my Model Farm pillow top measured 17.5” square.
Then decide what size pillow form you’ll use. Keep in mind that your pillow top will lose ¼” on each side. My pillow top, for example, will end up as a 17” square.
As a general rule, I like for my pillows to fit a little snug in their cases…so I used an 18” pillow form like this one. (You can also easily find other sizes, like 12” inserts and 20” pillow inserts!)
💡 |
Tip: Adjust your pillow form’s fullness
|
Today I’m showing you my favorite way to create a pillow: with an envelope backing. An envelope pillow cover doesn’t have any zippers, making it super easy to take on and off…and super easy to sew!
To create your “envelope,” you’ll need two pieces for the back of your pillow. These pieces need to overlap each other (so no one sees the pillow insert inside), but you can decide exactly how much overlap you want. Usually, you’ll want between 3” and 6” of overlap, depending on your pillow size. I recommend using a larger overlap for a large pillow (and a smaller overlap for a smaller pillow). I’ll be using a 6” overlap for my pillow.
Once you’ve figured out your overlap, we’re ready to calculate.
Your first measurement is easy: just the unfinished width of your pillow top. So in my case, I need two pieces that are 17.5” wide.
The second measurement takes just a little math: Use the height of your unfinished pillow top, and divide it by two. Then add your desired overlap in inches to get the height of the pieces you need to cut. Since I have a 17.5” pillow top, I divided 17.5” by 2 to get 8.75”. Then I added 6”, which is the amount of overlap I want, to get 14.75”. That’s the height of the pieces I need to cut.
So now I know I need to cut two 17.5” x 14.75” pieces for my envelope backing. Simple, right?
Before we move on, here are those measurements one more time:
- Measurement 1 (width) = Unfinished width of pillow top
- Measurement 2 (height) = Unfinished height of pillow top ÷ 2 + Desired overlap
Go ahead and cut two pieces, based on your measurements.
Step 3: Prepare your envelope pieces.
Now that you’ve got your envelope pieces cut, we need to do just a little prep work before we sew everything together. We’re going to finish the overlapping edges with a simple folded hem.
Note that we’re working with the horizontal edge here, or your width measurement. In my case, I was working on one of my 17.5” sides.

Make a ¼” fold, and press a crease. (I usually just eyeball my ¼”.) Then fold it down another ¼”, and press another crease. You can pin everything in place at this point, if you’d like.


.
Stitch on this fold, and voila! You’ll have a neatly finished hem.
.

.

.
Now just repeat with your other backing piece. If your fabric has a right and wrong side, you’ll want to pay attention to which way you fold. In the end, you’ll want one piece with the finished hem at the top, and the other will have the finished hem at the bottom.
Step 4: Assemble your pillow cover.
Now we’re ready to put everything together.
Arrange your quilted pillow top and your top backing piece (the one with the hem at the bottom) so that they’re right sides together. The top edge should match, but your side backing will only go partway down your quilt top.

.
Next, place your bottom backing piece (the one with the hem at the top) with the bottom edge aligned with the bottom of your quilt top. This piece will overlap with the envelope piece you already placed.
Make sure all your sides are neatly aligned, and pin everything in place.
.

.

.
Now it’s time to head over to your sewing machine. Stitch a ¼” seam around the perimeter of your quilted pillow top.
💡 |
Tip: Reinforcing your seams
|
.

.

.
When you approach a corner, stop stitching about ¼" away from the corner. With your needle down, pivot the pillow 90 degrees, and then continue stitching.
.

.

.
Remember to secure your seams by stitching back and forth a few times.
Step 5: Finish and use your pillow!
Once you’re all done stitching, clip the corners of your pillow cover. This will help decrease the bulk in your seam and give you nice, clean corners once you’ve turned everything rightside out.
.

.
Speaking of which…you can turn your pillow cover right side out now, and stuff your pillow form into the case.
And there you have it: a beautiful quilted pillow cover with a simple envelope closure. Gorgeous and functional!
.

.

.

..

.

.

Recommended patterns for quilted pillows
If you don’t already have a quilt in mind for your pillow project, I can help! These Lo & Behold Stitchery patterns all include a pillow size:

Happy quilting…and pillow making!
Brittany
You may also like…
- Scrappy Quilted Coaster Tutorial
- Quilted Lanyard Tutorial
- How to Make a Pet Bed from a Quilt
- How to Make a Pillowcase with French Seams
- Free Scrappy Quilt Block Patterns
FAQ about sewing quilted pillows
Is an envelope or zipper pillowcase better?
Envelope and zipper pillowcases can both work well, but an envelope pillowcase is easier to sew and often easier to stuff a pillow form into. A zipper pillowcase lets you get a snugger around your pillow, but it’s more complicated to sew, and some people find zippers uncomfortable on pillows.
How do you measure for an envelope pillow?
To measure for an envelope pillow, figure out what size pillow you want to use. For the front, you can cut out a piece of fabric that size or a little smaller (depending on your preference). and Then use this formula to create your backing pieces:
- Measurement 1 (width) = Unfinished width of pillow top
- Measurement 2 (height) = Unfinished height of pillow top ÷ 2 + Desired overlap
How long does it take to make an envelope pillow cover?
An envelope pillow cover isn’t a very long project, so you can easily sew one up in just a couple hours…or maybe less!
Are envelope pillow covers easy to make?
Yes, envelope pillow covers are easy to make! You use very simple math to create your pieces, and then it just takes some basic straight stitching.
How much fabric does it take to make an envelope pillow cover?
The exact amount of fabric it takes to make an envelope pillow cover depends on your desired pillow size, but you can easily make a 20” pillow cover with just one yard of fabric.
🔄 |
Post updated 1/22/2026
|
.
This post may contain some affiliate links meaning I may receive a small commission from each sell. Rest assured, I only share my favorite items with you!
.
.
.