How to Test and Adjust Your Scant ¼” Seam (The Mystery of the Scant ¼”, SOLVED!)
Sewing with a ¼" seam is the backbone of quilting. But have you ever heard of a scant ¼" seam?
I remember the first time I heard this term, I thought it was a bunch of malarky. I refused to believe that it needed to be a "thing” and had it in my mind that if I just ignored its existence, maybe I would never have to confront reality. (ha!)
Well, my friends, the reality is…scant ¼” seams do matter (at least for some quilt patterns) but they aren’t as daunting as you may think they are (or as scary as I made them in my mind!). So today I’m here to de-mystify the scant ¼” seam so you know why you need it…and how you successfully achieve one.

The quilt featured above is the Interwoven quilt pattern. .
Scant seam 101
What is a scant quarter-inch seam?
“Scant” is kind of a vague word, but a scant ¼” seam has a specific definition: a seam that is narrower than a true ¼” seam…by the width of one thread.
I was a little skeptical when I heard this for the first time. Why isn't a true ¼” seam good enough? Who would decide to use a scant ¼” seam just for fun? Well, I learned my lesson the hard way when I went to create my Interwoven quilt pattern and kept running into MAJOR issues.
Why do you need a scant quarter-inch seam?
It turns out, when you press your seams (either open or to one side), you lose a tiny bit of fabric as it folds around the thread in your seam. The amount you lose can vary based on things like:
- The ply and weight of your thread
- The way you press your seams (open or to one side)
- Your pressing accuracy
- The number of seams in your block
In other words, a scant ¼” seam can vary from person to person or even project to project. But even if there isn’t one exact measurement for a scant ¼” seam allowance, even small changes can have a big impact on your quilt as a whole.
Let me give you an example.
How seam allowance affects finished measurements
Say that hypothetically, the width of the thread and or the fold of the fabric as it goes *around* the thread accounts for 1/32 of an inch. Pretty small right? You might not notice this if you only have three seams in a block. If we do the math, 3 x (1/32) = less than a tenth of an inch. But what if you have nine seams in a block? It turns out that 9 x (1/32") adds up to more than ¼”! That’s a noticeable difference.
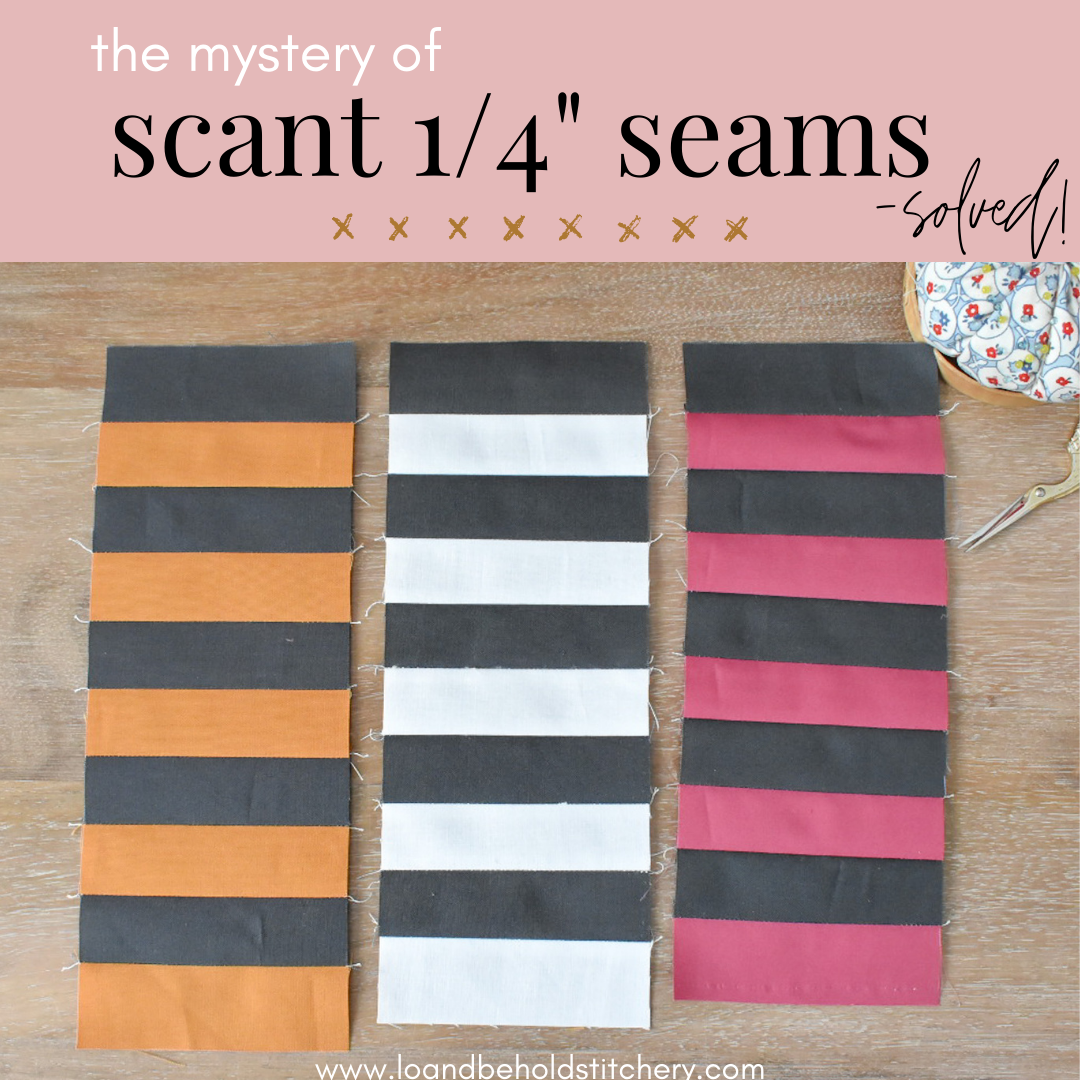
To illustrate this, I sewed 10 1.5” strips together with three different seam allowances. In theory, my finished set should measure 10.5” (10 x 1.5 equals 15” and subtracting 4.5” of seam allowances gives you 10.5”).

So how did they measure up? With the strip set on the left, I used a seam allowance that was way too narrow. As you can see, that meant the finished set measured larger than 10.5”. I used a “true” ¼” seam allowance for the strip set on the right, but that made the finished set come out too short. It was only when I used a scant ¼” seam for the set in the middle that it turned out the right size: 10.5”!
When do you need to use a scant ¼” seam?
It helps to think about a scant ¼” seam as a fluid adjustment rather than a definitive measurement…and once you do, you’ll understand when and how much you need to adjust your seam. Let’s look at some of the most common factors that may require a seam allowance adjustment.
Pattern or piecing technique
The more pieces a block has, the more likely it is you’ll need to use a scant ¼” seam. That’s why, for example, patterns like Petite Plaid, Deco, Interwoven, Rhythm, and Knitted Star all suggest a scant ¼” seam. These patterns have blocks with lots of piecing, which means there are many opportunities for your seam allowance to become “off” in the piecing process.

Some techniques, like stitch and flip or the snowball technique also yield better results when you use a scant ¼” seam.
This is one of the reasons why I recommend always making a test block first for any new quilt project or technique.
Thread thickness
Like most quilters, I usually use 50-weight thread for piecing. (If you don’t know what that means, check out our essential guide to quilt thread.) This thinner thread doesn’t eat up too much of the seam allowance when you press your seams.
But if you happen to use a thicker option, like 40-weight thread, you may notice an effect on the accuracy of your seams.
Fortunately, your test block should help you spot any issues…as long as you test with the same thread you plan to use in your project.
Pressing direction and technique
Generally speaking, I like to press my seams open. I find it gives me a more accurate measurement than pressing seams to one side. (This is because when you press your seam to one side, the fabric has a higher chance of creating a larger fold around the seam.)
This stack of blocks shows just how much of a difference pressing direction can make. These seams were pressed to one side after sewing. See how thick the stack is in the center (where the seams are)?

That being said, MANY people press their seams to one side and have great results! And sometimes patterns recommend pressing the seams to the side in order to create nesting seams, which makes it easier to line up seams and create a crisp intersection within your block.
Either can work, so make sure you press your test block in the same way you plan to press your actual project.
If you prefer pressing your seams to one side, or your patterns calls for a specific pressing method, making sure the nose of your iron gets (gently) into the seam can help reduce any extra folding that may occur around the thread. A wool pressing mat and tailor’s clapper can also help you get flat seams…which means a smaller adjustment to your seam allowance.
Fabric thickness
Some fabric types and brands of fabric require more adjustment to your seam allowance. For example, I notice a slight difference between Art Gallery quilting cottons and Kona solids. Kona fabrics seem a little bit thicker and stiffer, which can mean more fabric gets “eaten up” by the seam allowance.
In the same vein, using a fabric like yarn-dyed wovens will take more adjusting than everyday quilting cottons..
Do I have to use a Scant 1/4" as long as I'm Consistent?
The importance of a scant ¼” seam really depends on the pattern.
For some patterns, it really only matters that your seams are consistent. You might be able to get away with using a true ¼” seam allowance, and you’ll just end up with a slightly smaller quilt in the end. For example, if you make a quilt entirely with squares (like the one below), you can technically use whatever seam allowance you want, and it will not make a difference in the end…as long as you stay consistent.

For most quilt patterns, though (my own included), your blocks may not look right within your quilt if they are not accurate. For example, with Petite Plaid, Homecoming, and Interwoven, you really want the blocks to measure accurately…otherwise the lines created within the quilt will not connect from block to block. It may not bother you, but the results can be pretty noticeable.
In most cases, it’s better to take 10 or 20 minutes to test and perfect your seam allowance (giving you better results), than it is to have inaccurate blocks…in my humble opinion. :)

The quilt featured above is the Interwoven quilt pattern.
How to test your seam allowance
I’ve told you how important it is to test your seam allowance…so let’s talk about how to do it.
Remember: the scant ¼” seam is nothing more than an adjustment. That means your scant seam will look different based on the factors we discussed above.
To test your seam allowance, make a test block…an entire one. If the pattern calls for eight seams in one block, recreate that whole block with test fabric. Then measure your test block and make sure that it measures what it should.
If the test block is larger than it’s supposed to be, your seam allowance is too scant. If the test block is smaller than what it should measure, your seam allowance is too big.
Sample test
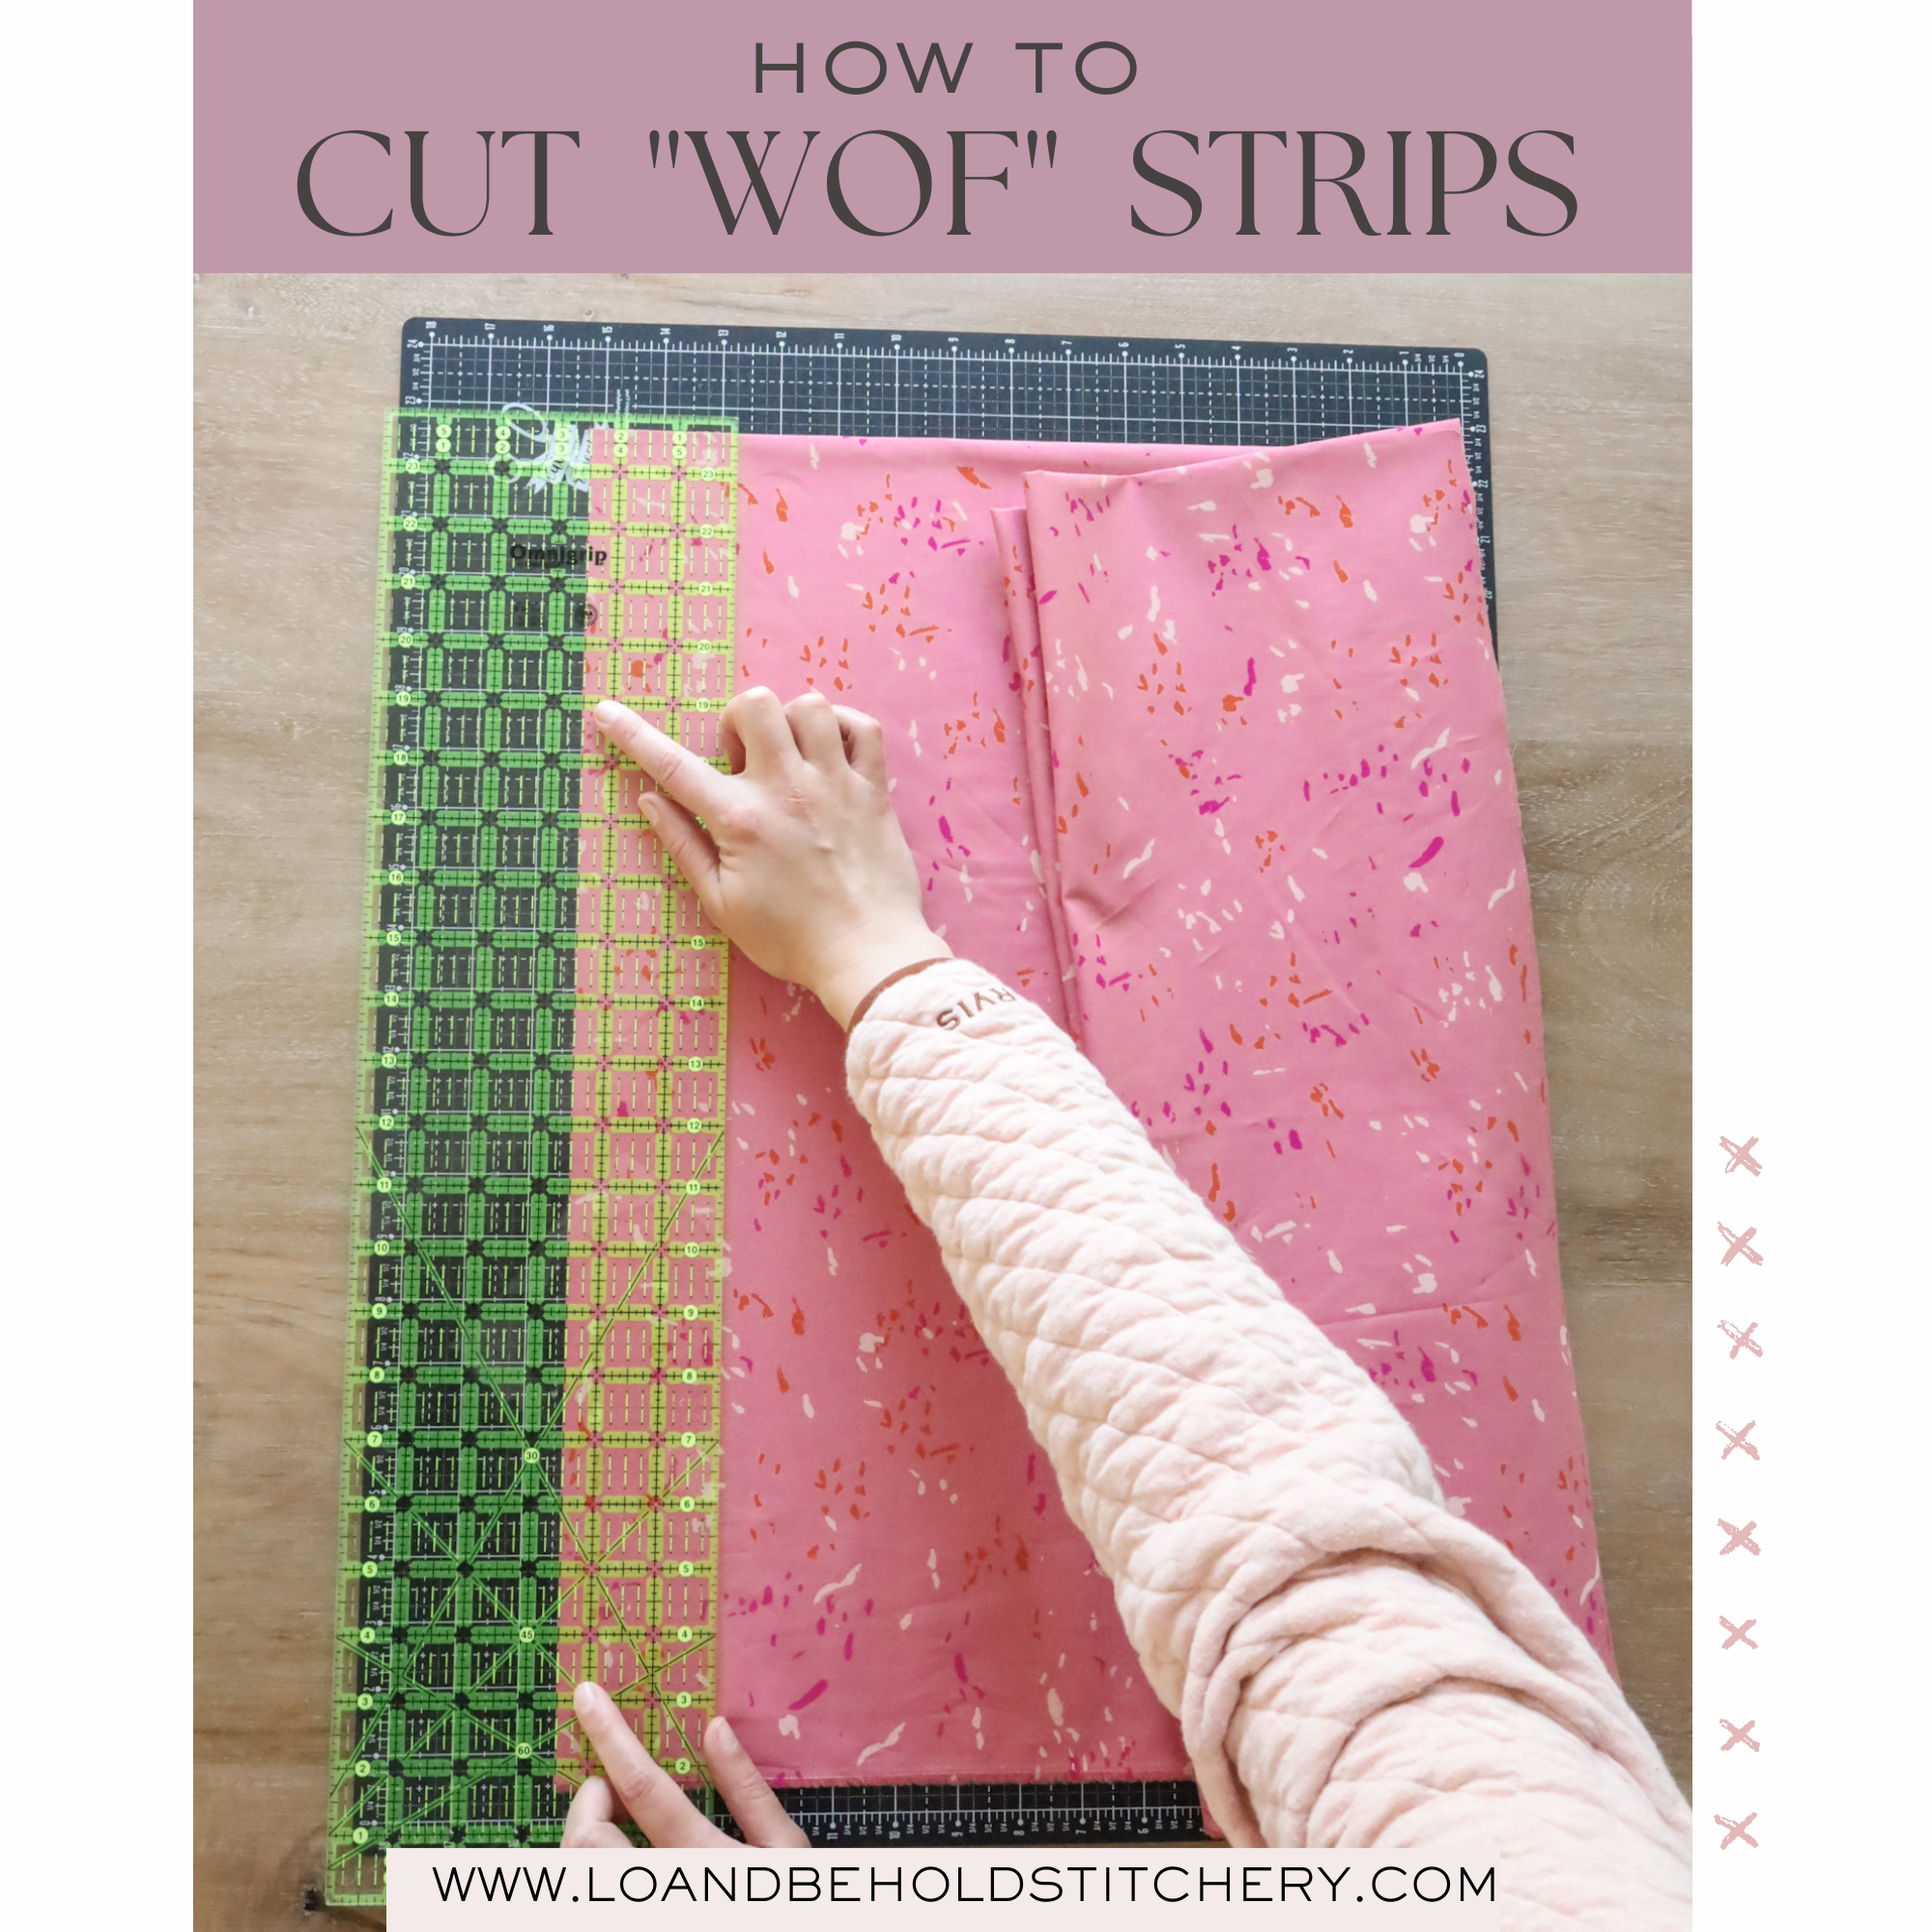
Here’s an exercise you can follow along with: Cut 10 1.5” x 4” pieces of fabric. Sew the pieces of fabric together lengthwise to create a unit, as seen below.
As you sew your 10 strips together, measure your strips. If a strip is sandwiched between two other strips, it should measure 1”. Outside strips (with only one sewn edge) should measure 1.25”.
If your middle strips are larger than 1”, your seam allowance is too scant. If they’re smaller than 1”, your seam allowance is too big and needs to be more scant. This may take some trial and error, so repeat this exercise until you find the sweet spot.
After sewing all 10 pieces of fabric together, the finished unit should measure 10.5”. Keep in mind that the final block size, rather than the size of an individual piece, will give you a more accurate depiction of what is going on…but you can look at the photos below to see approximately where your exams should be.

.

.
How to adjust your seam allowance
Now that you know if your seam allowance is too wide or too narrow, let’s talk about how to adjust it.
First, about ¼” seam presser feet…these feet can be so helpful for piecing, but they are not the end-all and be-all for accuracy. Don’t assume your seam allowance is perfect just because you have a piecing foot! Instead, use your ¼” foot when you make a test block, and then see if you need to make these adjustments.
Needle position
The easiest way to fix your seam allowance is by moving your needle position (if your machine lets you).
To make your seam allowance smaller (because your test block was too small), you can move your needle to the right. To make your seam allowance larger (because your block was too large), you need to move your needle to the left.
Once you know where your needle needs to be, I recommend writing down your machine settings! You may need to adjust them slightly for future projects and fabrics, but your written reminder will give you a good starting point. (Plus, some machines reset the needle position every time you turn them off, so a sticky note can be a great reminder to adjust!)
Fabric position
If your machine doesn’t let you move your needle, you’ll have to move your fabric instead.
If you need a smaller seam allowance (because your block was too small), try moving your fabric a little to the left. If you need a bigger seam allowance (because your block was too big), try moving your fabric a bit to the right.
If you use a ¼” inch presser foot, it can be a helpful frame of reference for where your fabric should sit. Maybe you need to push the fabric right up against the guide bar…or maybe your fabric needs to just barely make contact.

Machine landmark
If your needle position doesn't move and you need to adjust your seam allowance, it can help to create a landmark on our sewing machine to show you exactly where to line up your fabric. You can make your landmark with something like masking tape or diagonal seam tape. Add several layers (or use a stack of index cards) if you want to create a “ridge” you can butt the fabric up against.

My adjustments
When I started piecing with an HP (High Performance) foot on my Janome M7, my scant ¼” seam wasn’t quite perfect. In order to achieve a scant ¼” seam, I had to align my fabrics so that they sat just under the right edge of my presser foot. Easy enough!

Conclusion
While it may seem scary and mysterious, scant ¼” seams don’t have to be a big deal. You just need to take the time to adjust and practice your seam allowance…and you’ll end up with accurate blocks (and less stress in the long run)..

The quilt featured above is the Knitted Star quilt pattern.
- I hope this post helps you do just that!
Happy quilting!
Brittany

More quilting how-tos
Scant ¼” seam FAQ
What does “scant” mean in sewing?
In sewing, scant means a little less than…so to get a scant ¼” seam, you need to sew a seam that’s just less than a true ¼” foot.
How do you measure ¼” on a sewing machine?
To measure ¼” on a sewing machine, some machines have measurement markings on their needle plates. Using a ¼” presser foot can also help you measure ¼”. For the most accuracy, though, you should measure your ¼” seam allowance with a ruler after sewing.
How do I sew a scant ¼” seam?
To sew a scant ¼” seam, you may need to adjust your needle or fabric position. Your adjustments will depend on how large or small your seams currently are, so make and measure a test block before making any changes.
| Updated 10/01/2025 - We updated the organization of this article and adjusted some wording. All the information remains the same! |